This tutorial will show GL Strings users how to localize content at the design stage of an app development life cycle stage. Users can follow the steps to upload content from Figma or Sketch files through to finally migrating translated strings into an app.
For more information on integrating GL Strings into UX tools such as Figma, Sketch, or Adobe XD, please see the GL Strings Integration Documentation.
Before starting, users should make note of the following considerations for localization at the design stage:
- It is recommended that users create a copy of a page before downloading translations to prevent compromising the design file.
- All fonts used in the design file must be installed locally. Translations won’t be populated for text with missing fonts.
- If there are changes in formatting within a text string, those changes are included as placeholders in the uploaded string. This formatting is found in curly brackets {} within the string. The plugins do have an option to ignore formatting for these cases. This option makes it easier to migrate translations to app strings. See the Integration Documentation to learn more.
- GL Strings Dashboard updates can take up to 10 minutes for the design software plugins to download translations (including recently added languages.)
- This article is geared towards Figma users, however similar steps can be taken to localize Adobe XD or Sketch designed apps. Refer to the GL Strings Integration Documentation for more information.
- See the Design Tool Plugin Best Practices blog post to learn more plugin tips and tricks
Table of Contents
- GL Strings Project Creation and Figma Integration
- Upload Content from Figma via Plugin to the Project on GL Strings
- Add Languages to the Project and Initiate Translation Workflows
- Download Translations into Design File
- Create Translated Screenshots and Upload them to GL Strings via the Plugin
- Review Translations in GL Strings In-Context Editor
- Migrate Translations to your App
Step 1 - GL Strings Project Creation and Figma Integration
- Open Figma and navigate to the file which requires integration with GL Strings
- Use the steps outlined in Figma Integration Documentation - Installation to add the GL Strings Plugin to Figma
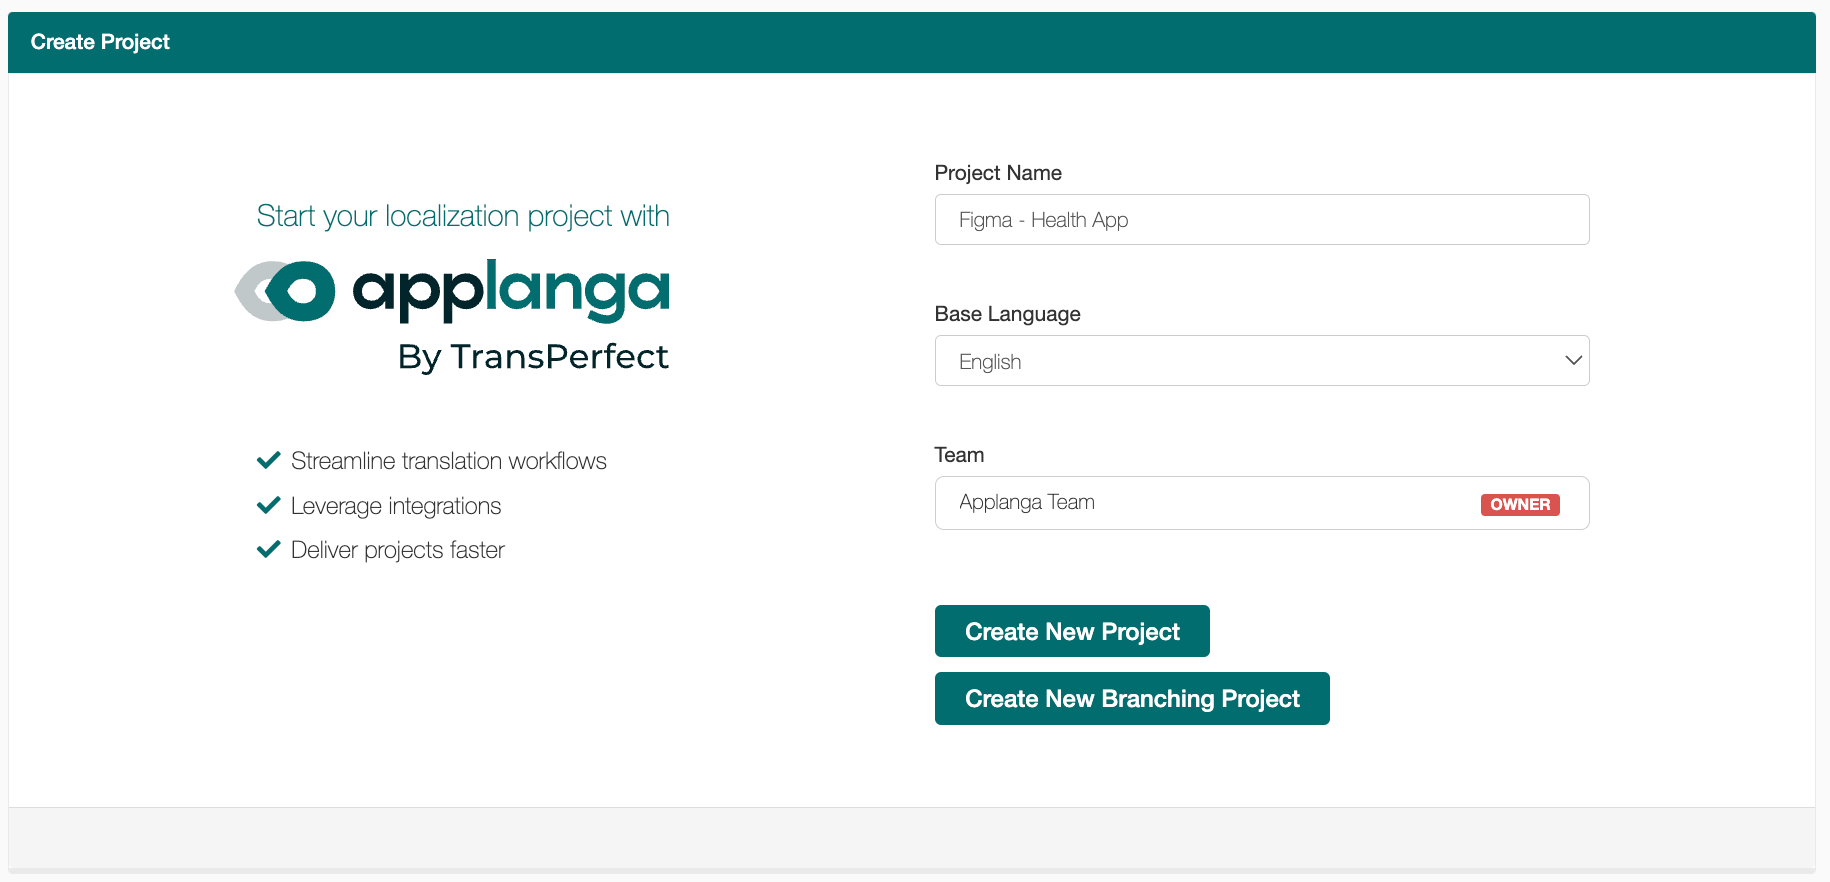
- Navigate to GL Strings, log in, and create a project for Figma integration by clicking +Add Project
- Complete the project creation by adding a Project Name, Base Language, and selecting a Team
- Click Create New Project and proceed to the Integration step
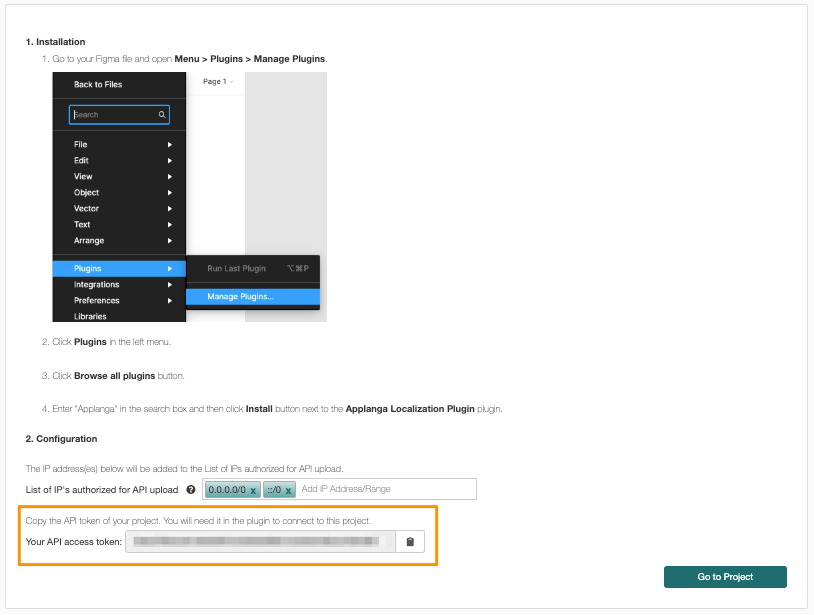
- Click View integrations and select Figma plugin from the integration panel
- Copy the API token for your newly created project and click Go to Project to complete project creation
- Open Figma and navigate back to the Figma design file requiring GL Strings integration
- Follow the steps outlined in the Figma Integration Documentation - Connection to establish the connection between the Figma design file and the GL Strings project.
Back to Top
Step 2 - Upload Content from Figma via Plugin to the Project on GL Strings
After integrating an GL Strings Project with a Figma files, users must upload all content, strings, and screenshots from Figma to the GL Strings Project.
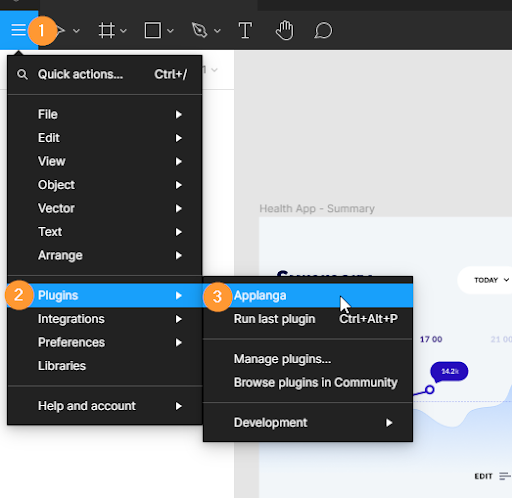
- Navigate to your Figma file and select the menu in the top right corner, then select Plugins > GL Strings
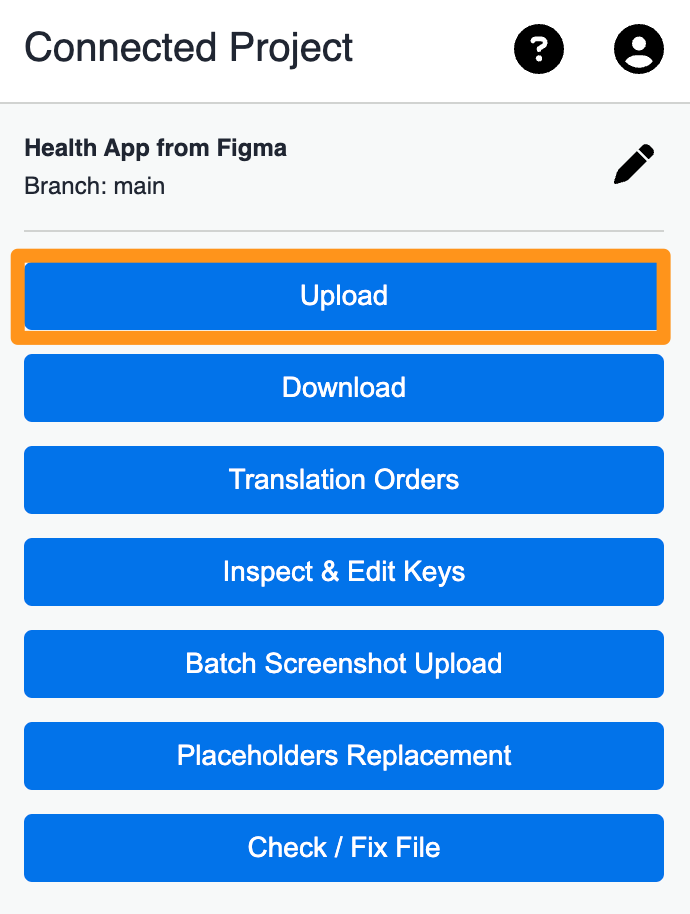
- From the GL Strings Plugin menu, select Upload
- Use the default, pre-selected upload options or follow the Figma Integration Documentation - Upload Content for Translation steps to complete Figma content upload to the GL Strings Project
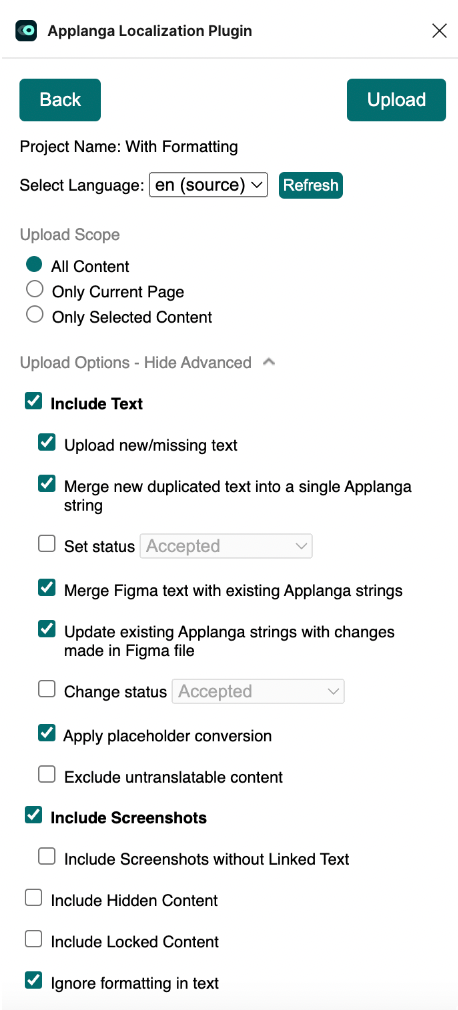
- Click Finish once the upload is complete
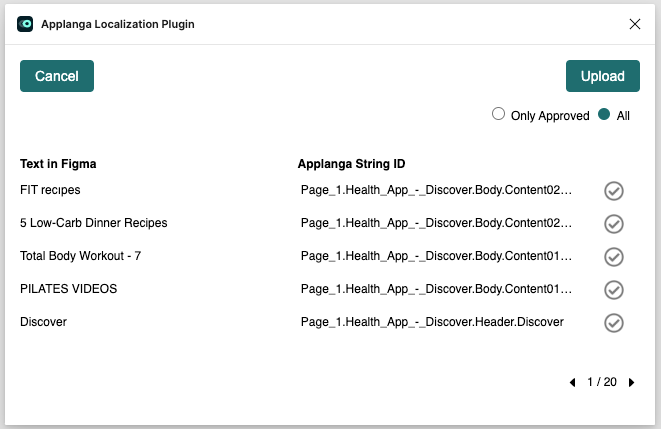
When new text that is not yet on GL Strings is part of the upload, there is the option to manually edit the resulting new string Id names. The string ID naming dialog will not display if only screenshots are being uploaded or there are no new texts to upload to the GL Strings dashboard. Refer to the Rename String IDs section for more information.
Back to Top
Step 3 - Add Languages to the Project and Initiate Translation Workflows
Once the UX design file content is uploaded to the GL Strings Dashboard, users can then add languages to the GL Strings Project and start the project translation workflows. GL Strings provides two main translation workflow options for users: translations orders fulfilled by GL Strings’s parent company TransPerfect or users can rely on their internal translation resources.
- Login into GL Strings and navigate to the Figma-integrated project
- Use the Language Panels to find the required languages for translation (A or B) then click Add (Use the Search bar (C) to find specific languages or dialects)
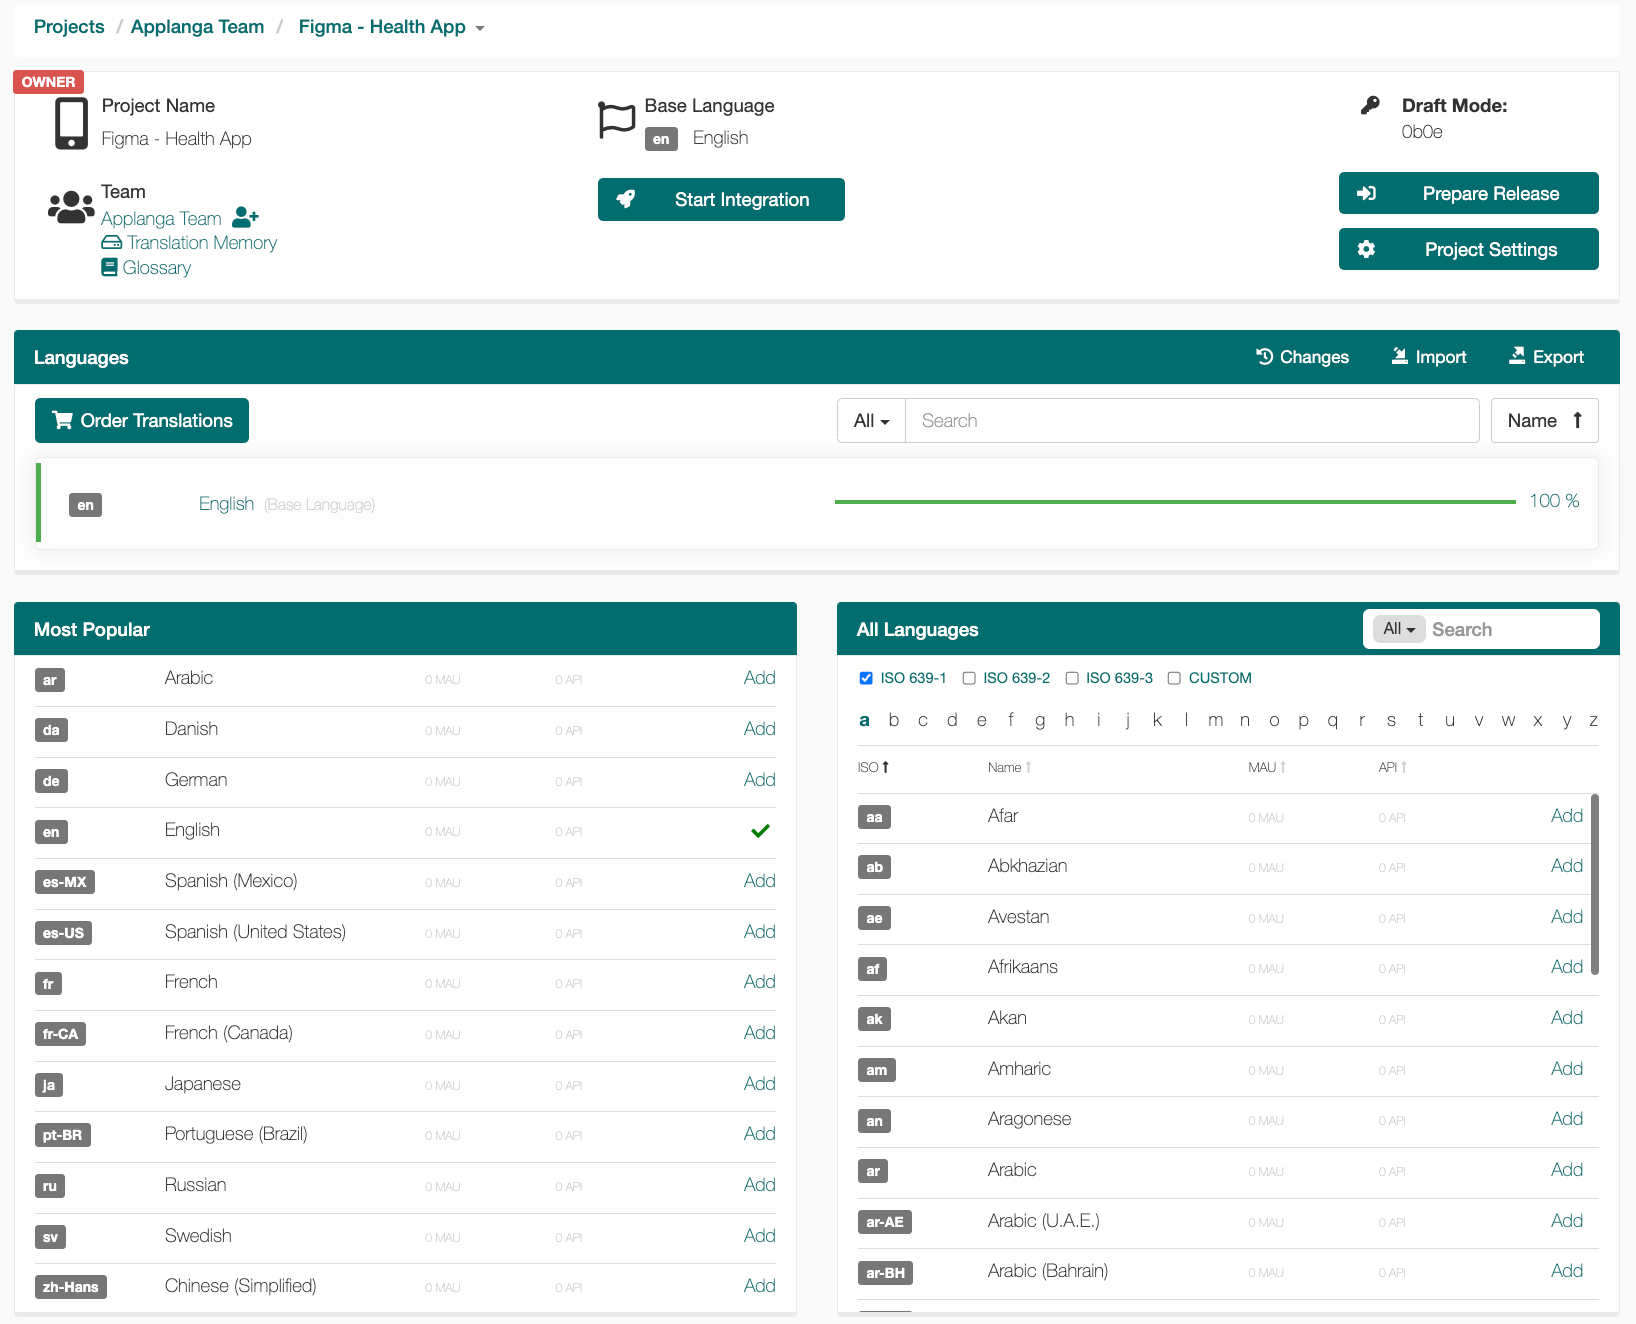
- To start the translation process within the GL Strings Dashboard, users can either utilize the GL Strings integration with TransPerfect Translation Services OR users can translate the content within their own internal teams
- TransPerfect Translations - If using TransPerfect translation services, follow the steps outlined in TransPerfect Translation Service Documentation to start the ordering process.
- Self Translating - If the GL Strings user's internal teams will complete translations, follow the steps outlined in the Translate Yourself Documentation. Users can skip to step number three for Figma-integrated projects.
For additional translation workflow information, GL Strings user’s can refer to the Translation Workflows Documentation.
Back to Top
Step 4 - Download Translations into Design File
Once translations are available in the GL Strings Dashboard, they can then be downloaded back into the UX design file for review of the translated design file and, if necessary, make adjustments to the layout and UX - proofing the design for localization. This is a helpful step to catch any issues which may otherwise only be spotted later in the process (e.g when the actual app is built and tested in a translated version.)
- Open the originally uploaded design file again
- Select the menu in the top right corner then select Plugins > GL Strings
- Click Download on GL Strings plugin menu
- Follow the steps outlined in the Figma Integration Documentation - Download Translations to Figma.
- Please note, the translation download will overwrite the source text in the design file. It is strongly recommended for users to create a copy of the source file for the translation process. Users can also revert back to the file starting point by selecting the source language and downloading it again.
- The design will appear translated now (To reset the design to the original form, download the base language again)
- Review the translated Figma file and enact any required changes
Back to Top
Step 5 - Create Translated Screenshots and Upload them to GL Strings via the Plugin
After downloading translated content into the design file, translated screenshots can then be uploaded to the GL Strings Dashboard for linguistic review in the GL Strings dashboard.
There are two methods: language by language or batch screenshot upload.
Method 1:
- Open the GL Strings-integrated Figma project in Figma
- Select the menu in the top right corner then select Plugins > GL Strings
- Select Upload from the GL Strings Plugin Menu, then follow the steps outlined in the Figma Integration Documentation - Upload Translated Screenshots
Method 2:
- Open the GL Strings-integrated Figma project in Figma
- Select the menu in the top right corner then select Plugins > GL Strings
- Select Upload from the GL Strings Plugin Menu, then follow the steps outlined in the Figma Integration Documentation - Batch Screenshot Upload
Method 2 Notes:
- For batched screenshot upload, the plugin will take screenshots for all languages available in the GL Strings project one at a time (download language 1, screenshot and upload, download language 2 and so forth.)
- After all languages complete upload, the base language values will be automatically re-applied.
Back to Top
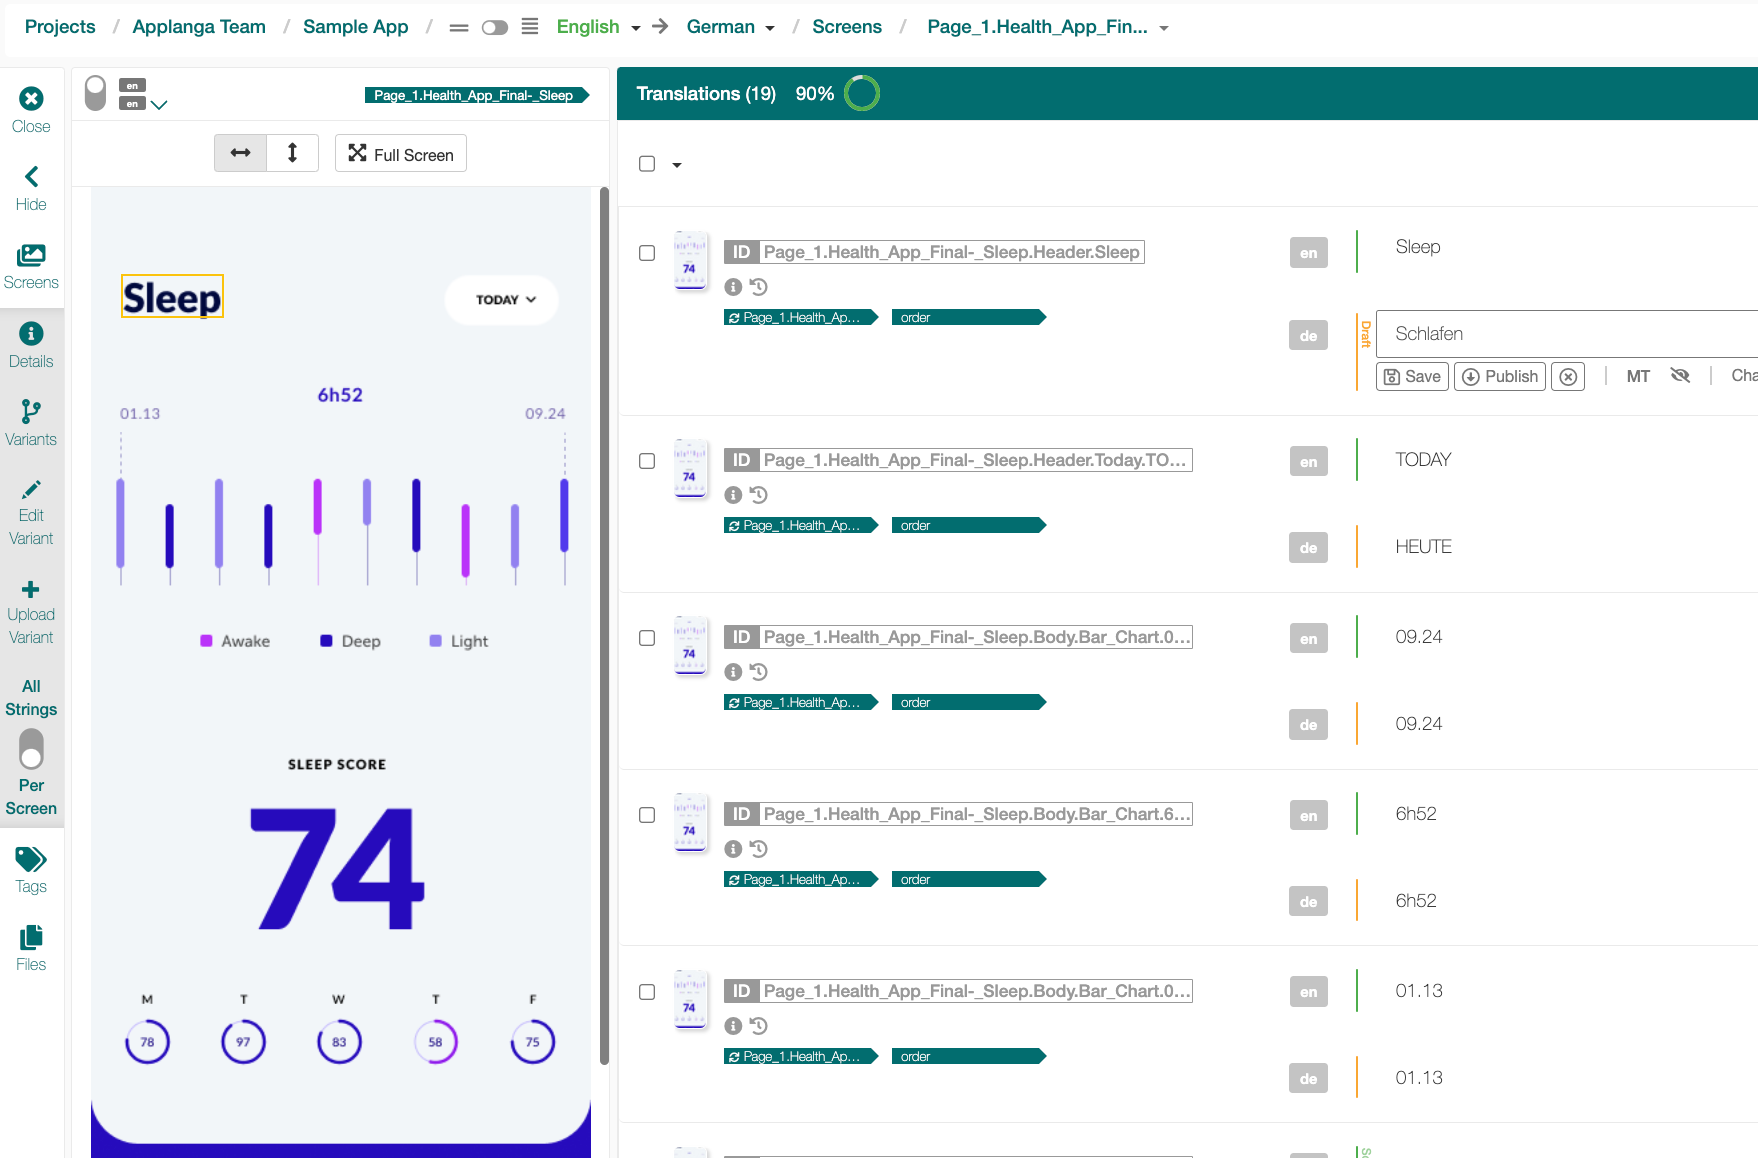
Step 6 - Review Translations in GL Strings In Context Editor
Once translations with screenshots are uploaded to the GL Strings Dashboard, users can also use the GL Strings In-Context Editor for linguistic review.
- Login into GL Strings and navigate to the integrated project
- Select the Language with the uploaded, translated screenshots
- Click Screens and select the screen associated with the app page to review (The screen names/tags are imported with the screenshots and are associated with the individual pages in the Figma project)
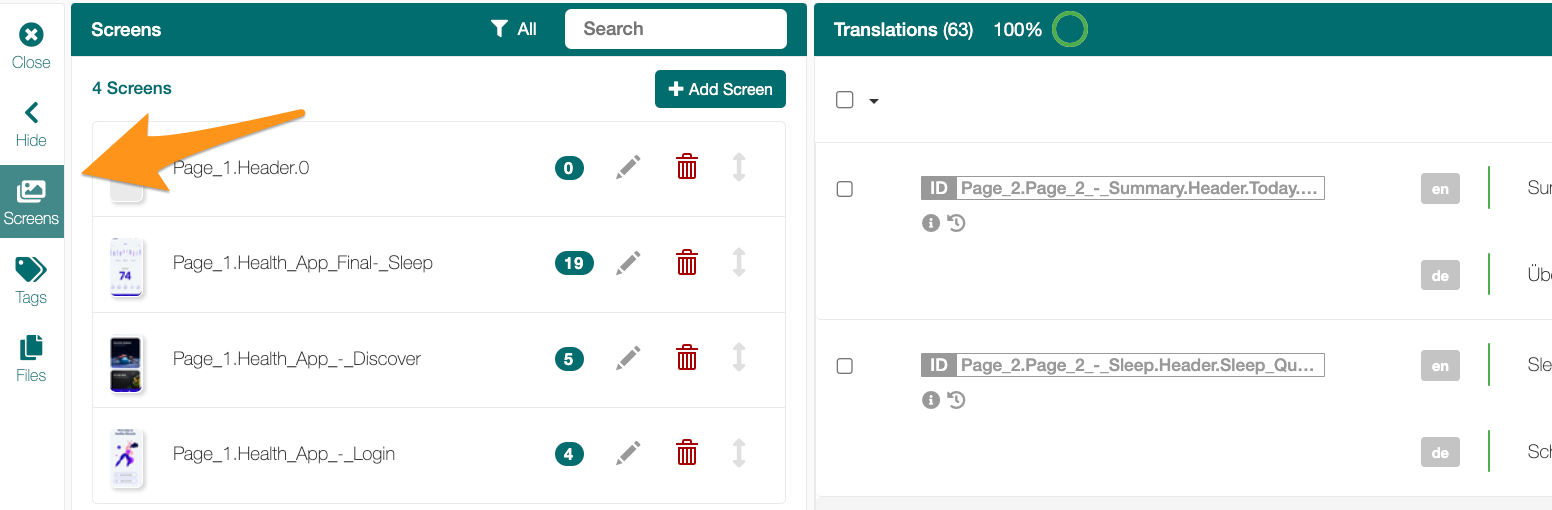
- Click on individual strings to edit translations then save as a draft or save as the target value
For more information about In-Context review, please refer to the Reviewing Translations on GL Strings Documentation.
Back to Top
Step 7 - Migrate Translations to your App
Once translations are approved, development teams can easily export string files from the Figma-integrated project for use in an app build since the string Ids were previously named accordingly during the upload process. Developers can also set up one of the other integration types to seamlessly pull translations into their build.
Refer to the Manual Export article or the Integration Documentation for the option that works best for you and your team.
If you do not choose to rename the string IDs upon the initial upload from Figma to GL Strings or you used previous versions of the Figma plugin to upload your design file content, users should follow the steps outlined in the Localization at the Design Stage blog post.
Back to Top

