

This guide shows design tool plugin users who skipped the key renaming step how to apply translations from one project to another.

This post will show users how to complete the localization process which originally started at the design stage. Localization at the design stage kicks off the localization process in tandem with product development.
Starting localization at the design stage saves teams valuable time during both the localization and development process. Translators can begin working with an app’s content while developers build the app itself.
This process shifts localization from post-development to the design stage, before development even begins. It also allows for functional testing and linguistic, in-context review using the translated design files. Starting localization at the design stage helps prevent delays in the release or deployment of an app.
In continuation of the Localization at the design stage article, we will show users who opted to skip the string ID renaming step, how to use the Translation Memory (TM) to apply translations from one project to another.
This process requires two separate projects. One project is for the design tool plugin integration and the second project is for the project integrated with an app. If there are Draft values in the design-plugin project, users must first accept and publish those translations. Once the translations are accepted they can be added to the TM. Users can then apply translations from the TM to the second project which is integrated with an app.
Follow the steps outlined in the Localization at the design stage article before proceeding with the below process.
Please note that a design file may not contain all an app's strings or the strings in the design file are not an exact match with the actual app's text. Oftentimes, system specific strings, strings with placeholders or variables, and newly developed pages are missing from translated design files. While localization at the design stage will translate most of an app's strings, you may need to create an additional translation order to capture the remaining untranslated content.
Accepted translation values can be added to the Applanga Translation Memory (TM). The TM allows users to copy translated strings across multiple projects.
Once translations are accepted and published, navigate to the project on the Applanga Dashboard.
Open the Editor for the language with accepted and published translation values.
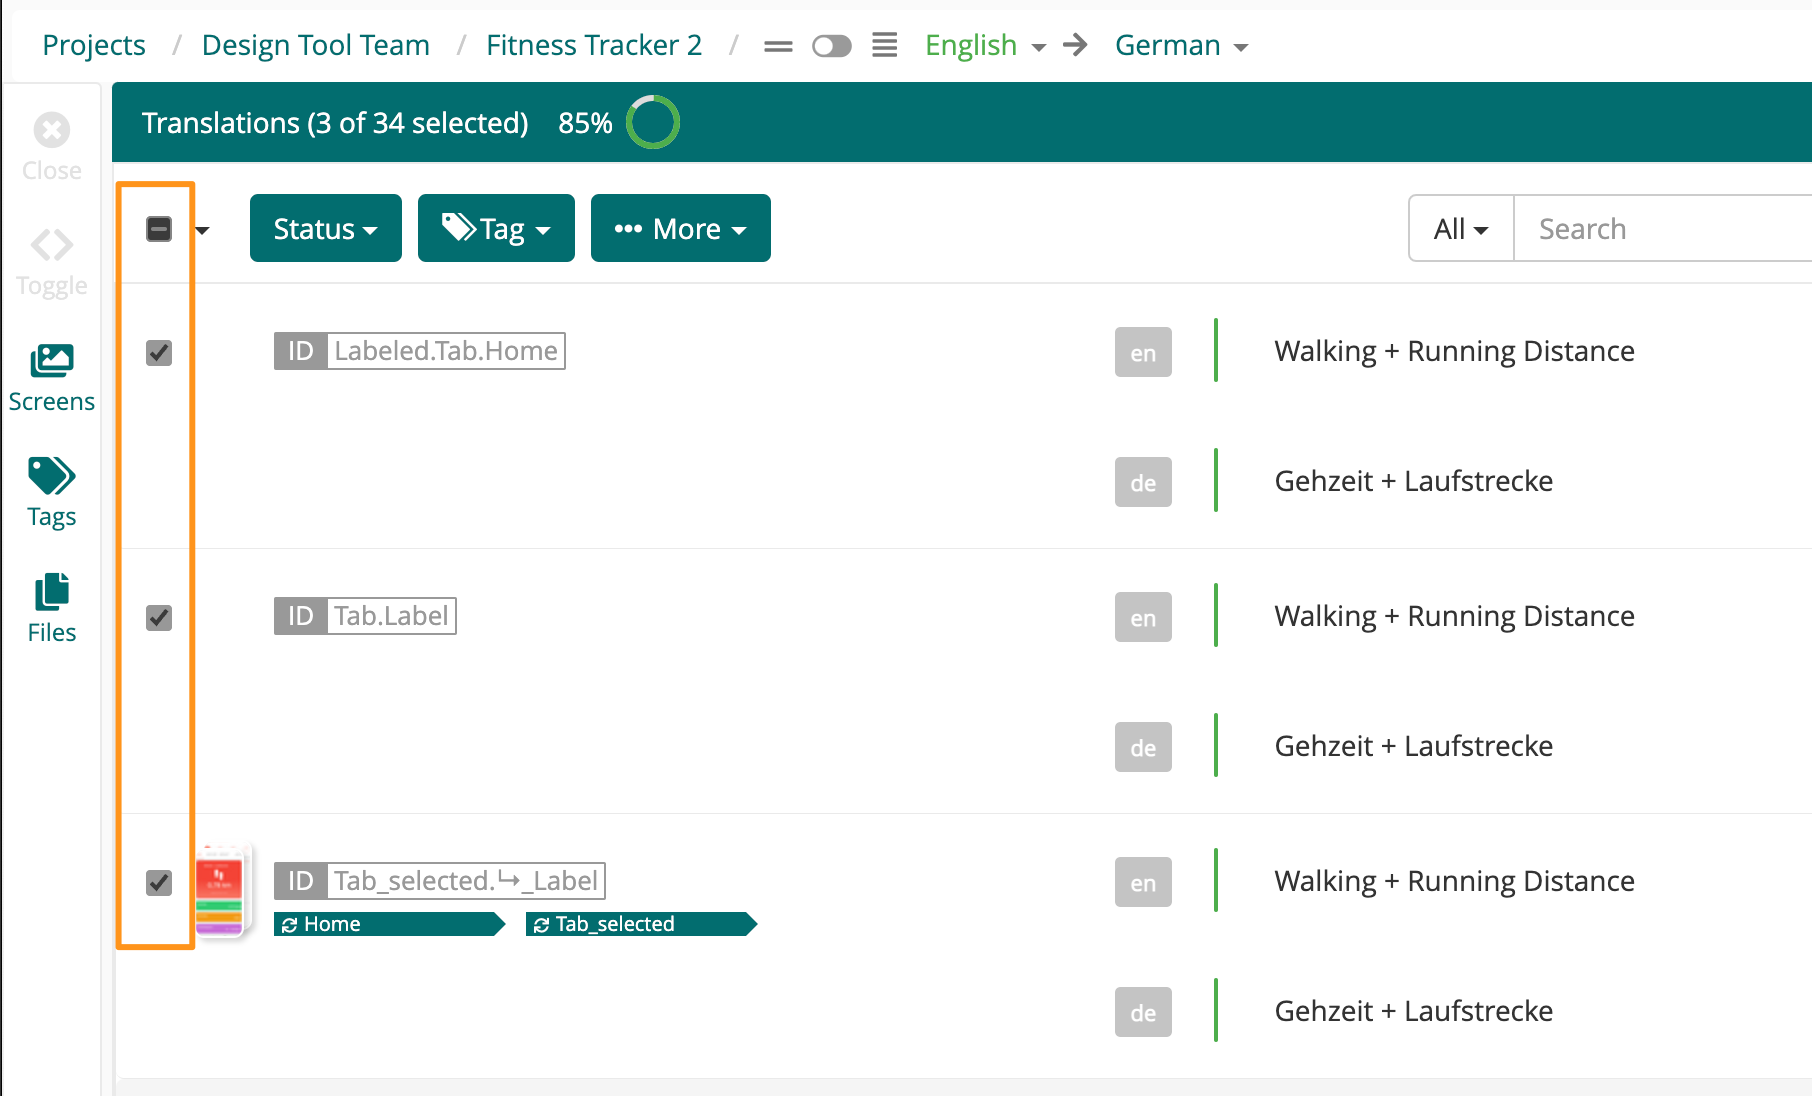
Use the filter options to limit the selection to only accepted and published translations.
Mark the checkboxes for the accepted translations on the left-hand side of the Editor.
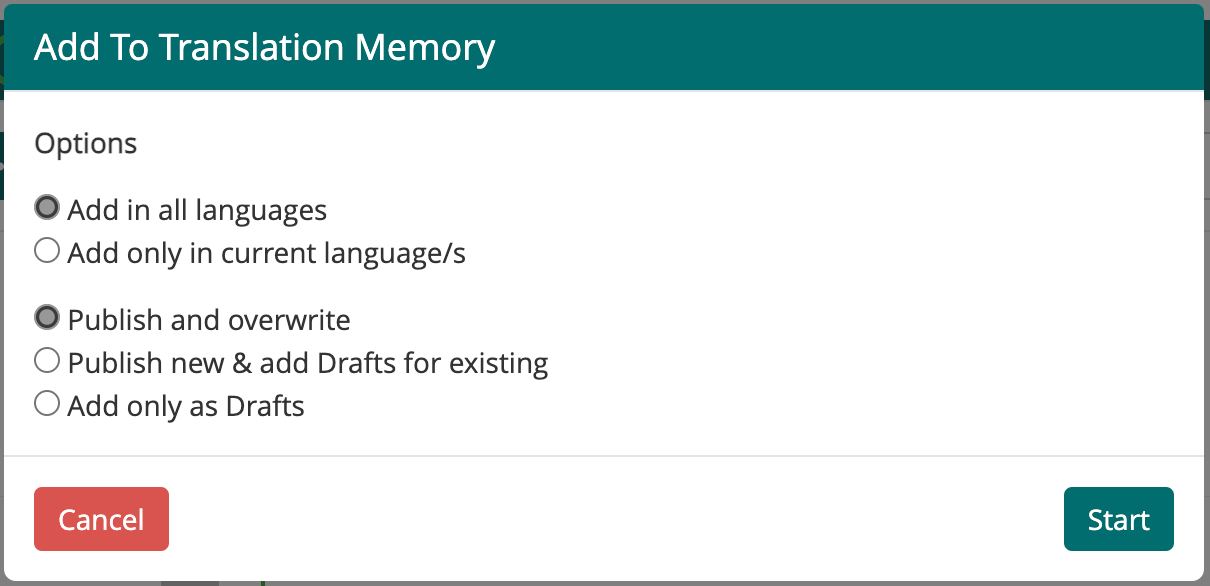
Follow the steps outlined in the Translation Memory documentation - How do you add translation to the Translation Memory? to add the accepted translations to the TM.
Once the appropriate TM options are selected in the TM pop-up, click Start then click OK on the Success notification pop-up
Applanga users can apply the Translation Memory (TM) feature to seamlessly copy translations from a design file based project to a project containing the actual app strings.
Navigate to the Applanga Dashboard and create a new project for the app.
Integrate the app with the new project by using the appropriate instructions outlined in the Integration documentation then click Start Upload.
After strings upload to the Applanga Dashboard, add the required languages using the language panels on the Applanga Project page.
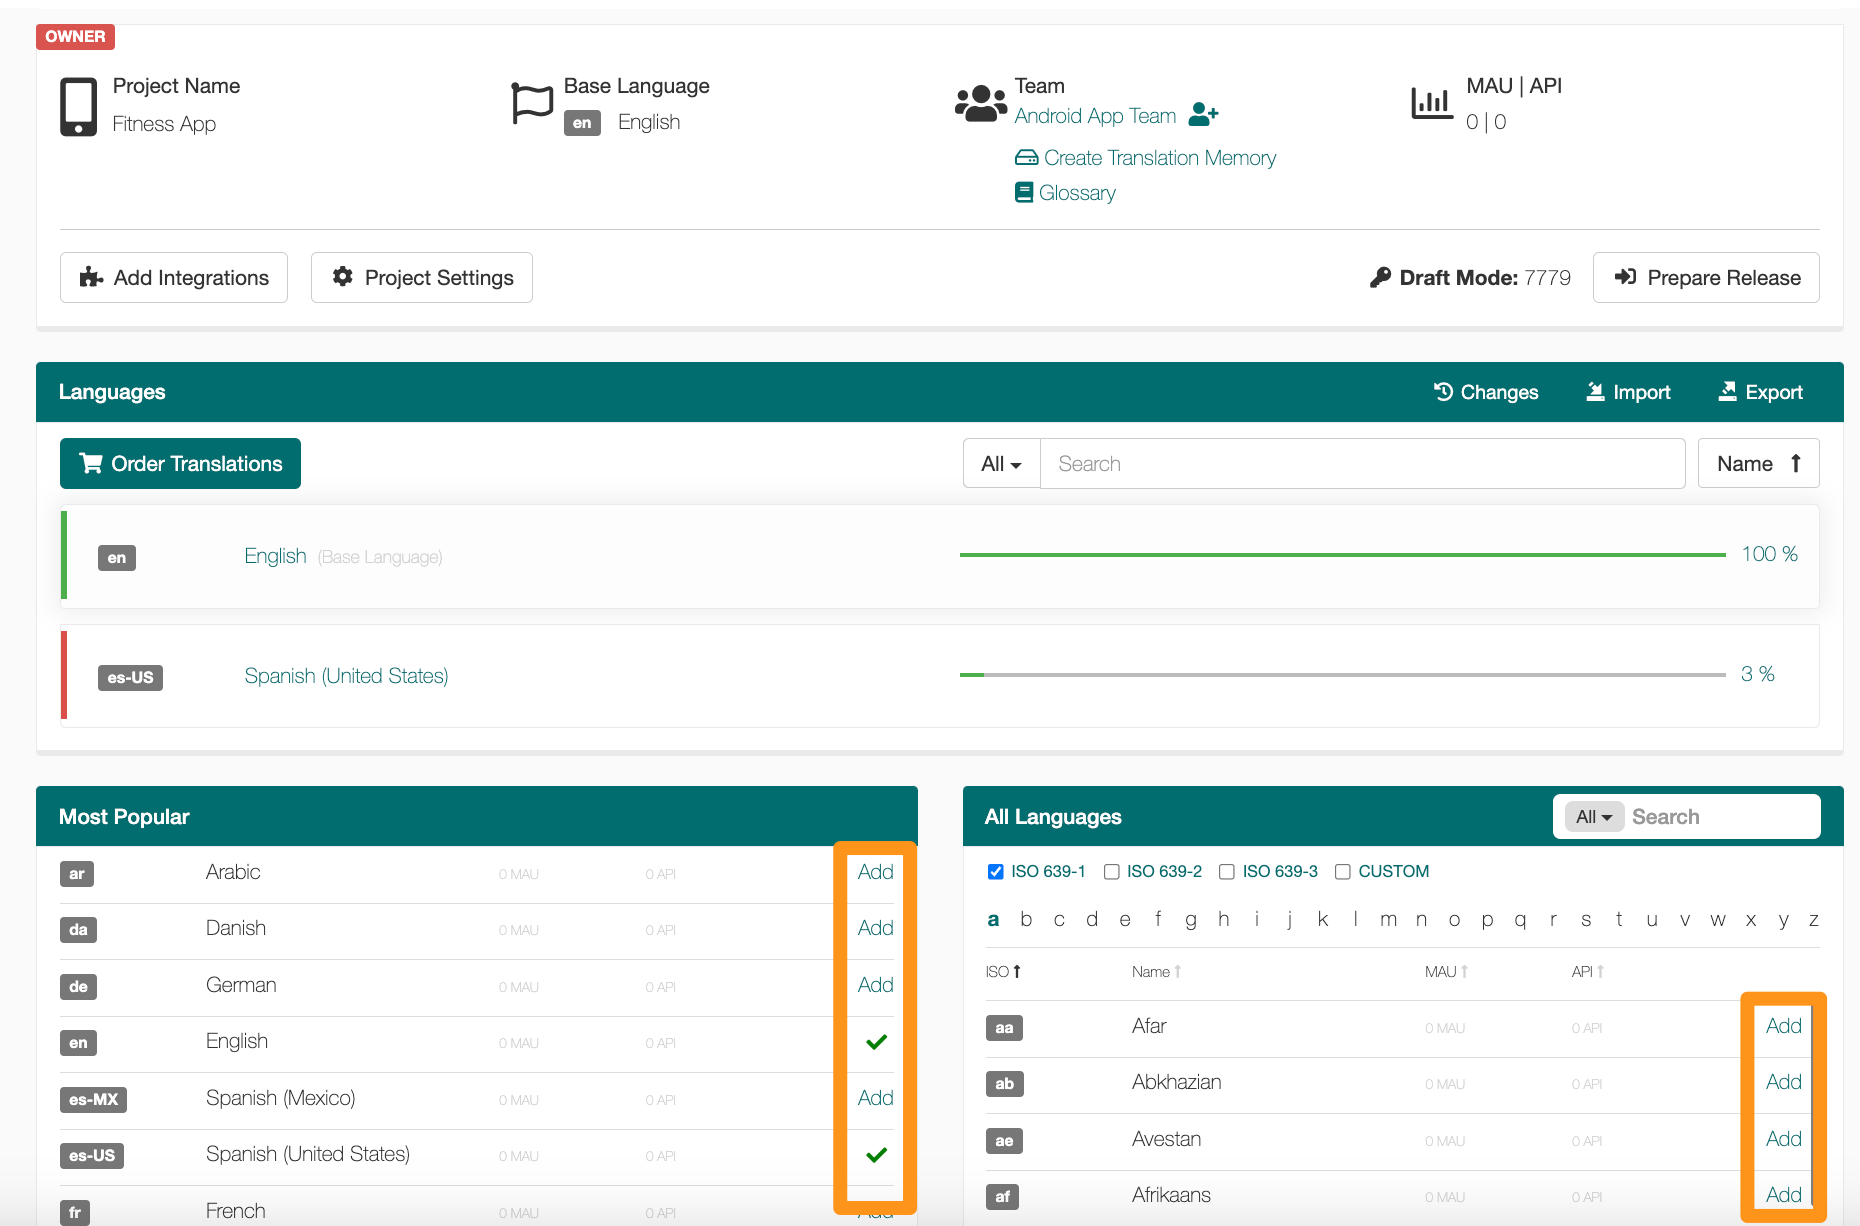
Select the language which requires translation by the Applanga Translation Memory to navigate to the newly added language’s Editor.
Use the filter, tags, or search functionality to limit the scope (if needed), then mark the appropriate checkboxes for translation.
Click the More dropdown menu and select Translate from Memory.
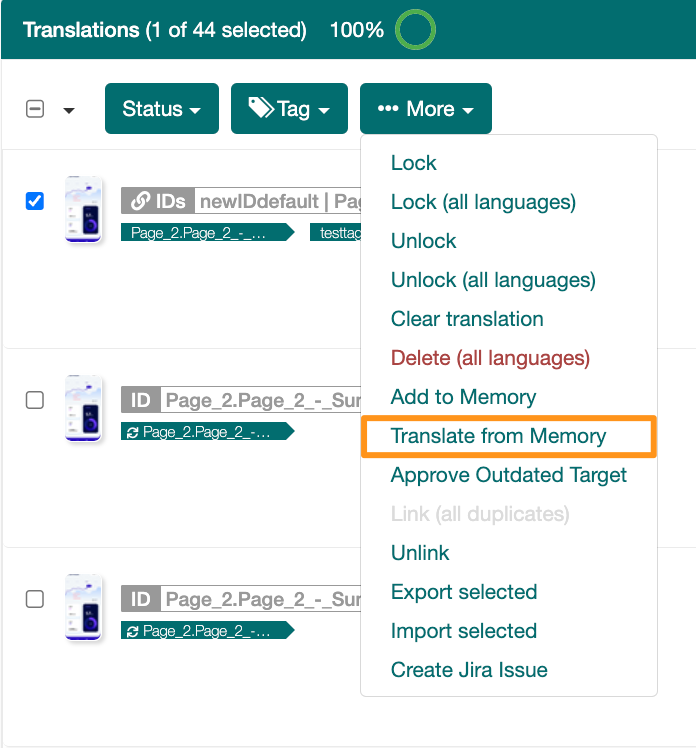
Select the appropriate options from the Translation Memory pop-up, then click Start.
Review the translations and make updates as necessary.
For more detailed Translation Memory instructions, follow the steps outlined in the Translation Memory documentation.

A guide for using Over-the-Air updates and pluralization with React-Native and Applanga
Read the Full Article
Are you wondering which keys stored in your Applanga projects are actually used in your app and which ones are just dead weight?
Read the Full Article