The Applanga String Management and Editor Interface can include screenshots of an app so translators, reviewers, and testers alike can see and even navigate through the app screen by screen. This helps them better understand your app design, the overall user journey, and get a feeling for how much space is available for translated strings. With better context, screenshots on Applanga can help you get more accurate translations quickly.
Adding screenshots to Applanga can become overwhelming if there is no automation in place to capture the screens in the beginning. If your development team doesn't have the resources to automate screenshot generation and upload, this guide will help you upload screenshots in manageable batches via the dashboard.
There are two options for uploading screens to Applanga without any automation. Users can add screenshots to a project via Draft Mode or by manual upload.
If your app is not integrated via the Applanga SDK, you can manually upload screenshots to Applanga.
Open the Editor of your Applanga project in the base language
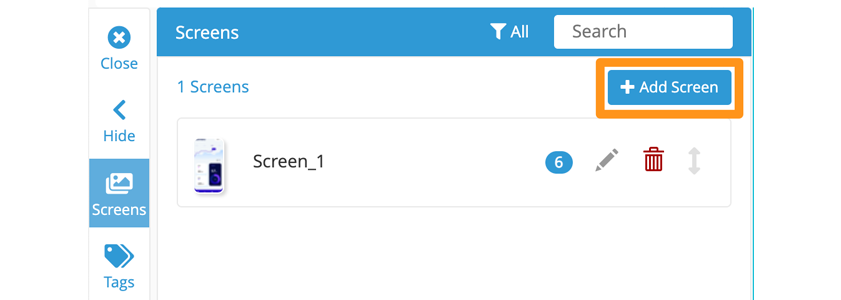
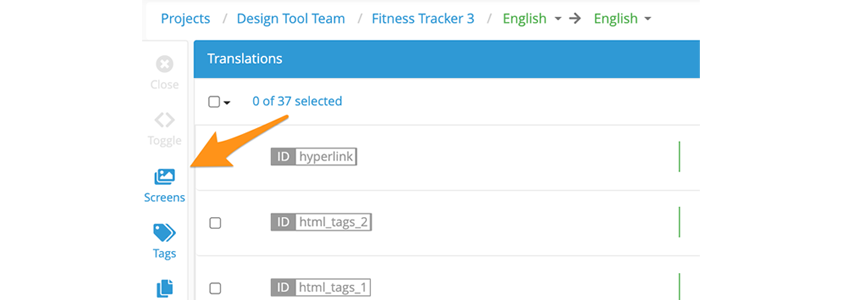
Click the Screens icon on the side menu then click +Add Screen
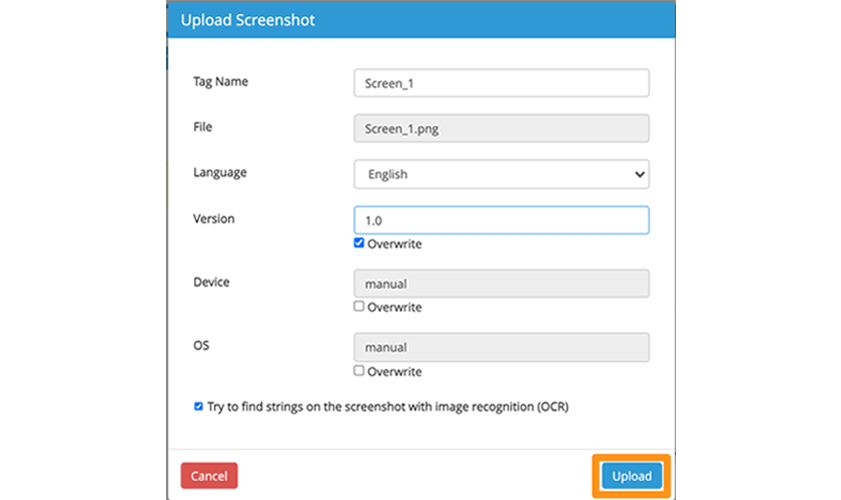
Drag & Drop or Browse Files to upload a screenshot
Complete the required information in the Upload Screenshot dialog box then click Upload
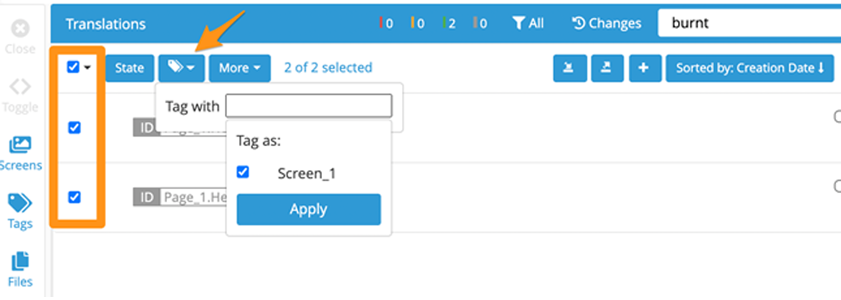
Use the Search to find strings from the uploaded screenshot
Mark the checkbox next to the string, then tag the string with the tag for a given screen
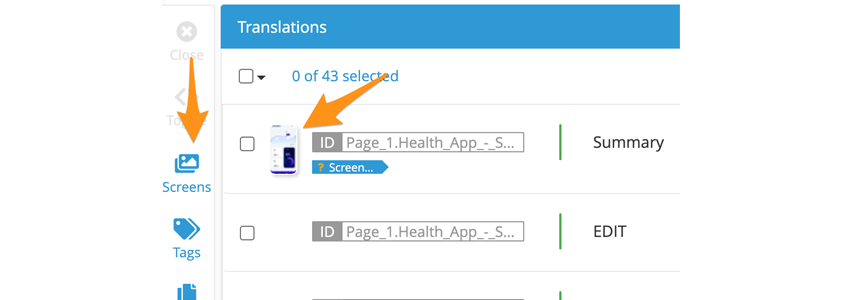
Click the Screens icon on the side menu or click on the screen thumbnail to review the uploaded screen
Repeat steps 1 through 7 to gradually upload all app screens to the Applanga Project (Users can follow these same steps to upload translated screens to the project.)
Open your app in Draft Mode with the Draft Mode key using the steps outlined in the Draft Mode article
Once the App in open in Draft Mode, follow the steps outlined in the Screenshot Upload article to generate and upload a few screens to the Applanga project
Navigate to the project on the Applanga Dashboard
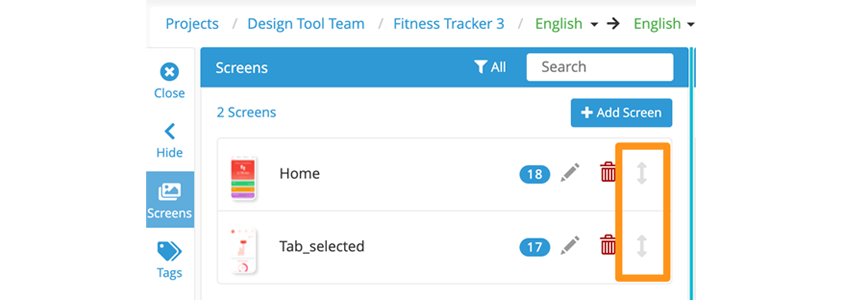
Click the Screens button on the left-hand side-menu to confirm screenshot upload
Click the Arrow icons to drag and drop the screens into the correct order (This will allow users to navigate through screens sequentially while using the In-Context Editor)
Repeat steps 1 through 5 to gradually upload all app screens to the Applanga Project (Users can follow these same steps to upload translated screens to the project.)
Want to learn more about Screenshots on Applanga? See the Working with Screenshots article.

A guide for using Over-the-Air updates and pluralization with React-Native and Applanga
Read the Full Article
Are you wondering which keys stored in your Applanga projects are actually used in your app and which ones are just dead weight?
Read the Full Article