

New to Applanga? Here’s all you need to know about our design tool plugins and how to achieve its full potential.
Nowadays most applications are built using the agile methodology, which is based on continuous development and the collaboration of cross-functional teams. Product managers, product owners, developers, and UX designers need to communicate and align constantly in order to make the development process move forward uninterrupted and efficiently.
In this context, prospective users will sometimes reach out to us because they wish to localize their app with the help of Applanga, but are unsure about how to integrate the localization steps into their workflow.
At Applanga we offer a wide range of integrations that give users the flexibility of localizing their app at any stage of the development process. With this in mind, when someone approaches us looking for advice, we first seek to understand their needs so we can evaluate which integration(s) will work best for them.
One of the integration options that generates more interest —and questions— is our design tool plugins.
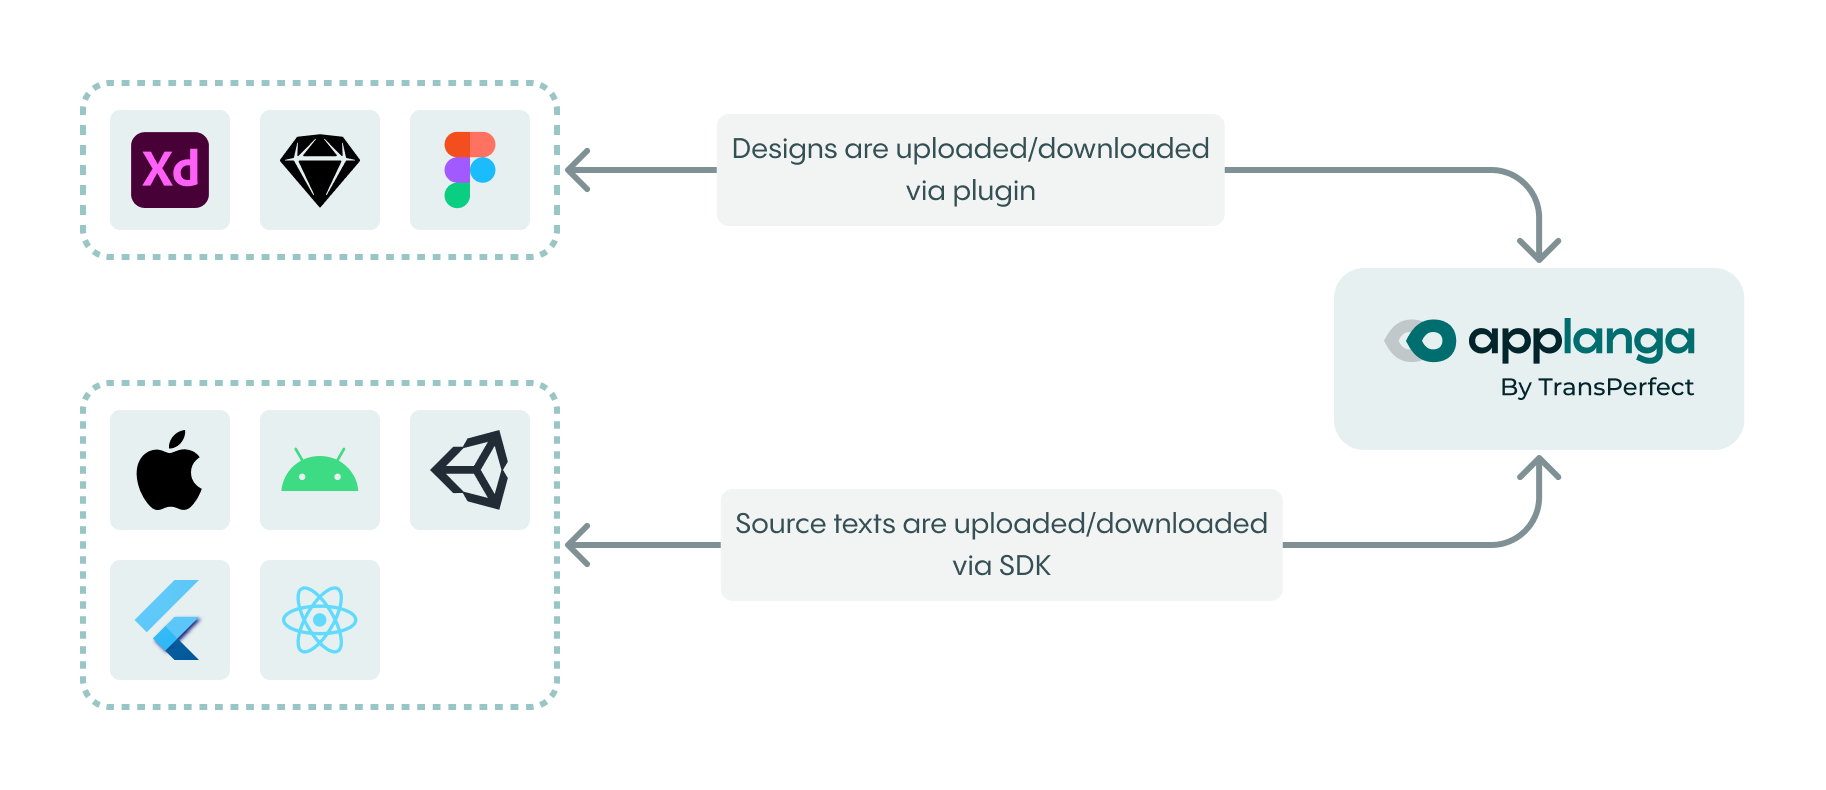
The plugins allow teams to localize their app content while it is still in the design stage, as well as automate the handover of the app copy and its translations from designers to developers.
From a localization perspective, the advantages are clear; our plugins are simple and intuitive. With only a few clicks, a design file can be instantly uploaded to our dashboard, where linguists can translate and review content while taking advantage of our CAT tool features. Amongst them, the in-context view, where automatically extracted screenshots from your designs are displayed side-by-side with the text, thus giving linguists invaluable context.
From a development standpoint, the introduction of the localization step during the design stage means that the app will be launched into all markets at the same time. Moreover, the use of the plugin will reduce the manual work as well as the back and forth between the different teams involved in development, which results in less errors and faster turnaround times.
To help you take full advantage of our plugins, we have put together a short guide in which we share the answers to users’ most frequently asked questions.
In this first article, we’ll cover how you can use our plugins, alone or combined with other integrations as you start your journey with Applanga.
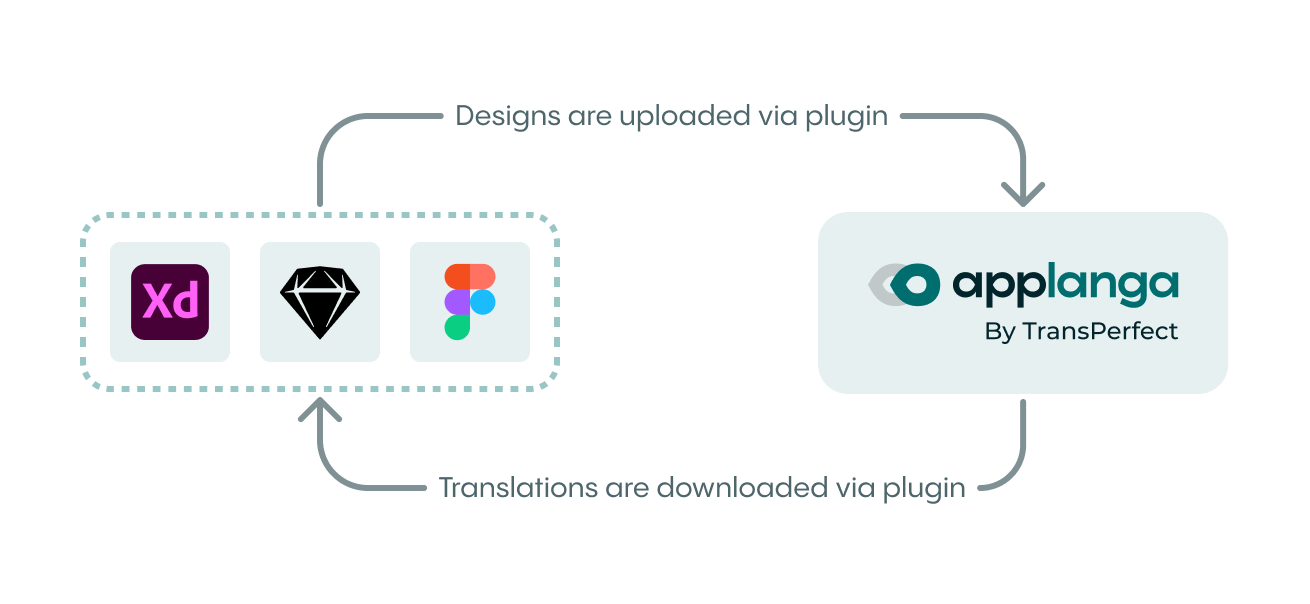
Let’s begin with the simplest scenario: once the designs are final, they are uploaded into Applanga via the plugin, localized, and downloaded back into your design file.
One of the plugin’s strengths is that users can add, remove, or make updates to the text in Applanga or in the design file at any point of the localization phase. However, if different teams have access to the app content, it could lead to someone overwriting or deleting updates by mistake. To avoid this, we recommend following these rules:
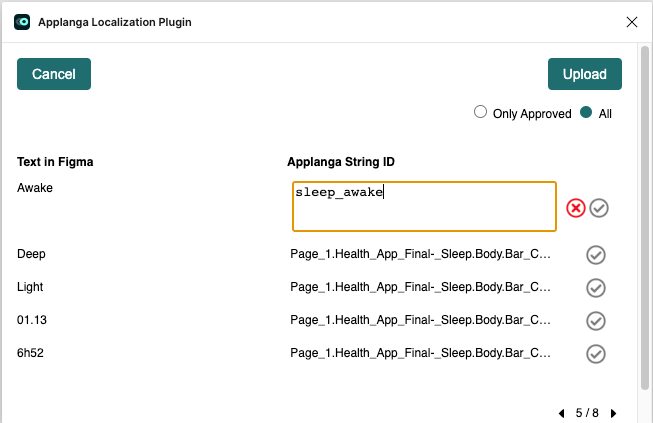
Another of the plugin’s perks is that it allows users to upload design file content in a format that makes it easy for developers to integrate it directly into the app. As part of the upload, you can set a key name for every text string. While the app’s content is being localized into other languages via Applanga, developers can build the app. Afterwards, once the translations are ready, everything can be easily exported in a format that is compatible with the app (e.g. strings or xml) and inserted into it.
Although this isn’t a mandatory step, if you want to go this route, we strongly recommend that developers, UX designers, and copywriters align beforehand on a key naming convention. The key naming interface is part of the upload flow of all Applanga design tool plugins.
If naming the keys as part of the upload is too much of a burden for the person using the design tool plugin, you can skip this step and let the plugin generate key names automatically.
While keys can’t be renamed on Applanga, you can clone a key and give the clone any other key name in the process. This can be done at any stage by a person who is familiar with the key naming convention. After this is done, the clones can either be linked into a single entry on Applanga or the original key can be deleted.
A recurring question from Applanga users is if the design tool plugins can be used in combination with other integrations to bridge the gap between the teams involved in the app development process in an even more automated fashion. The answer is yes!
Typically, copywriters and UX designers work closely together on the app designs and UI text. They are also responsible for sending the final version to developers so that the app can be built. Since each team works with different tools, more often than not, app content ends up in several Excel spreadsheets or design files that are sent back and forth between developers and the other teams.
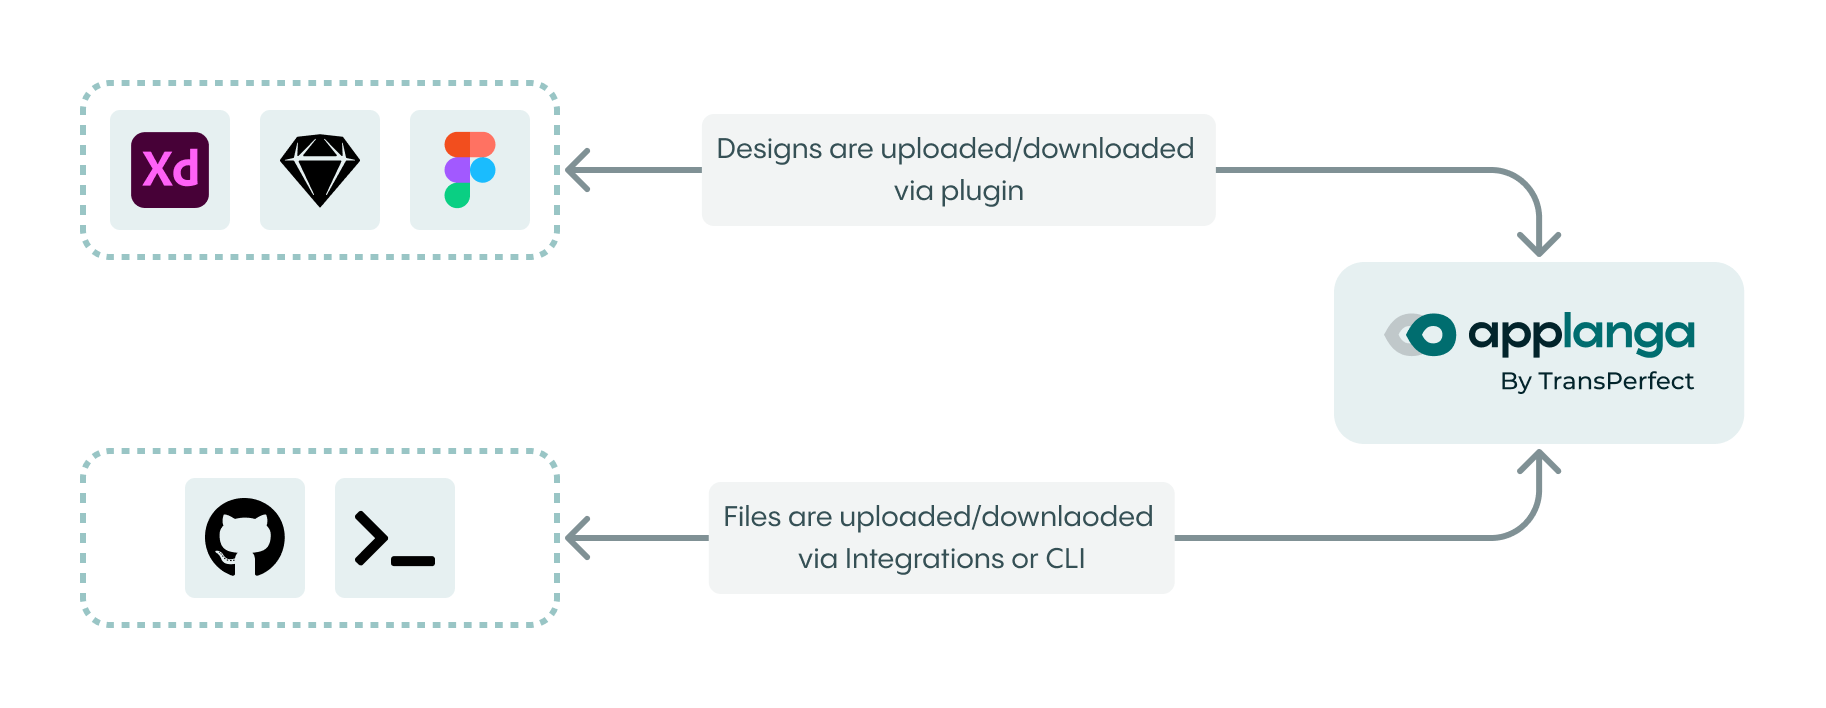
As we saw in the previous section, our design tool plugins help streamline the design, copywriting, and localization steps by unifying all of them in Applanga. By adding other integrations to the mix, developers can also easily download the translations from Applanga, hence eliminating unnecessary back and forth between teams.
Our design tool plugin and CLI integrations can be combined in a single Project or a multiple Project setup. Our suggested workflow for the single Project setup is as follows:
When and where keys for new content should be created depends on your internal processes. You can either create them during the plugin upload, on Applanga, or in the string files that you will upload to Applanga via the CLI integration. We recommend settling for one method to avoid confusion.
Our suggested workflow for a multi-Project setup is as follows:
Note: occasionally, some of the formatting in a design file will be displayed as a placeholder inside a string in Applanga. Once the translation memory is updated, these strings and their translations will be stored including these formatting placeholders. The same strings that reside on the CLI Project won’t contain the same formatting placeholders because they will come from a strings file, so its possible that when the translation memory is applied to the CLI Project, there is a mismatch in these particular strings and they are left untranslated. To avoid this, there is a plugin option to Ignore formatting in text. This option will strip the formatting placeholders from the text on upload to Applanga.
When combining our SDK integration with the design tool plugin, you can follow one of these setups:
We recommend hosting everything in a single Project to simplify content and key management. To find out more about this setup, we invite you to revisit our article on the multi-platform setup.
The suggested workflow in this case is similar to the CLI & plugin workflow that we described above:
Note: since iOS and Android use different placeholder conventions, we recommend enabling the Android & iOS placeholder conversion feature.

Untangling the confusions in Apple’s localization file format jungle. When and how to use .strings, .stringsdict, .xcstrings and .xcloc.
Read the Full Article
Master key naming conventions and file structure to help ensure a seamless localization process
Read the Full Article