

Use the Glossary to ensure consistent terminology across your apps and projects
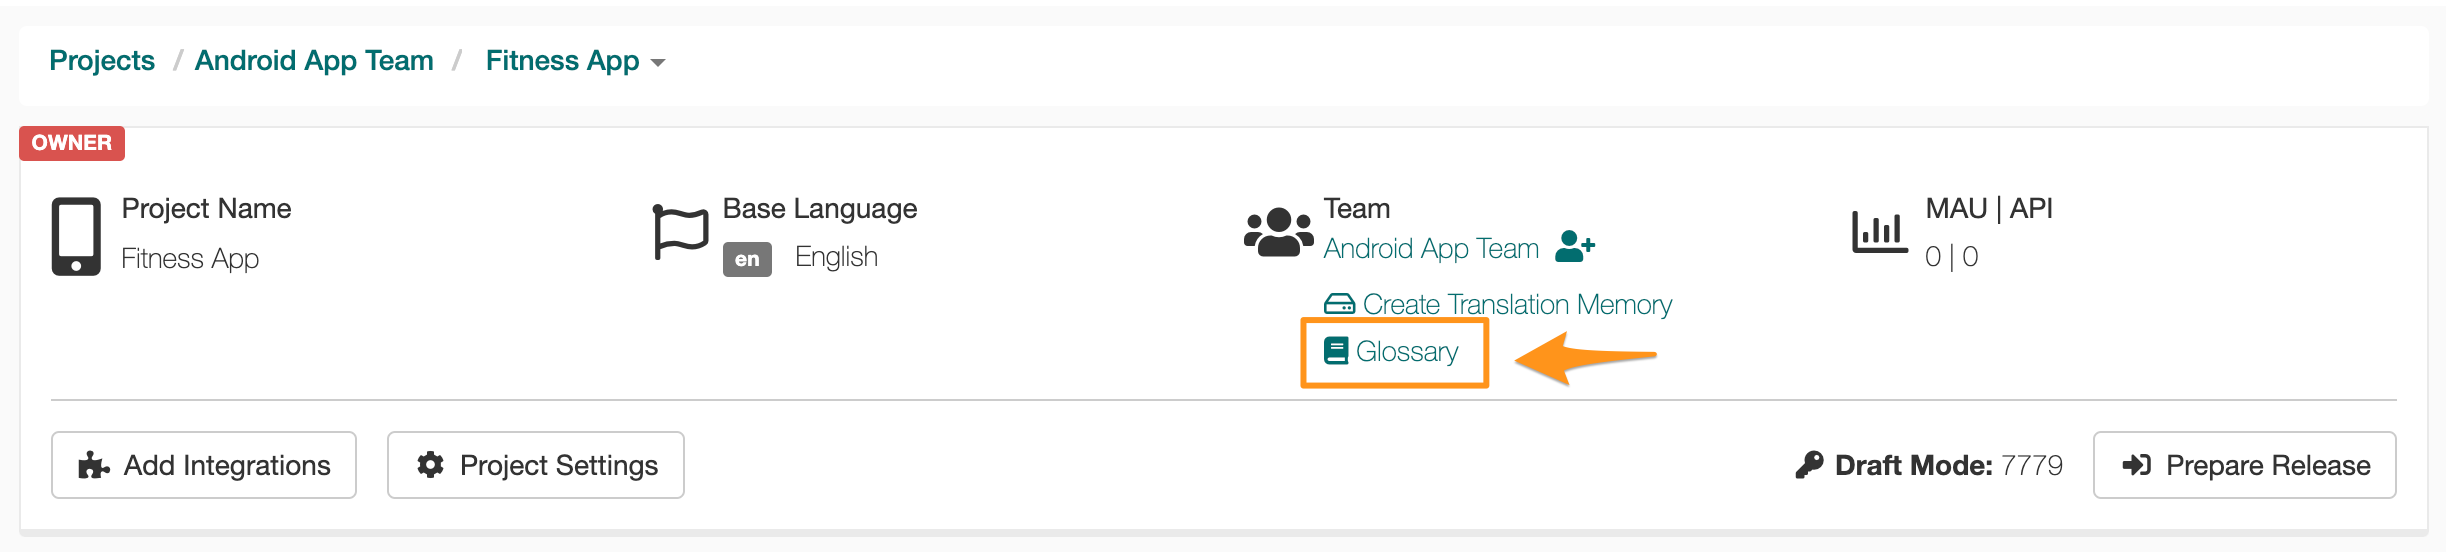
The Glossary feature is available for projects belonging to accounts in the PRO tier or higher. It is used to manage all terms unique to your app or software and can include instructions on how strings should be translated. Each Glossary is assigned to a specific project. You can find it on the Project page, next to the Team and the Translation Memory access.
📝 Note: Use of the Glossary available on GL Strings is recommended for teams that have their own linguistic team managing translations. If you are using TransPerfect Translation Services, TransPerfect will manage an internal glossary for TransPerfect linguists on your behalf. Please check with your TransPerfect Account Manager if you have questions regarding glossary terms.
There are 2 kind of terms which are usually managed through the Glossary:
Terms that should not be translated at all
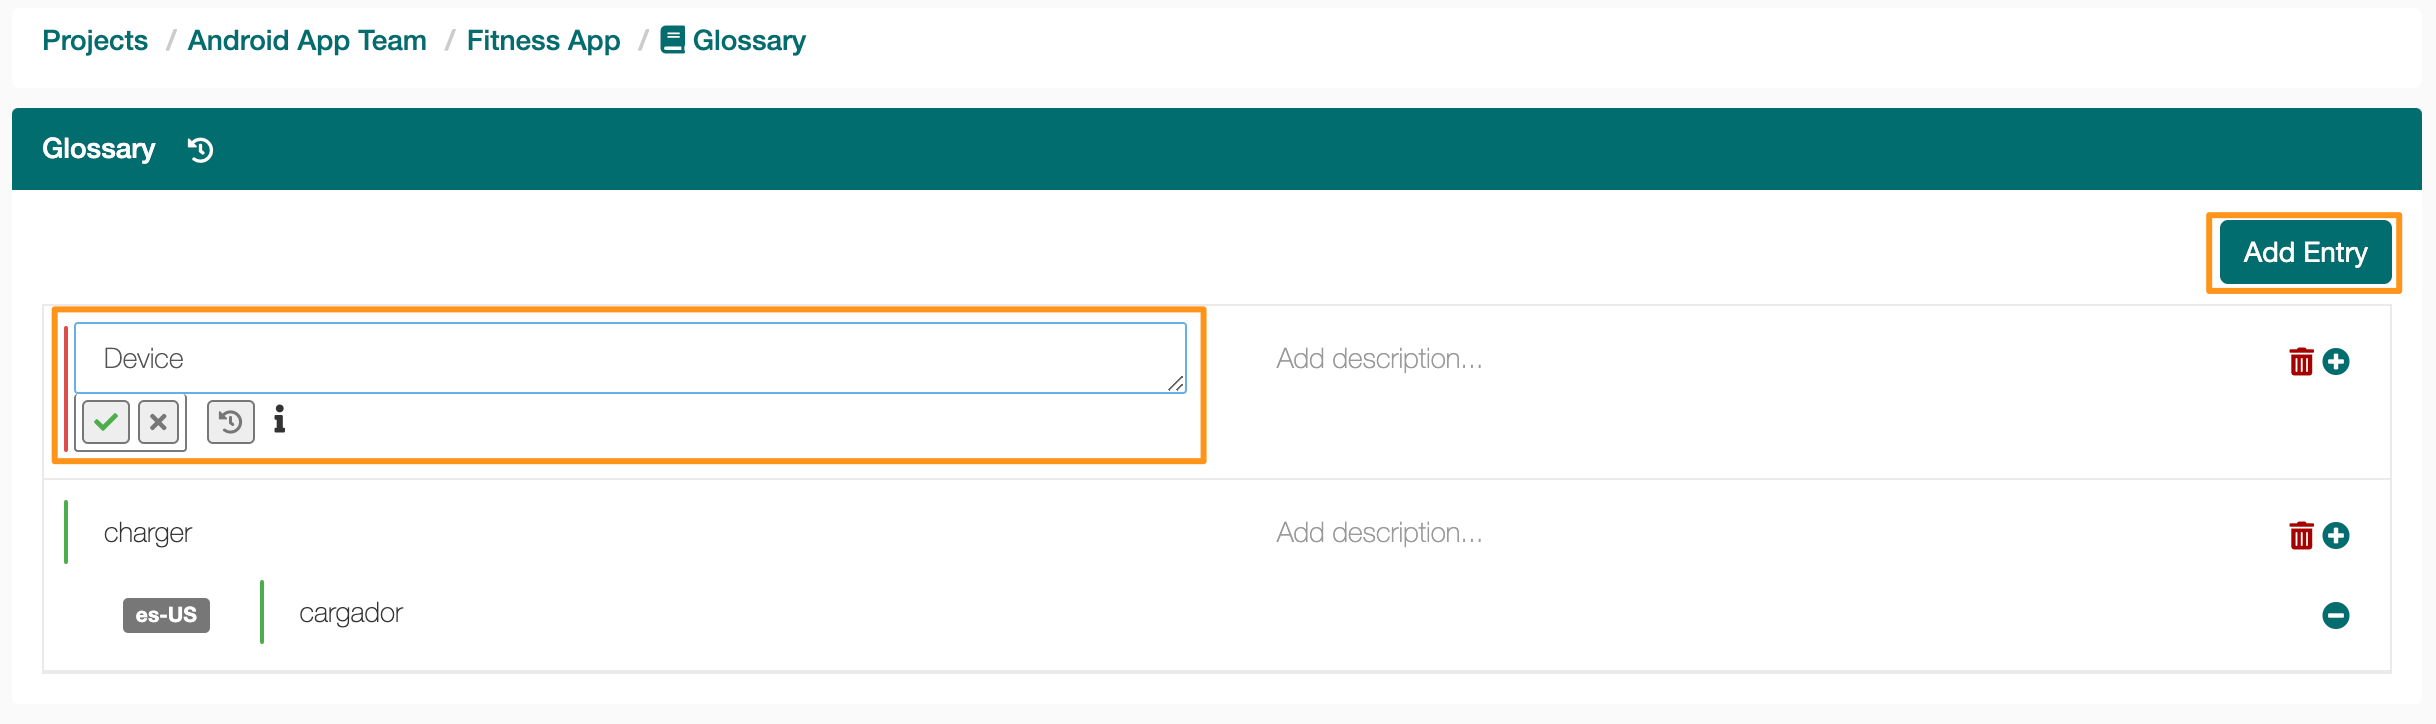
For example, branded words like the name of your app or usage specific lingua (e.g. “to twitter”). Simply add these terms to the memory with or without a description.
Terms that should always be translated in a specific way
For example, if you use different branding in certain regions and developed specific translations accordingly, add them like a regular glossary term, then add the languages and the translations for that term accordingly
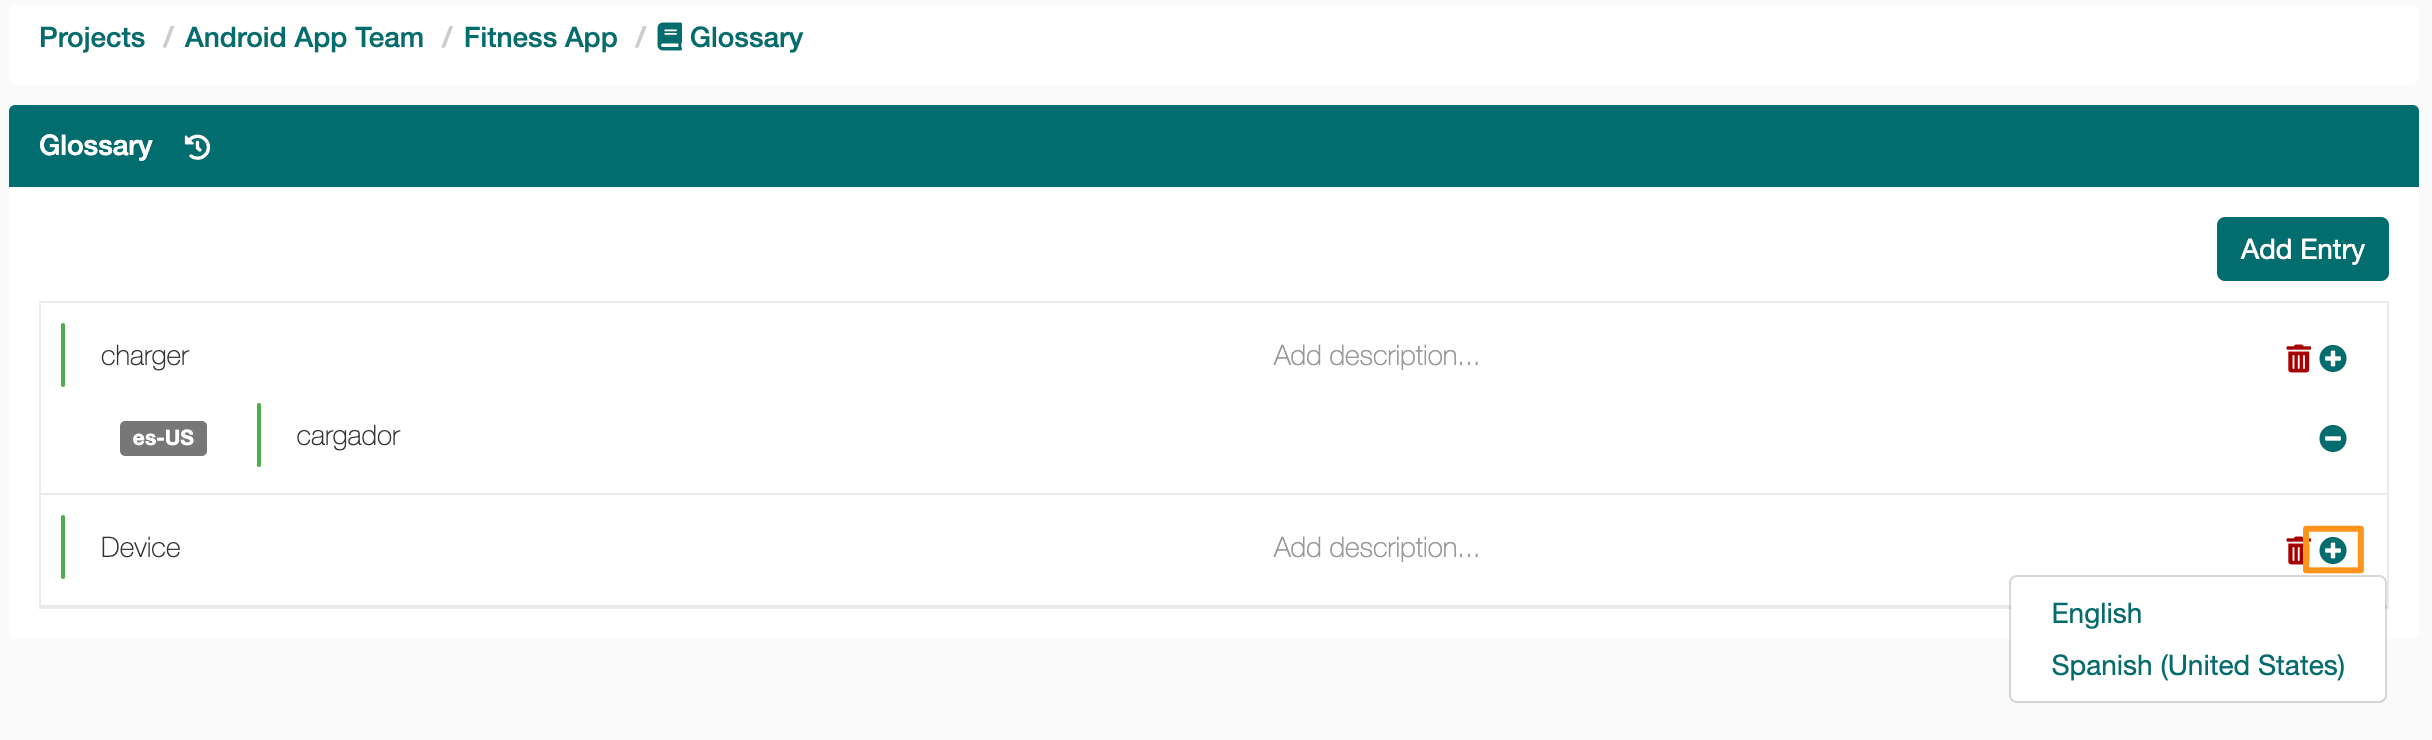
If there is more than one possible translation for a term, you can also add synonyms for that term in the Glossary, be it in the base language or target languages.
Please note that glossary terms are case sensitive.

There are a few prerequisites to consider before importing terms into the Glossary:

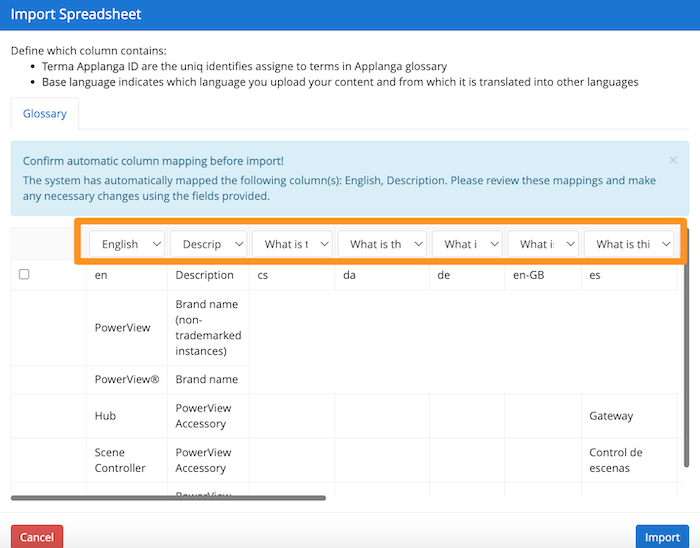
To import your terms:
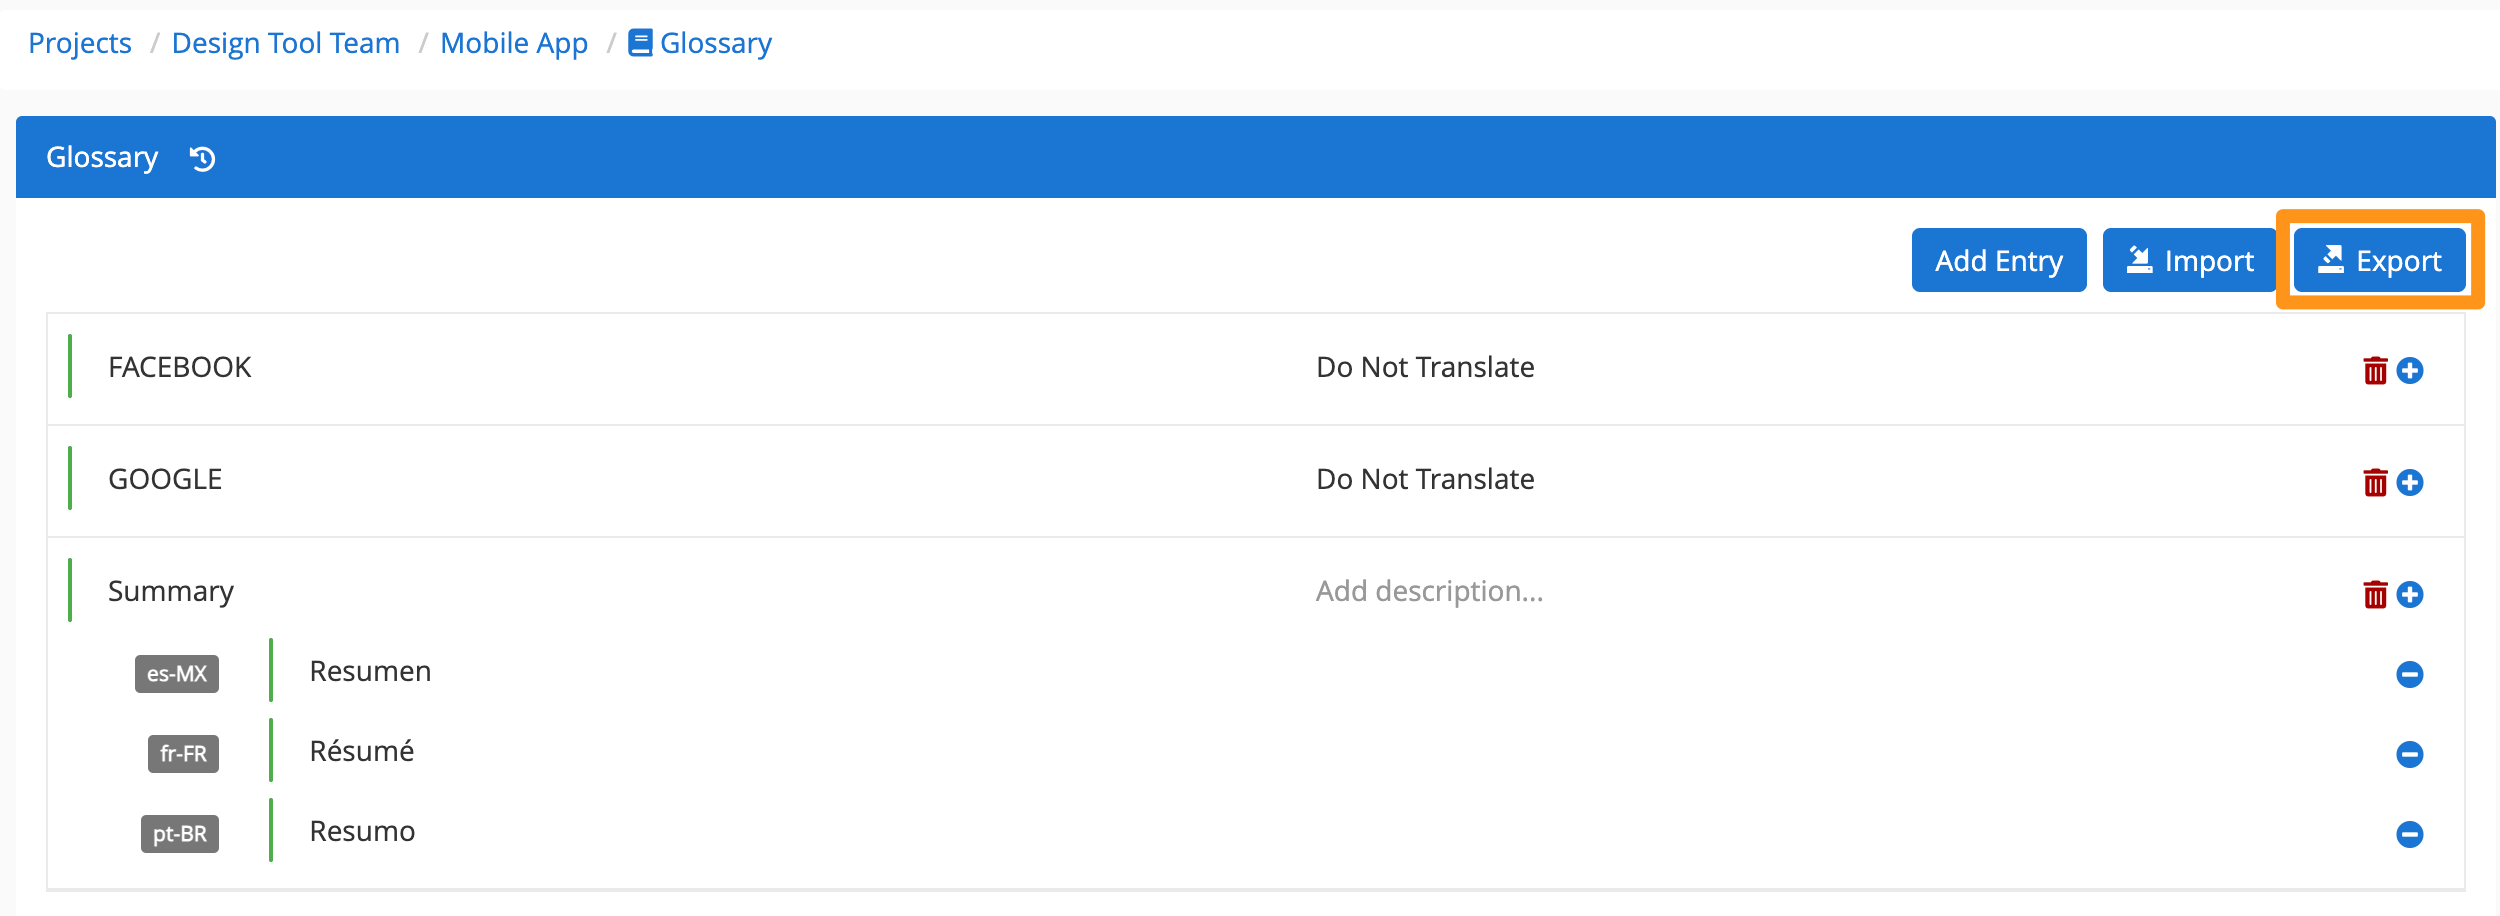
To export all terms from the Glossary to a multilingual Excel file:
You can edit glossary terms directly in the GL Strings dashboard or you can do it via a Glossary import.
To edit the terms in the dashboard, simply access the Glossary and click on the term that you wish to edit.
To edit the terms via an import, you should first export the Glossary and make the edits directly in the Excel file. Once you complete the edits, you can import the Excel file back into the GL Strings Glossary.
If you decide to edit your glossary terms via an import, you should take the following into account:
Add or edit terms
Remove terms
If you remove one, multiple, or all terms from a column and then select a header in the Import Spreadsheet dialog, the terms that have been removed from this column will be deleted from the Glossary. This applies to the base and target languages as well as the synonyms columns.
To remove all the content from the Glossary, keep the ID column and an empty column for the base language. During the import, label both columns with its corresponding header (ID and Base Language).
If you remove a synonyms column, all the synonyms from that column will be removed from the Glossary.
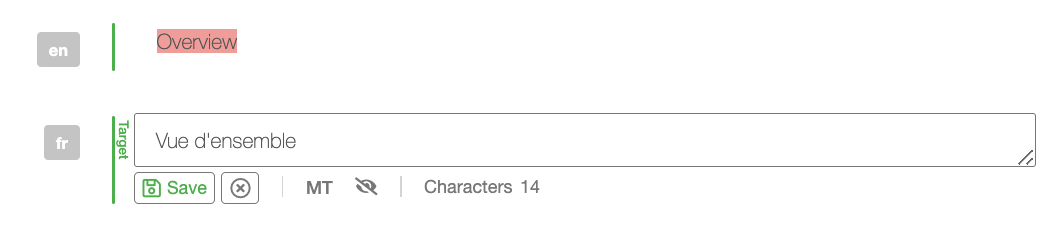
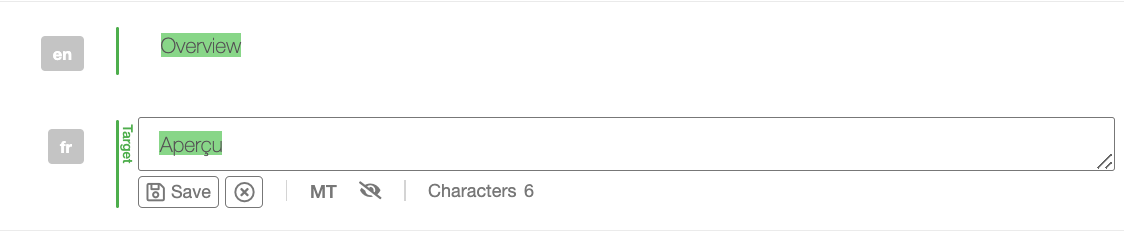
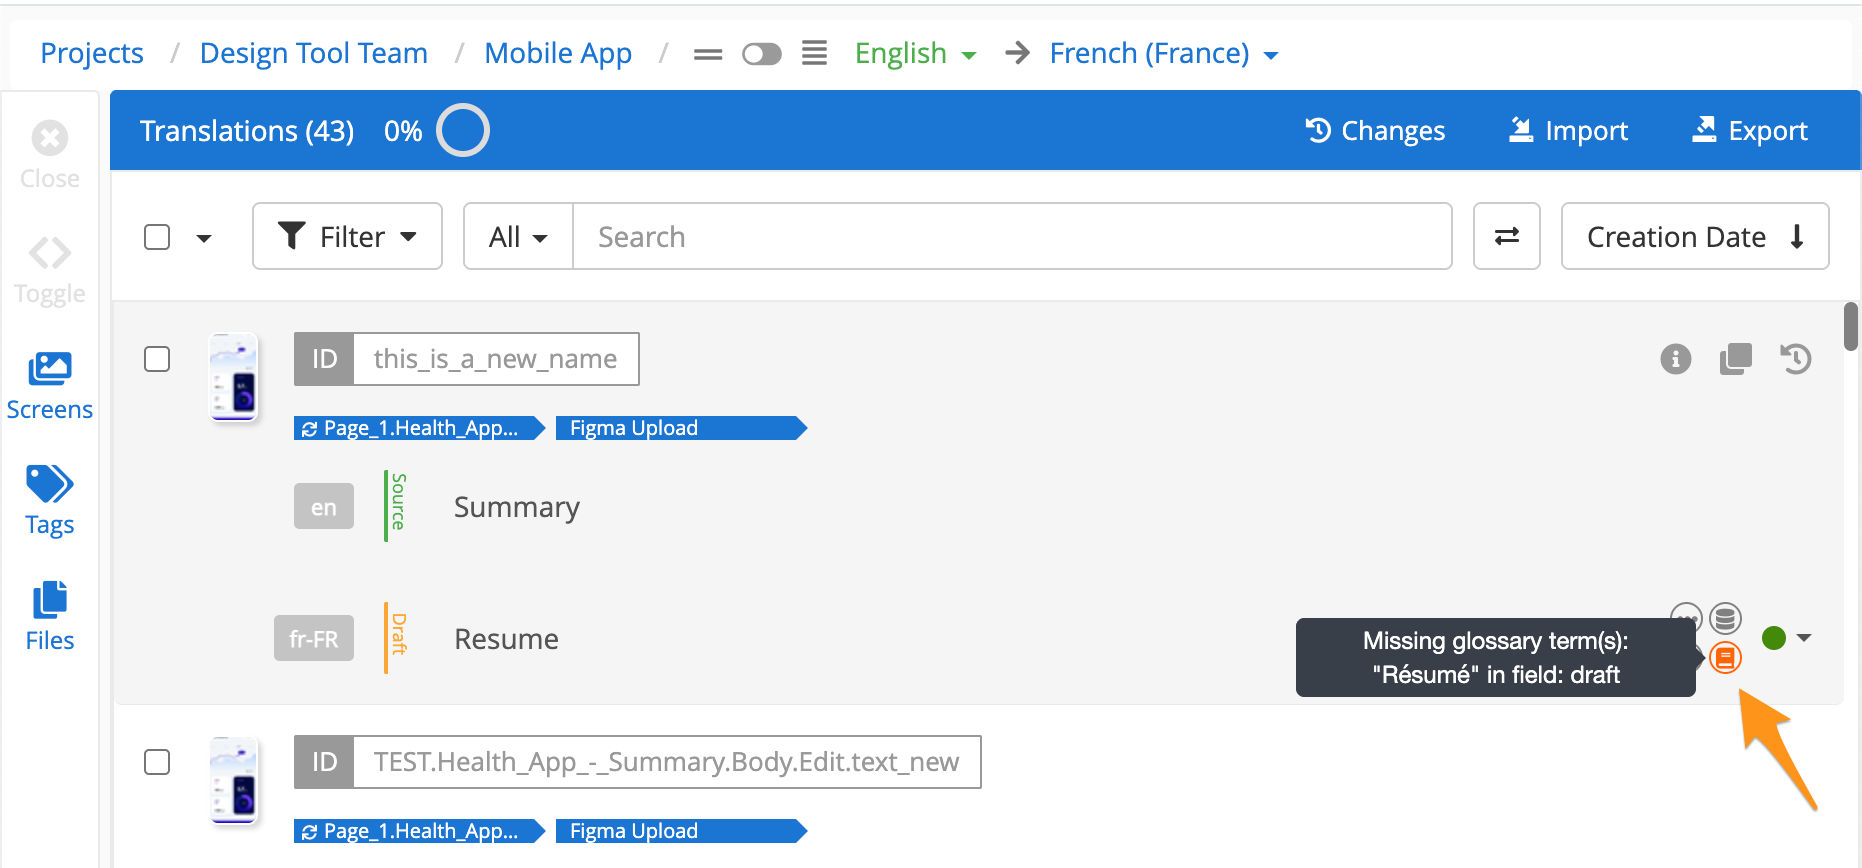
Glossary terms are highlighted in the Editor in red in the source language when they are missing in the translation (1) and in green if they were inserted correctly (2). The highlighting is only visible when actually editing a translation's text.
There is also a Filter option With Issues > Glossary Term Missing to find all entries where glossary terms were not translated correctly.
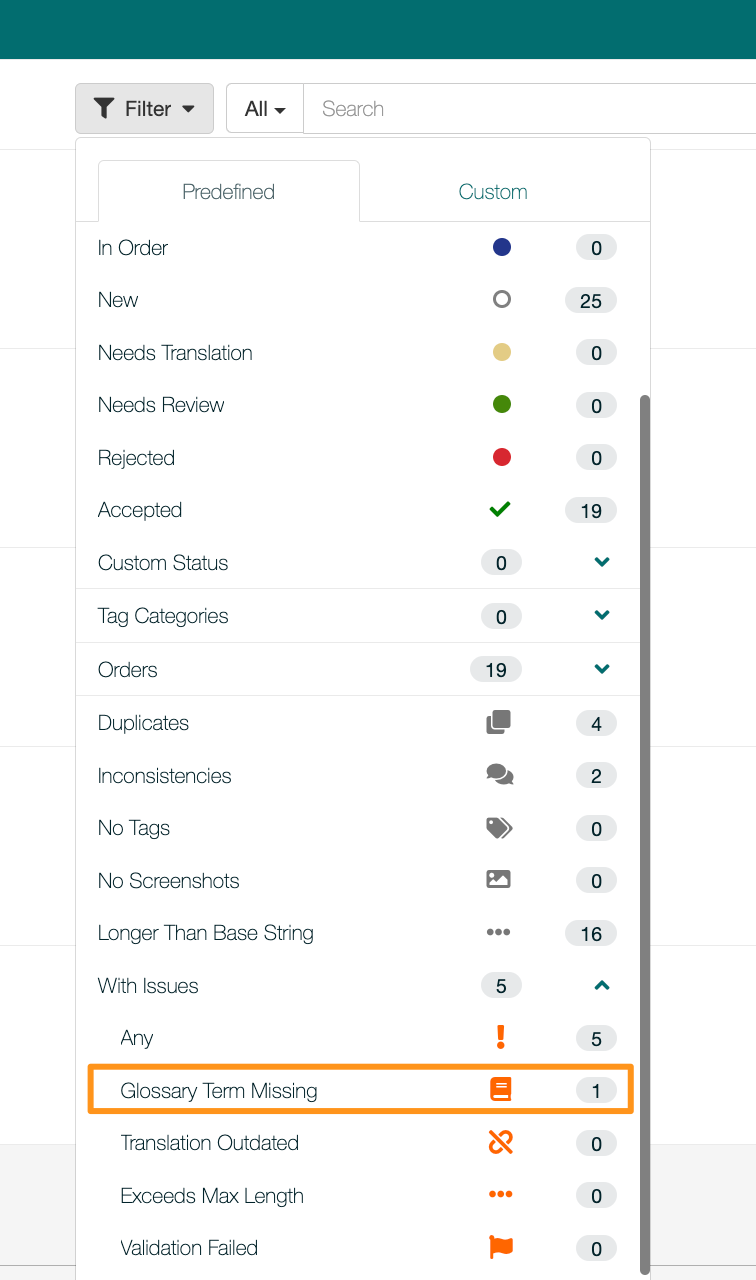
Hover over the Glossary Term Missing warning to view which term is missing from the translation.
The Glossary is active for all the Branches within your project.