This Article will show users how and where to manually import files to the GL Strings dashboard. Users can import a file with source or target content (existing translations) to a given project and language. GL Strings accommodates the following files for import with a max file size of 20 MB:
.csv, .tsv, .ini, .js, .json, .properties, .po, .pot, .resw, .resx, .strings, .stringsdict, .xls, .xlsx, .xliff, .xlf, .xml, .yaml, .yml, .arb, .tmx, .tbx, .php
For more information regarding supported file types and formatting, refer to the file formats documentation.
The GL Strings dashboard handles imports differently based on the type of file used.
- For XLIFF which specifies which languages are contained therein, GL Strings will allow the upload to the appropriate language only. Source or target language code in the given XLIFF has to match the language on the dashboard in the GL Strings project.
- For Excel, TSV and CSV files, the user must specify what content is included in the file such as which columns correspond to which kind of content (e.g. column A contains the key names, column B contains the key values, etc.)
- For native file types e.g. Android string .xml or iOS .strings files, users must import the file in the appropriate language. The GL Strings importer will not check if the content in the file matches the selected language.
Table of Contents
- Importing a File During the Onboarding Dialog
- Importing a File to an Existing Project
- Importing a file in the String Management Interface
- Import Options
- Importing Excel Files
How to Import a File During the Onboarding Dialog
- Add a new project by clicking the + Add Project button
- Select Import Files on the Onboarding dialog
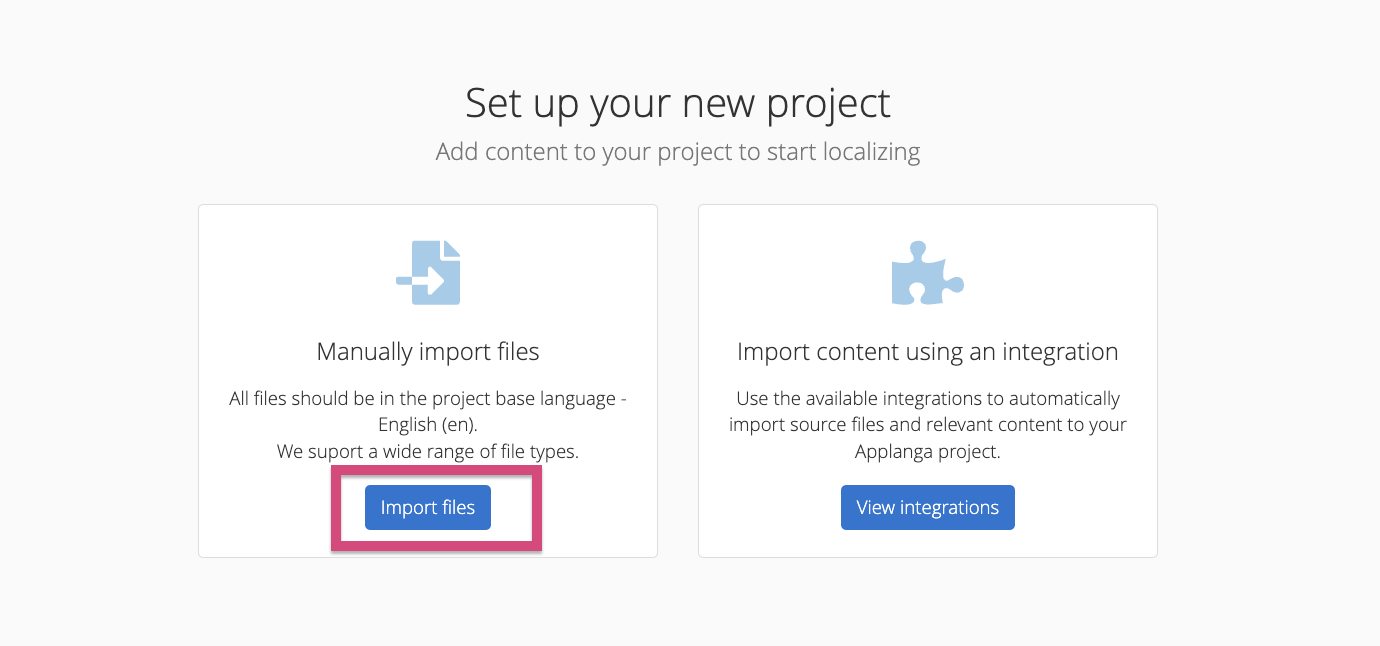
- Drag & drop or click Browse files to choose the file for manual upload
- Mark the appropriate checkboxes in the Importer Options pop-up (refer to the Import Option Descriptions below for more detailed information)
- Click Import
Back to Top
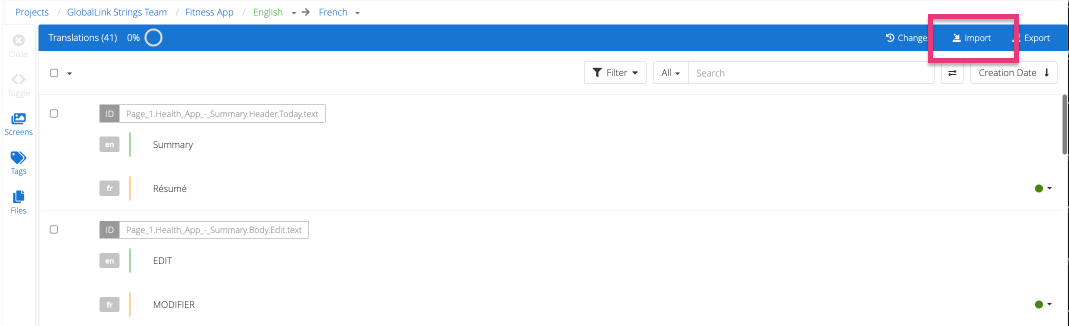
How to Import a File to an Existing Project
- Open the project in the GL Strings Dashboard and click Import

- Drag & drop or click Browse files in the file explorer to choose the file for import
- Mark the appropriate checkboxes in the Importer Options pop-up (refer to the Import Option Descriptions below for more detailed information)
- Click Import
Back to Top
How to Import a File in the String Management Interface
-
Navigate to the project in the GL Strings Dashboard and open the Editor View by selecting the specific project language
-
Click Import then drag and drop or click Browse files in the file explorer to choose the file for import
-
Select the appropriate options in the Importer Options pop-up (refer to the Import Option Descriptions below for more detailed information)
-
Click Import
Back to Top
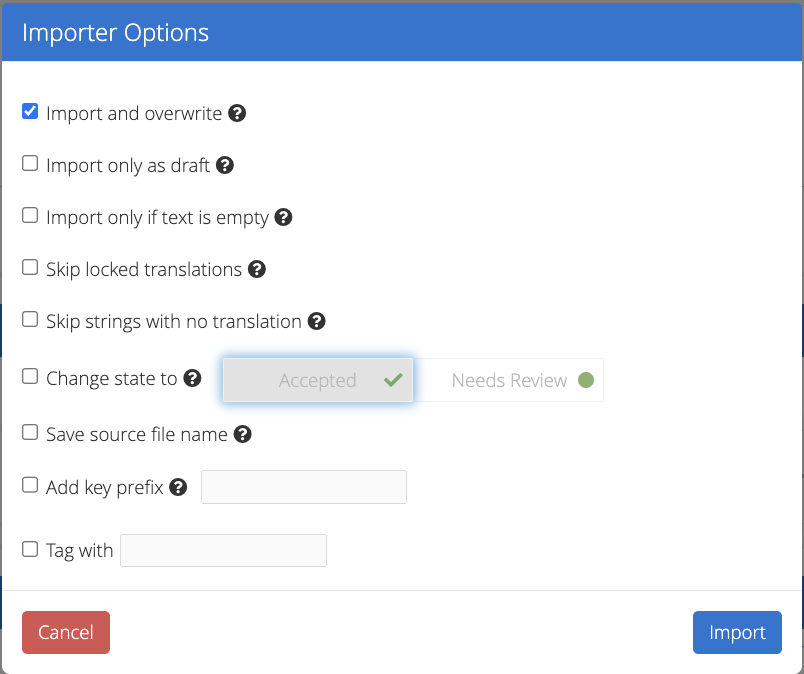
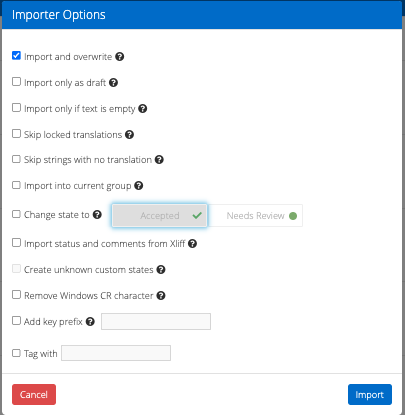
Import Option Descriptions
-
Import and Overwrite - GL Strings imports keys with their values. It also overwrites any existing key values with the new key values found in the imported file. For XLIFF files, this will also apply to any status, description, and string length restriction defined in the imported file.
-
Import only as draft - The keys in the file will be imported as drafts. If the published translation of a given key already has the same value as in the file to be imported, this value is skipped to avoid duplicated content.
-
Import only if text is empty - Only empty keys will have their values imported from the file, skipping all strings that already have a value on the dashboard. This avoids overwrites.
-
Skip locked translations - Locked keys will not be modified by the imported file.
-
Skips strings with no translations - Keys that have no value/are empty in the imported file will be ignored for any other purposes. For example, this will prevent the status or description on GL Strings from being overwritten unless the key value is updated as well.
-
Change state to - Enables users to set the ‘Accepted’ or ‘Need Review’ status to the imported keys.
-
File-specific options:
- Disable Plural Support - Plural strings (e.g. ‘one,’ ‘two,’ ‘many,’ and ‘few’) will be treated as regular keys.
- Import Status from xliff (XLIFF only) - Sets status based on the key status found in the XLIFF.
- Create unknown custom states (XLIFF only) - Add unknown custom states from the XLIFF file to the team.
- Save Source File Name - Saves the file name along with the imported keys so that they can be filtered and exported using this file name and split at a later date.
- Skip non String values - Skips key values that are not String type, such as numbers or booleans.
- Auto-generate missing keys - (XLS, CSV, & TSV only) Automaticallly generate timestamped-based keys for imported values without pre-defined keys.
- Remove Windows CR character - Carriage returns are removed from the imported keys.
- Add key prefix - Free text field where users can enter a prefix for the key names in the imported file.
- Select File-Type - This option will only be shown during the import of .yaml, .json and .properties files. These formats can't be automatically determined by their extension, users need to select which specific format they want to import.
-
Tag with - Adds tags to imported keys. Existing tags can be added or new tags can be created.
Back to Top
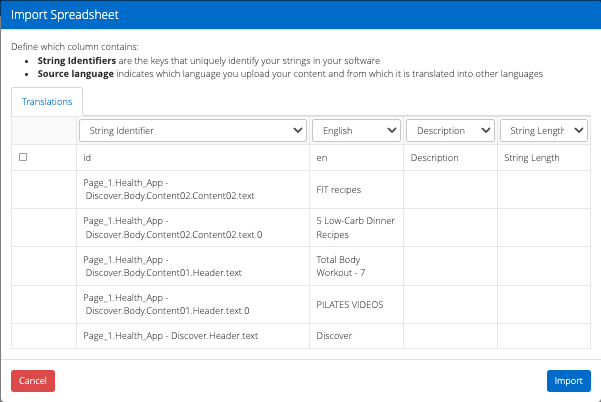
Importing Excel, TSV, and CSV Files
These additional steps apply to the following file types only: CSV, .XLS and XLSX. After importing the files and selecting the appropriate Import Options, users must specify which columns correspond with which values.
-
After clicking Import and selecting the appropriate Import Options, users must wait for the Import Spreadsheet pop-up to load. For larger files, this step may take a moment.
-
Navigate to the tab from which content should be imported and select the appropriate dropdown menu option for each column to define how the data in the given column should be imported to GL Strings.
- At least the key name and one language must be defined
- Users can also associate each column with the following values: String Identifier, String Length, String Description, translations for languages already present in the GL Strings project, and additional Custom Metadata Field values
❗ Important: Users can either import only metadata OR import metadata for all keys that also have a language value.
- If you ONLY select a column for keys and a column for one or more metadata values, the metadata values for all keys will be imported to the project.
- If you select a column with values for any language, the metadata will only be imported for those keys that also have a language value. Keys with no language value will not be imported to the project.
Back to Top

