GlobalLink Strings Sketch Plugin
A Sketch plugin for translating Sketch files with GlobalLink Strings.
Version: 2.5.0
Website: https://www.globallinkstrings.com
Table of Contents
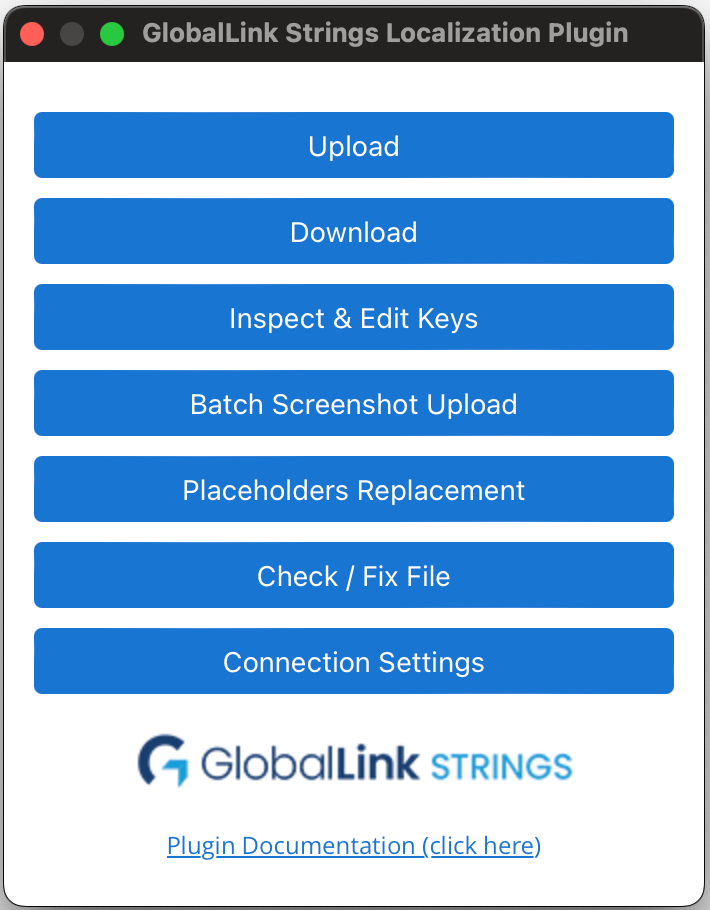
- Installation in Sketch
- Connecting a GL Strings Project and the Plugin
- Usage and Features
- Connection Settings
- Uploading content for translation
- Translate your Sketch file
- Uploading translated screenshots
- Uploading translated screenshots for multiple languages
- Placeholders Replacement
- Inspect & Edit Keys
- Check/Fix File
Installation in Sketch
The GlobalLink Strings plugin requires Sketch v54+ to run.
- To localize a Sketch file download the latest release of the plugin
- Unzip & Double-click on GlobalLinkStrings.sketchplugin, this should create a GlobalLink Strings sub-menu under Plugins in Sketch
Connecting a GL Strings Project and the Plugin
For a new project
- Create a new project in GlobalLink Strings Dashboard.
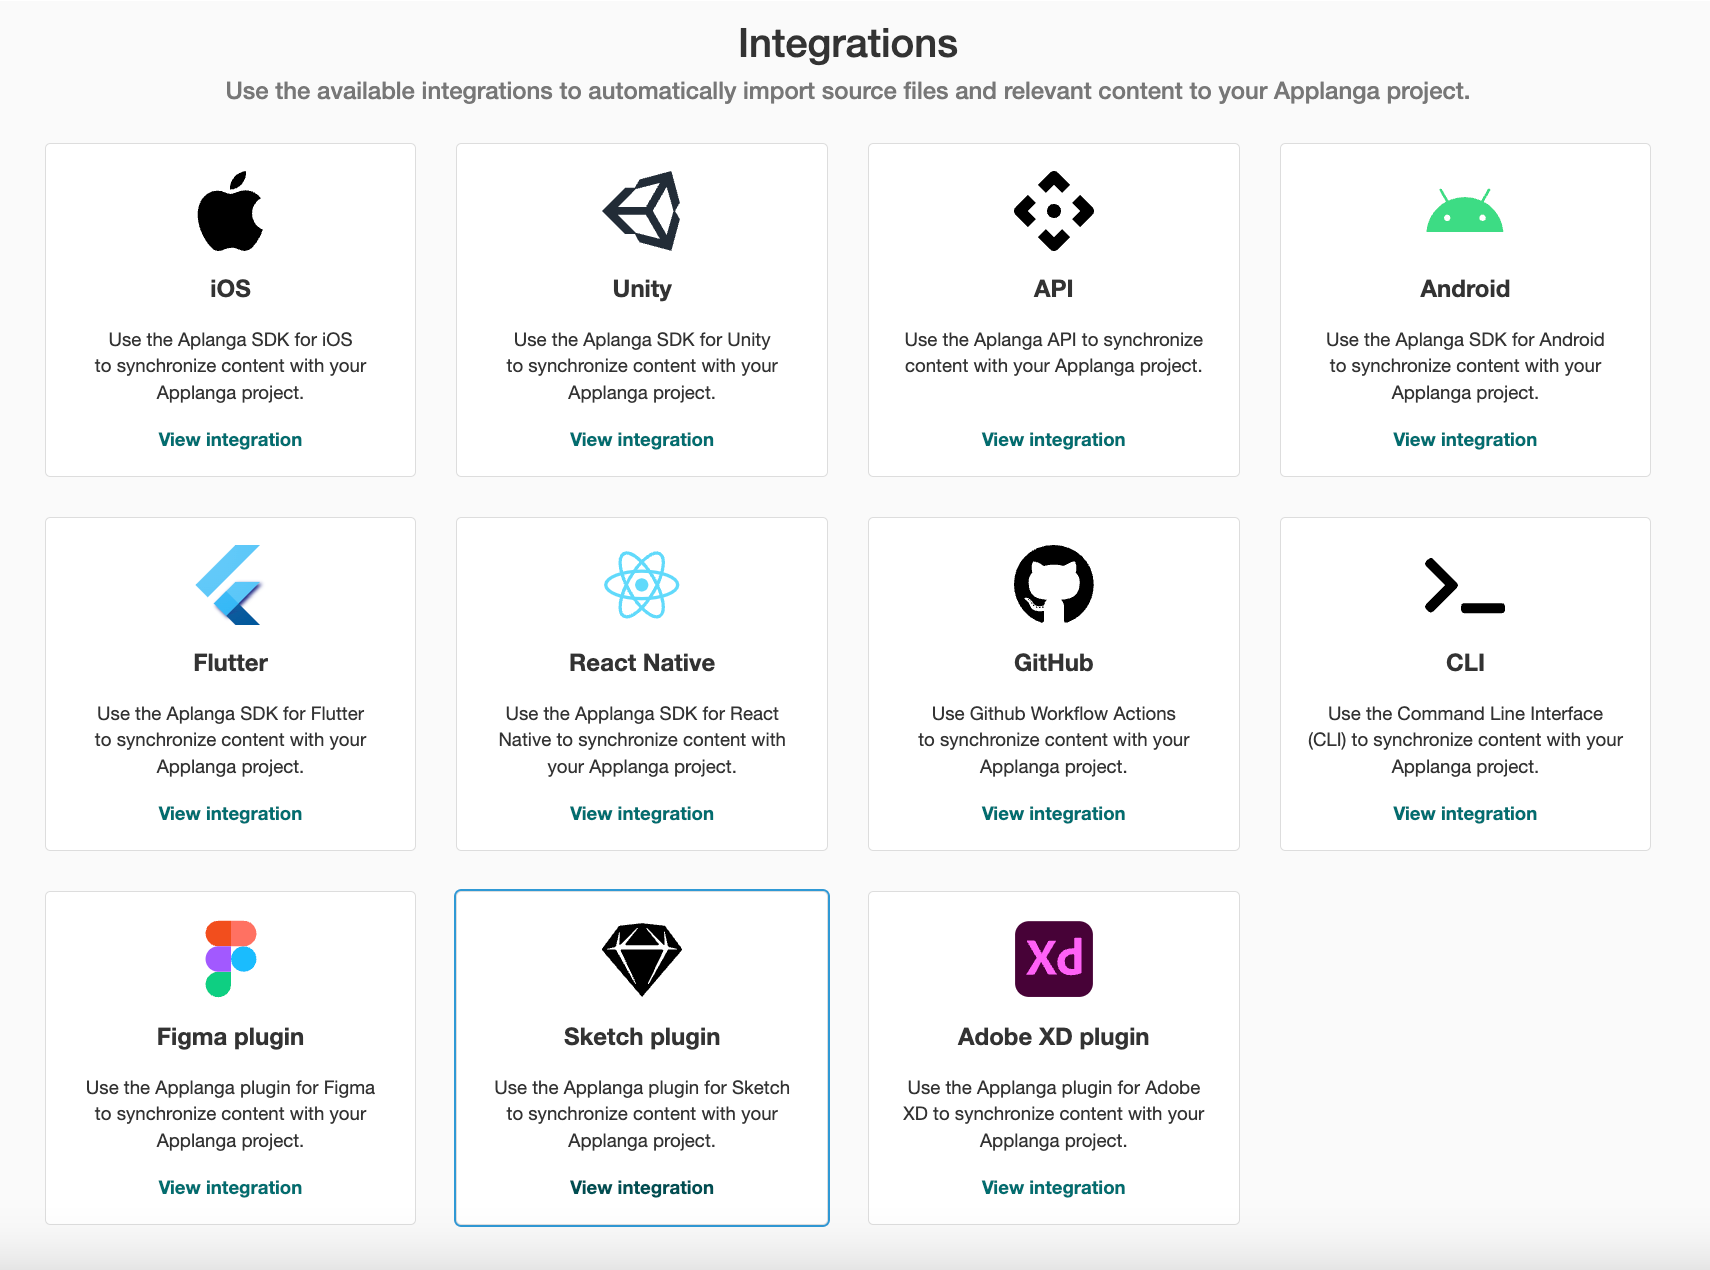
- Follow the prompts and select the Sketch integration option.
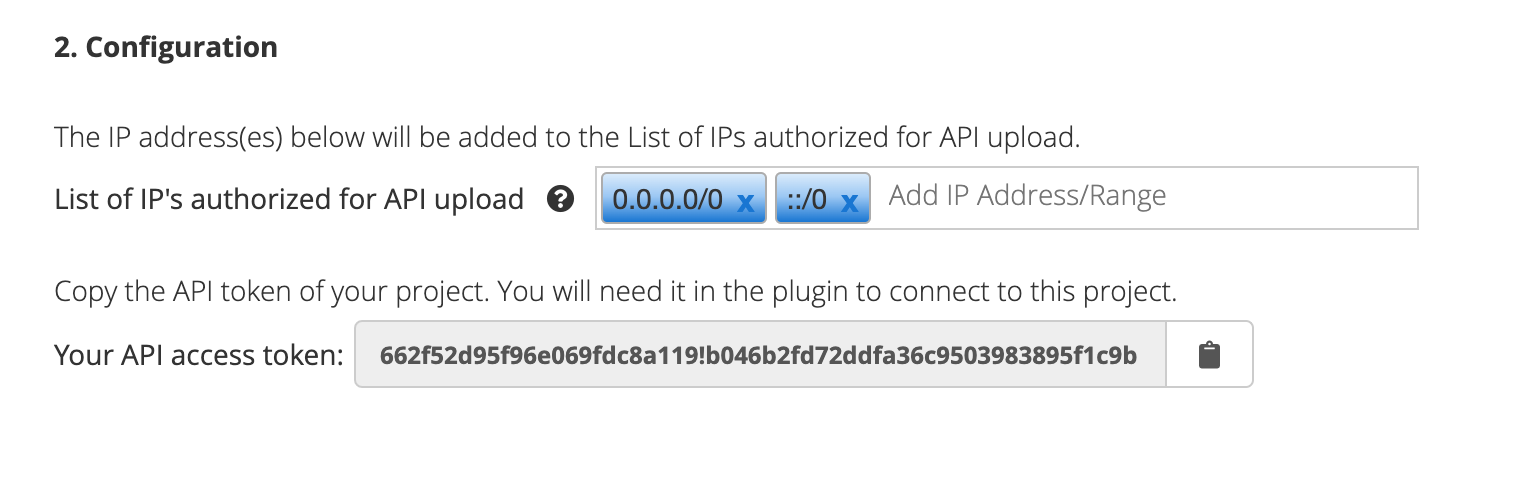
- Copy the API Token by clicking on the clipboard icon. You will need it to start using the plugin.
- Click on "Go to Project" to confirm the configuration (This will automatically whitelist all IPs so you are able to upload Sketch content to the Applanga project using the plugin! If needed, you can remove
::/0 and 0.0.0.0/0 then add your specific IP address. This will allow only you to upload content.)
For an already existing project
- Go to
Project Settings of the project.
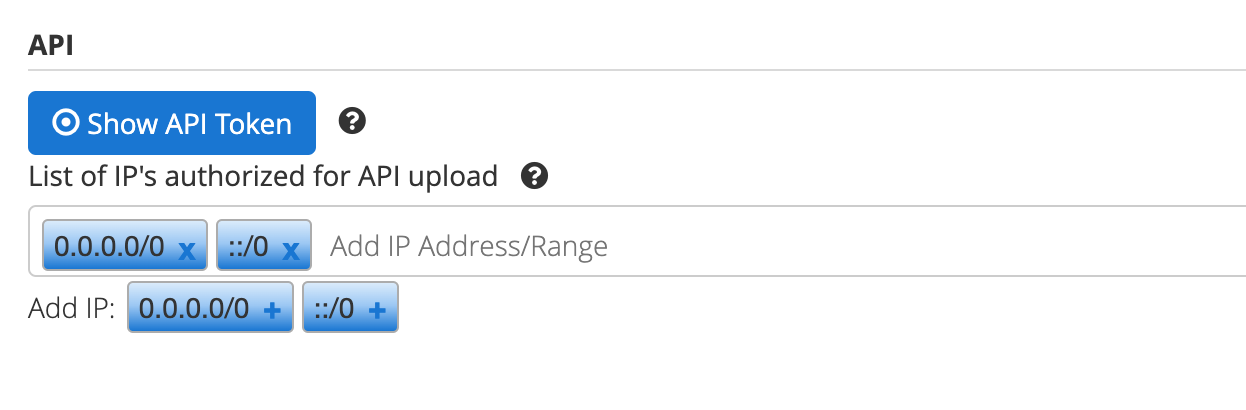
- Add
::/0 and 0.0.0.0/0 or the authorized IP addresses in the List of IP's authorized for API upload. This will authorize you to upload Sketch content to the Applanga project using the plugin!
- Copy the API Token by clicking on "Show API key" and then the clipboard icon. You will need it to start using the plugin.
- Scroll to the bottom of the Project Settings page and click "Update".
›
In the GlobalLink Strings Plugin
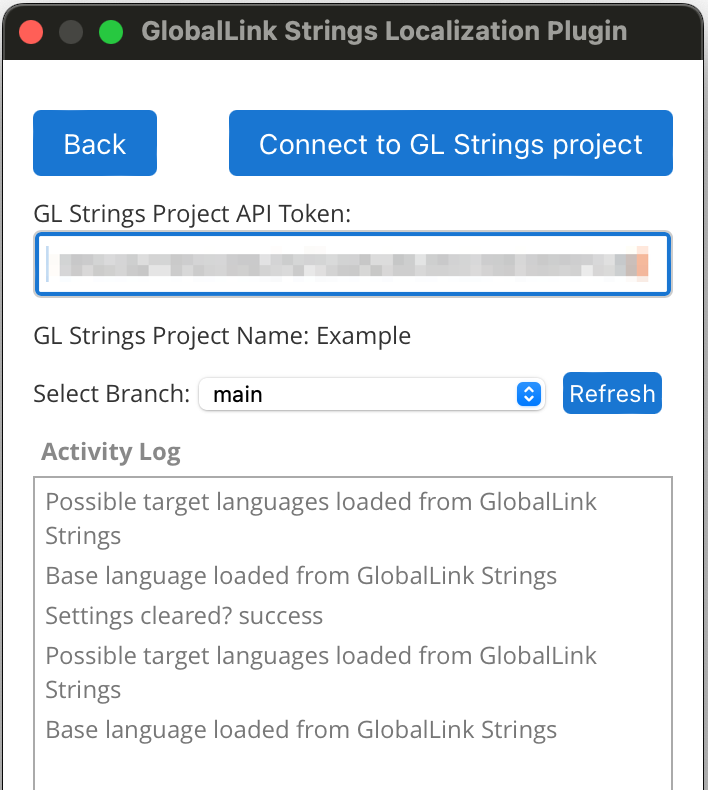
- If the design file is not yet connected to a project, the plugin will open on the Connection Settings page
- Enter the Project API Token
- Confirm the Project Name is correct
- If your Project has Branching enabled, use Select Branch to configure the Branch that should be used by the plugin for uploads and downloads.
- Click Connect to Applanga Project
Back to Top
Usage
Connection Settings
- Project API Token: please copy the API Token from the Project Settings page
- Project Name: corresponds to the entered API token (not editable)
- Select Branch: selects a specific Branch to connect to in a Branching Project
- Connect to GL Strings Project: saves the Connection Settings on your local machine. The selected options are saved separately for each Sketch file and will be loaded next time you open the file on your machine and start the plugin.
Back to Top
Uploading content for translation
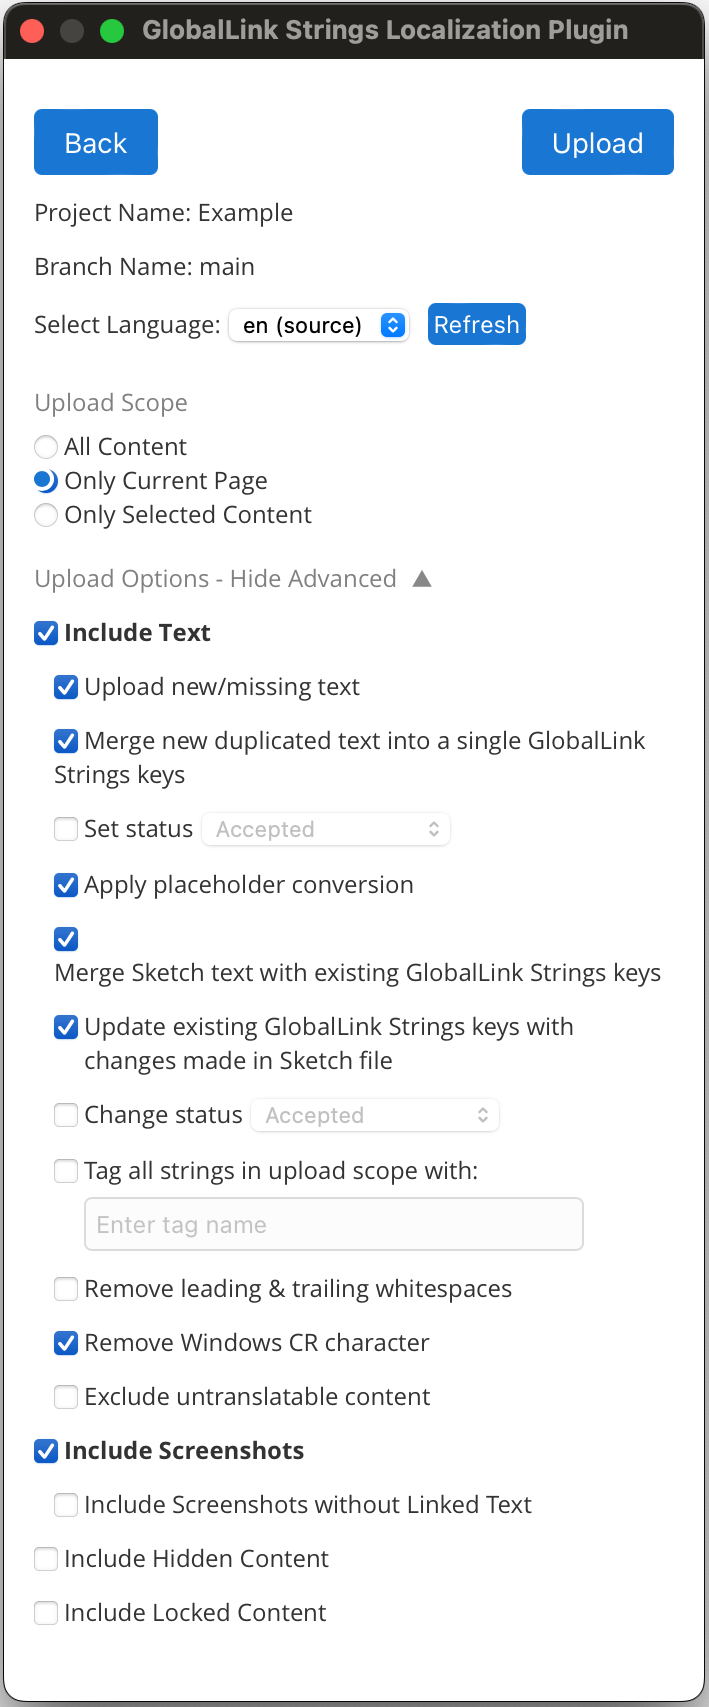
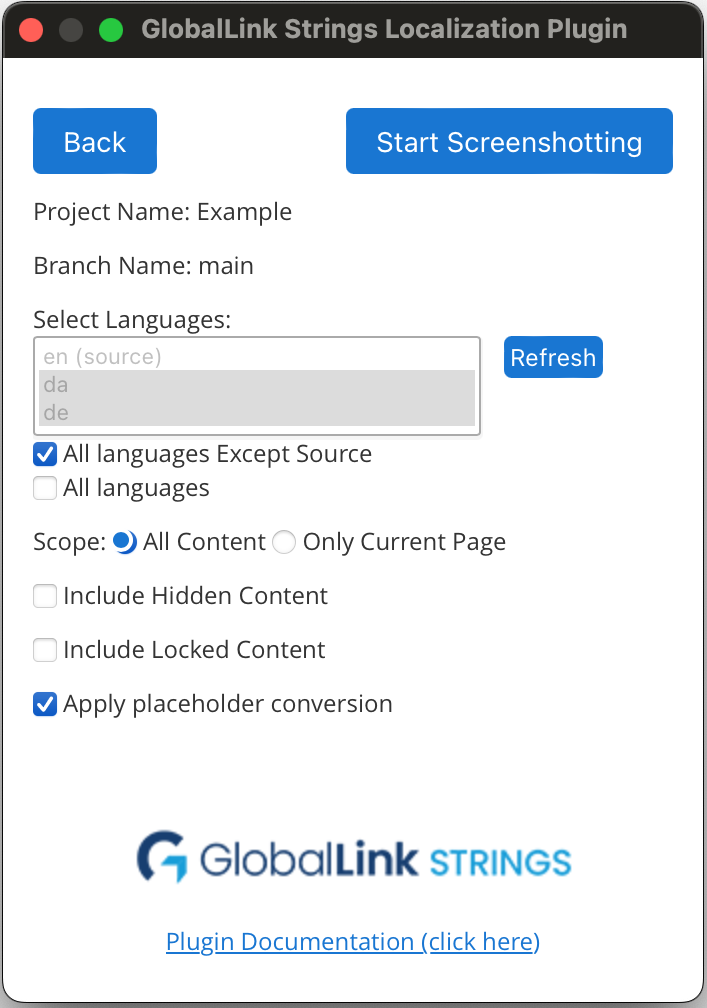
Upload Options
- Project Name: this is set to the Project which the plugin is currently linked via the API token (not editable)
- Branch Name: this is set to the Project Branch which the plugin is currently linked to (not editable)
- Select Language: the source language is preselected by default, but you can select any language for upload
- Upload Scope
- All Content: All content from the design file is included in the scope of the upload
- Only Current Page: Only content from the current page is included in the scope of the upload
- Only Selected Content: Only the content from the selection is included in the scope of the upload
- Include Text and Include Screenshots: select what should be included in the upload to your Applanga project (by default both options are selected for source language, and only the Screenshots option is selected for target language uploads)
- Advanced Upload Options:
- Upload new/missing text: with this option enabled, any text present in the file and not yet on Applanga is uploaded (by default enabled)
- Merge new duplicated text into a single GL Strings key: when this option is enabled during upload, for every text that is not in your project** yet, all duplicates found in the file for that text are 'merged' into a single new string key. If this option is disabled, one string key is created for each of the duplicate texts (by default enabled)
- Set status: this option sets a status for all new content uploaded to a project. To update the status of a text value of an already existing string key, use the Change status option
- Apply Placeholder Conversion: if defined variables and placeholders exist in the text in your connected project and there is a mapping defined in the Plugin, see the Placeholders Replacement options, this will convert placeholders on download to the Sketch file
- Merge Sketch text with existing GL Strings: when this option is enabled during upload, if a entry with the exact same text already exists, the corresponding string key is applied to the Sketch file instead of generating a new one. If multiple such matching entries exist, one is chosen randomly (by default enabled)
- Update existing GL Strings keys with changes made in Sketch file: when this option is selected, the corresponding entries on GL Strings will be overwritten with the content from the Sketch file (by default enabled)
- Change status: this option changes the status of an already existing string in your Project.
- Tag all strings in scope with: to categorise, find and furhter process only the strings that were in scope of the upload, enable this option and enter a tag name.
- Exclude untranslatable content: this option will exclude specific types of untranslatable content from upload to the project. Options for exclusion from upload include only numbers, times and dates, special characters,Lorem ipsum placeholder text, symbols, or single characters.
- Include Screenshots without Linked Text: if selected, screenshots that couldn't be linked to any text are uploaded to the Project (by default disabled)
- Include Hidden Content: determines if the hidden (close/open eye icon) content is included in translation scope (by default disabled).
Please note, that there may be invisible elements that will be included in scope, because they are invisible for other reasons than the “visible” property status.
- Include Locked Content: determines if the locked (padlock icon) content is included in translation scope (by default disabled)
Important notes!
- If you want to exclude pages or other elements from the upload, add 3 underscores in front of the element or page name (___).
- The upload for large files, particularly when screenshot upload is included, may take several minutes.
- You must whitelist your IPs in the Project Settings page before you can use the plugin! See the Configuration section for more details.
The Upload button is only active if there is an upload language selected and either the Text or Screenshots option is selected. The Activity log will display the progress indication and error messages.
Back to Top
Renaming Keys
When new keys are being created by the plugin in your project as part of the upload, there is the option to manually edit any of those new keys. The dialog will not display if only screenshots are uploaded, there are no text elements to upload, or if the plugin could find an already existing key in your project and match it to the text in upload scope.
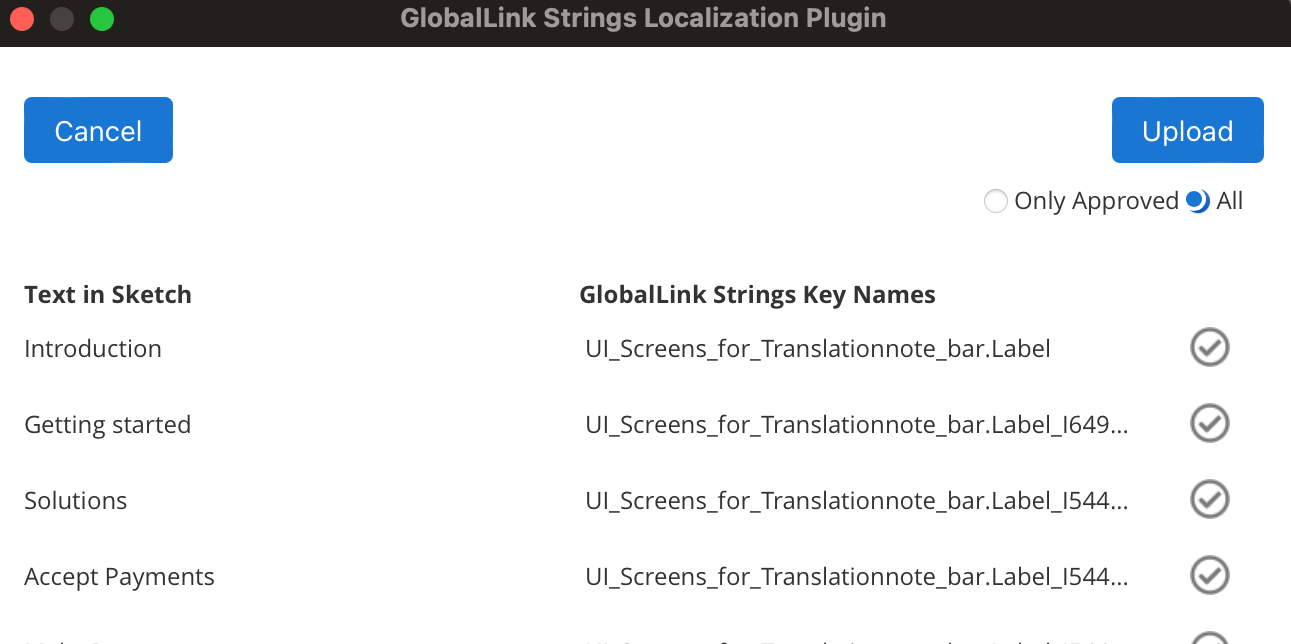
- Click on the source text, to expand it and display the full text
- Click on the suggested key name to edit it
- Click Confirm to approve the edits. You can also unconfirm to restore the original key name. If the Confirm button becomes red, the key name is invalid. Most often its a value conflict (the same key name, but different source text) with a key that already exists inyour Project or is a duplicate to a newly created key. Hover over the button to see a more detailed error message.
- Only Approved or All (default) determines if all of the texts are to be uploaded to your Projet or only confirmed ones(green checkbox). If any edits are made to the keys, only those approved will be included in the upload.
The Upload button starts the upload immediately. During the upload process, an activity log will inform you about the progress and any errors.
Back to Top
Translate your Sketch file
Once translations for your content are available in your Project, you can use the plugin to download the translations and populate them in your file.
You may prevent any part of your file from being translated by locking or hiding the elements out of scope and/or by limiting the download to specific pages (see Scope below)
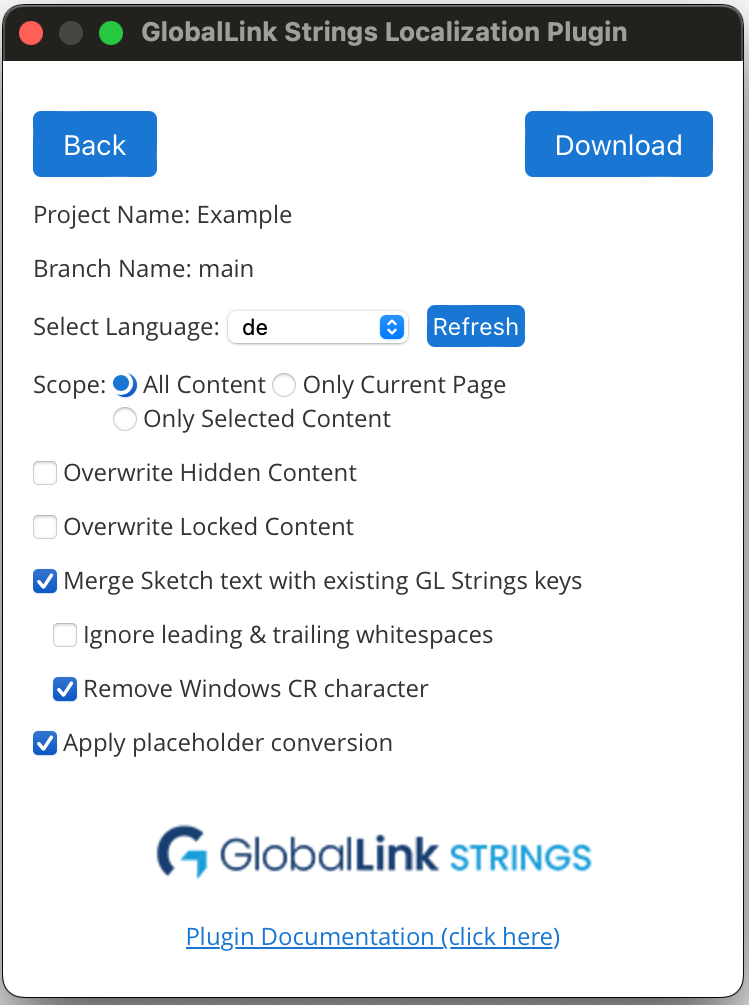
Download Options
- Project Name is set to the connected Project via the API token (not editable)
- Branch Name: this is set to the Project Branch which the plugin is currently linked to (not editable)
- Select Language: selects the target language to be downloaded. Please note that the Download button will not be active until a target language is picked (none is selected by default)
- Refresh: if a language was recently added to the Project, click refresh to access it for plugin download
- Mode determines if target translation values or draft translation values are downloaded and populate (by default Target plus Draft will be populated)
- Scope determines if the whole file is processed or only the currently open page (by default all content is in scope)
- Overwrite Hidden Content determines if the hidden (close/open eye icon) content is included in scope (by default excluded)
- Overwrite Locked Content determines if the locked (padlock icon) content is included in scope (by default excluded)
- Merge Sketch text with existing Applanga strings allows the linking of text in Sketch missing string keys locally to an existing string key from the connected Project. Please note, the text matching to the source text in Project may not work or may give false positives if the file is (partially) translated.
- Placeholder Replacement converts development placeholders as found in Applanga to the mapped text as set in the Plugin Placeholders Replacement options
Important notes!
- Please be aware that translation download for very large files may take several minutes.
- Note that any content that has 3 underscore characters (___) at the beginning of the element or page name is excluded from the scope.
- The translation download will overwrite the source text in your file. It is recommended to create a copy of the file for the translation process. You can also revert back to your starting point by selecting your source language and downloading it again.
The Download button starts the download immediately. The button is only active if there is a download language selected. During the download process, an activity log will inform you about the progress and any errors.
Back to Top
Uploading translated screenshots

If you want to upload screenshots from your translated Sketch file back to your Project, for example, if you want somebody to review the translation in-context, please follow these steps:
- Go to Download and select a language, run the download process.
- After the download is finished, go to Upload and select the language again but make sure that you only select Screenshots in the upload options
Back to Top
Uploading Translated Screenshots for multiple languages at once
The Batch Screenshot Upload option can be used to start an automated process that will, step by step, download translations for a language, take screenshots of the translated Sketch design, and upload the translated screenshots back to your Project for all languages selected one after the other automatically. When the process is done, the plugin will download and apply the Porject source language text again.
In order to upload translated screenshots for multiple languages at once, in the plugin UI, choose the Batch Screenshot Upload option. In the subsection of the Batch option, you can select which languages to include (all or everything but source), which set of strings (Draft or Target), and which layers (all or only the currently selected one) will be in scope for the batch process.
Back to Top
Placeholders Replacement
When transferring text from design files into app strings, moving from design to development, it is often necessary to add certain variables or placeholders to the text so it is usable in the app (e.g. replace numbers, counters, dates, time, etc with placeholders such as %d, %s, etc)
Trying to align the content for both output formats, design file and app, can mean that these variables are in the text and will appear in the design files which interferes with the ability to match the design to the app 1:1
The Placeholders Replacement option helps you to convert these elements between your desing file and the conneceted project during uplaod and download. It allows plugin users to replace any variable found in the content donwloaded with a predefined text elements.
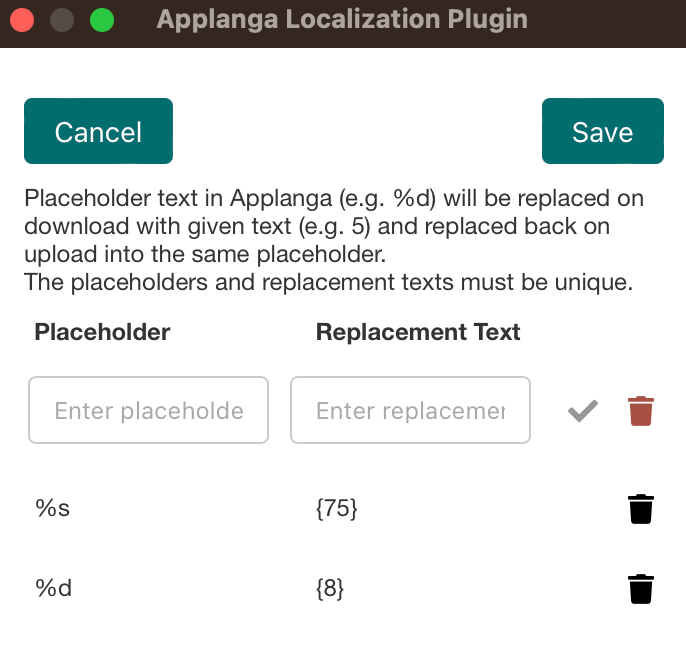
For example, with a mapping of “%d” to “5” in the plugin, the string “Lisa bought the %d apples” downloaded from your Project would appear as “Lisa bought the {5} apples” in the design file.
In the design file, text elements that should be replaced on upload or were replaces on download will be inside curly brackets {}. This should prevent any accidental edits and cleary seperate placeholder elements and regular text elements.
- Enter the placeholder text (e.g. %d) as found in the app strings to the Placeholder column in the plugin
- Enter the desired text (e.g. 5) the placeholder should be replaced with on download in the Replacement Text column
- Click the Checkmark to save this conversion and add more
- Click Save to save all mapped Placeholder Replacements
Back to Top
Inspect and Edit Keys
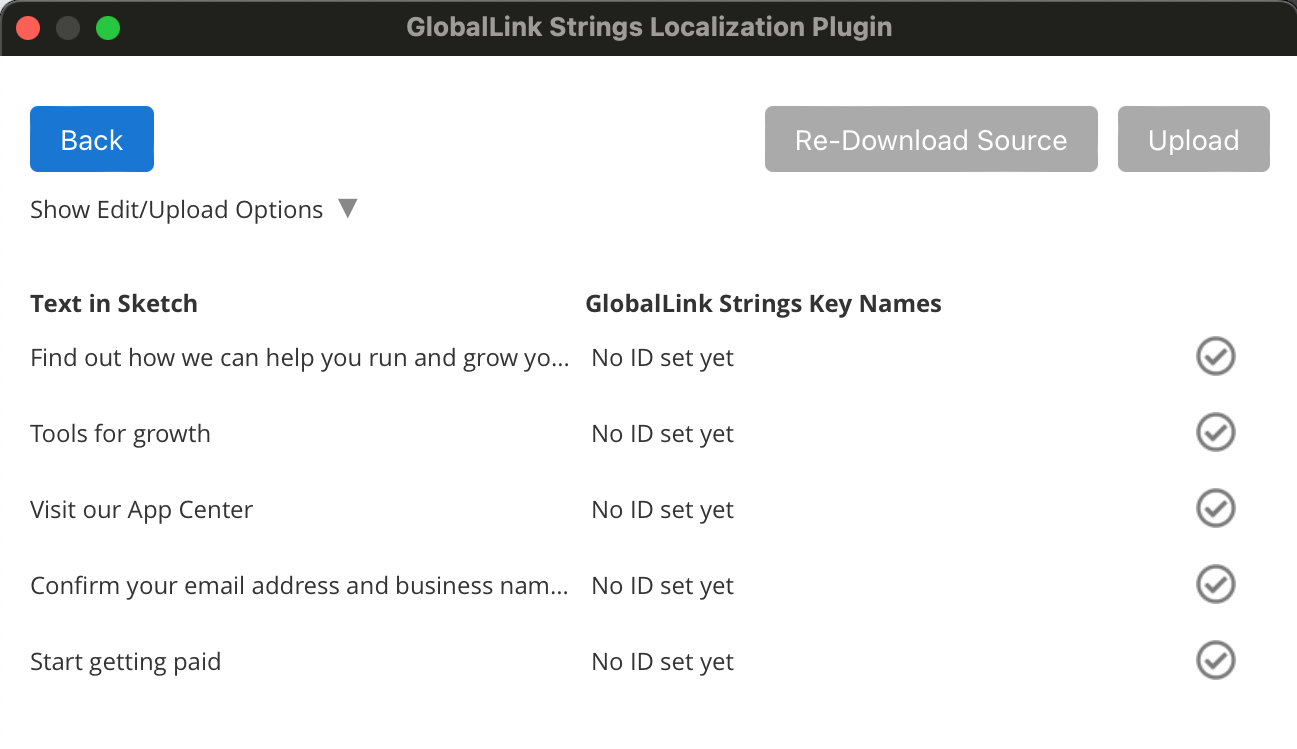
Inspect & Edit Keys allows users to view the GlobalLink Strings key connected to specific text in the respective design file. Users can also create new strings keys by removing the current key and setting a new one via the plugin.
- Select the element of the design file to display string keys in the plugin
- Click on the String Key text field to edit the string key, then select the checkmark to approve for upload (if an key already exists for a given text in your Project, users can search and apply that specific key)
- Once keys are updated, click Upload
Important Notes!
- Screenshots are not automatically uploaded with strings when using the Inspect & Edit Keys option. Users can manually assign strings on the Applanga dashboard using the screens tag. See the tags page for more info.
Back to Top
Check and Fix File
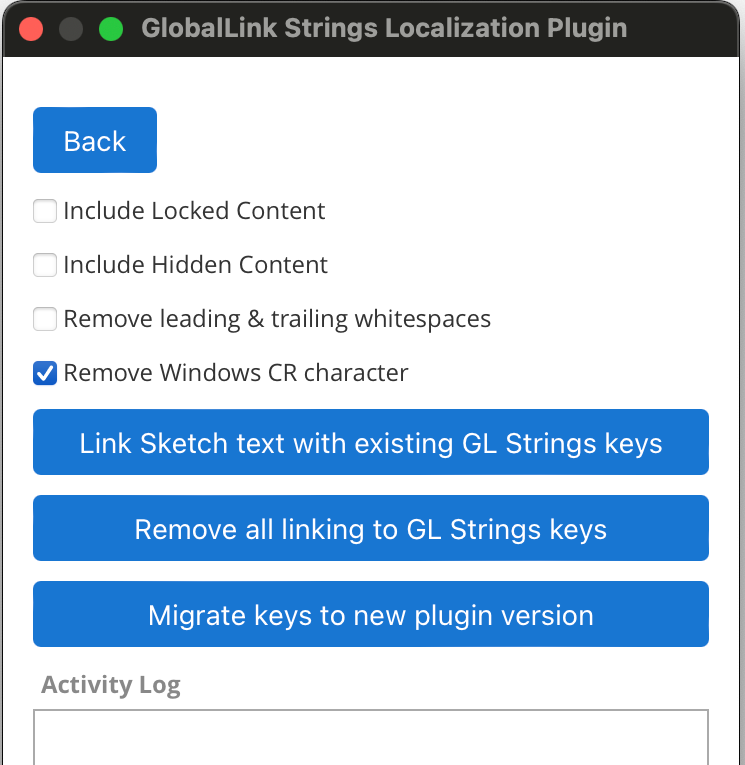
Check/Fix File
- Link Sketch text with existing GL Strings keys: this option tries to match the text in the file with existing GlobalLink Strings keys. It's similar to Merge Sketch text with existing GlobalLink Strings string values in download options, but is not limited to selections.
- Remove all linking to GL Strings keys: this option allows users to unlink GlobalLink Strings keys from a Sketch file that was previously uploaded to another Project. When users upload a previously connected file to a new project, the existing GlobalLink Strings keys can cause issues with the upload to the new project. This option prevents issues with both uploading and downloading content from Applanga.
- Migrate keys to new plugin version: The plugin update from version 1.* to 2.* changed how keys are stored in the Sketch file. This option will migrate this key storage method if you have previously uploaded the same Sketch file with the version 1.* plugin. This migration will not happen automatically during the upload or download process.
Back to Top

