

⚠️ Warning: Please be aware that this article references our technology as Applanga. We are in the process of updating all materials to reflect our new brand name, GL Strings. While the functionality and content remain the same, you may see the old name in various sections. We appreciate your understanding and patience as we make these changes.
This action installs the Applanga Commandline Interface and enables:
The benefit of using GitHub Workflows for this is that you can automate your localization process without the need to share any repository credentials with your localization provider.
To use GitHub Workflows on your repository you need to create a folder called .github/workflows/ and place the workflow configuration .yml files in there. Additionally you also need a .applanga.json configuration file present in your repository.
For a detailed example with setup instructions see the applanga/github-workflow-example repository.
This is the easiest and recommended approach to set up and integrate GitHub workflow with Applanga. From an Applanga project's integration page you can access the GitHub workflow integration UI that collects some required inputs and automatically generates the necessary config files for your integration.
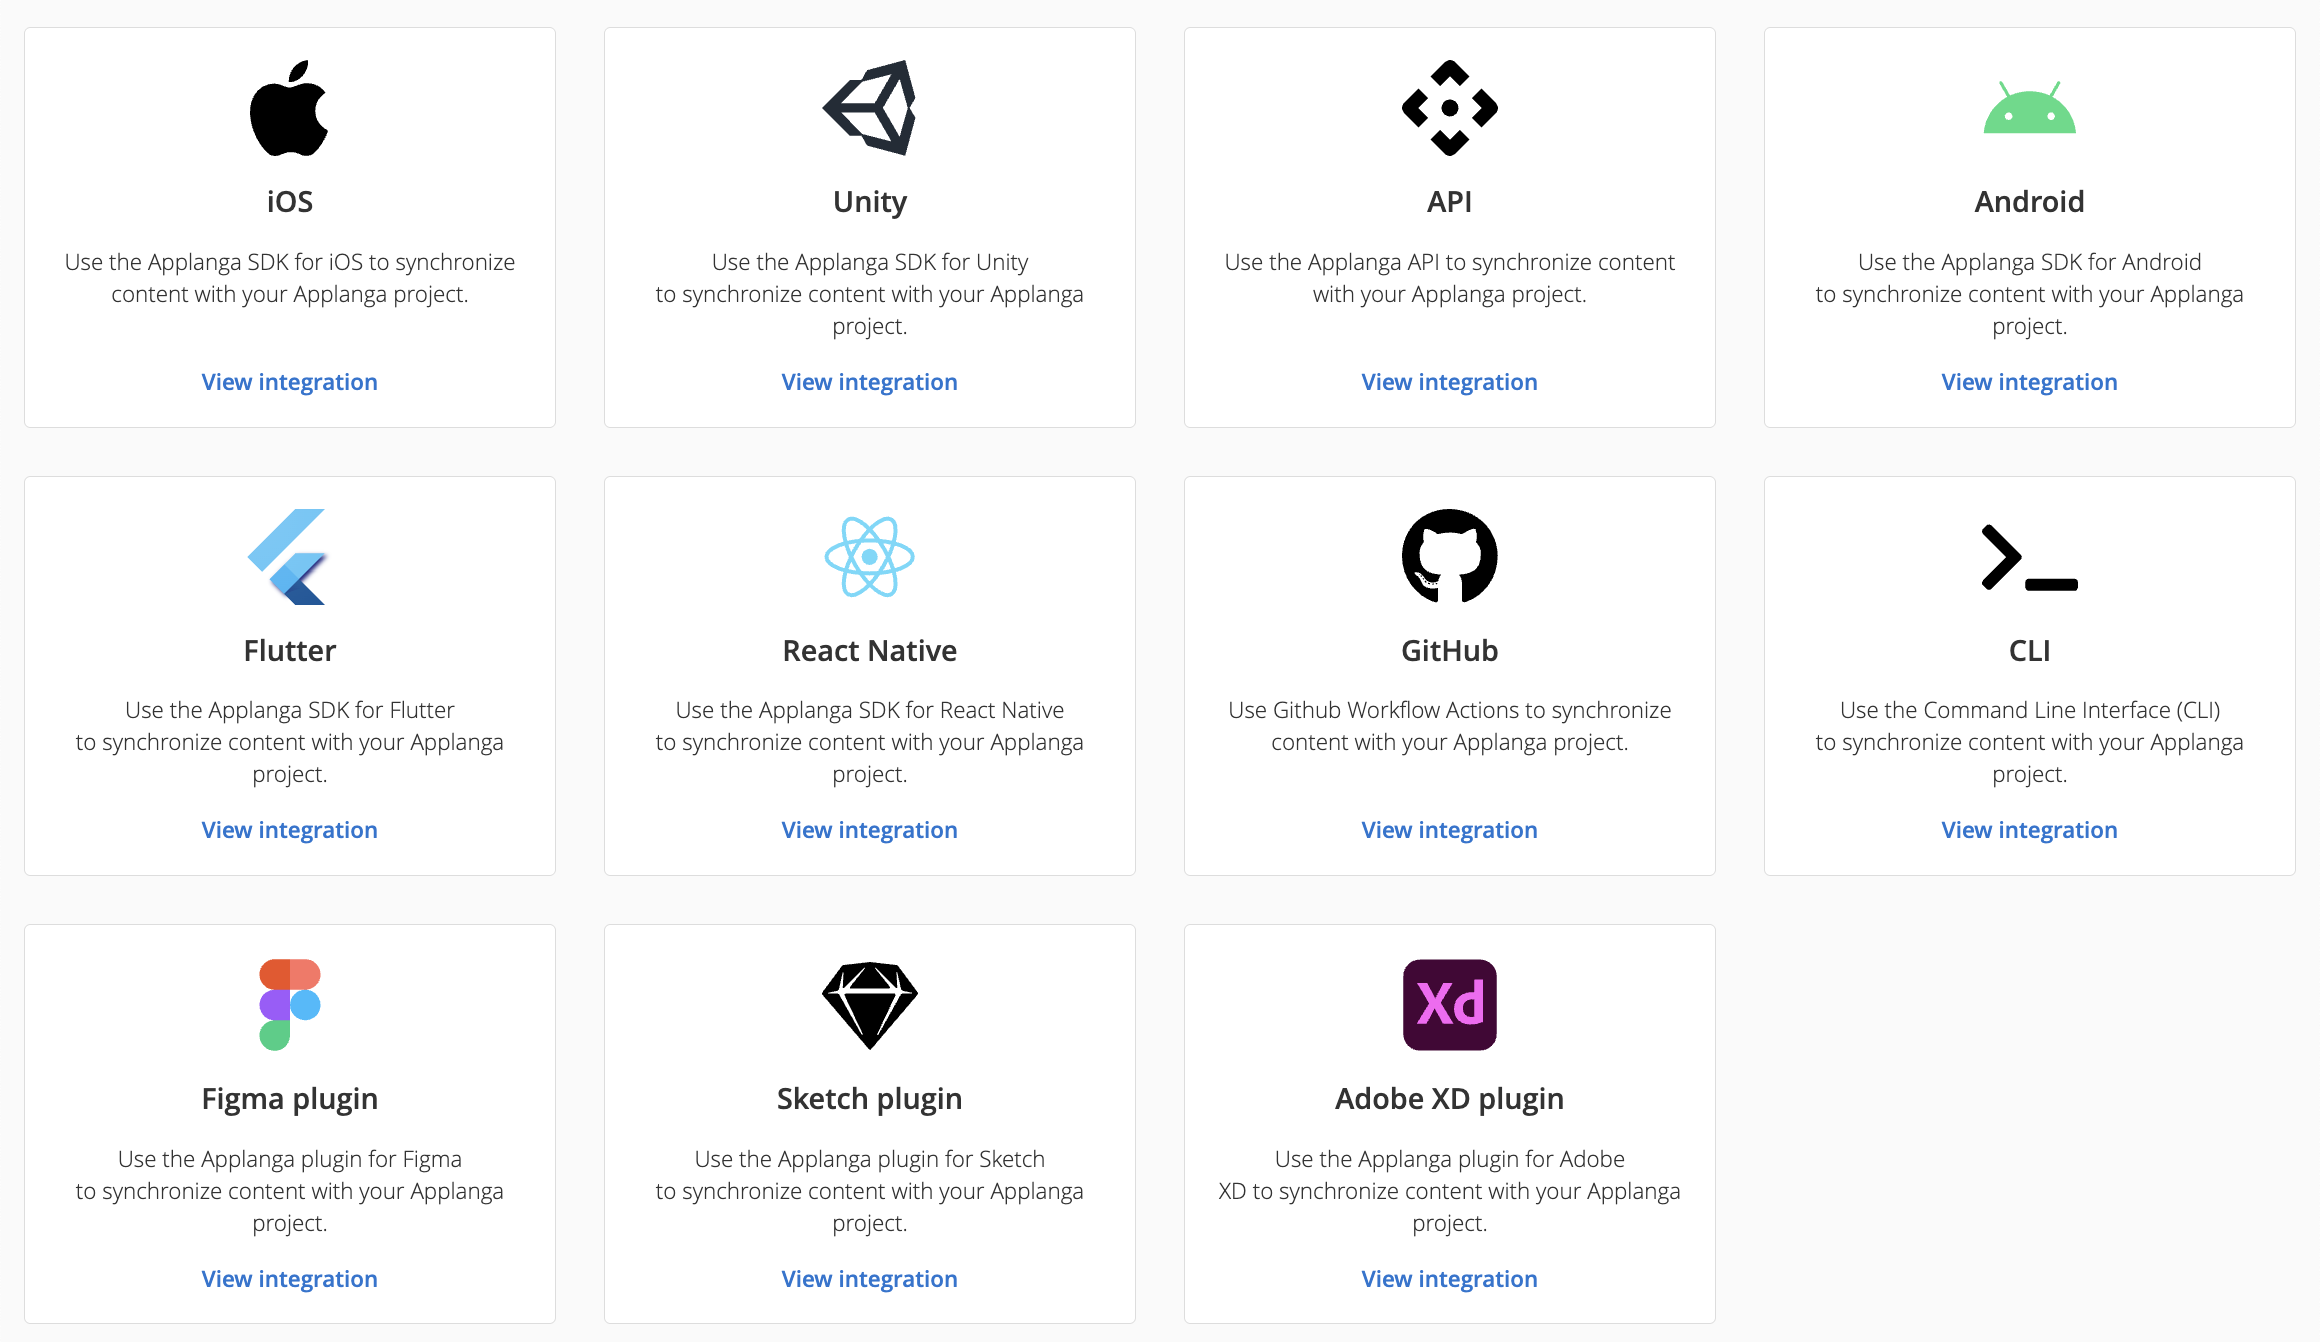
Select GitHub from the provided options.
Click Add GitHub Integration.
❗ Important Notes
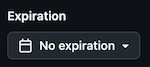
Set the Expiration to:
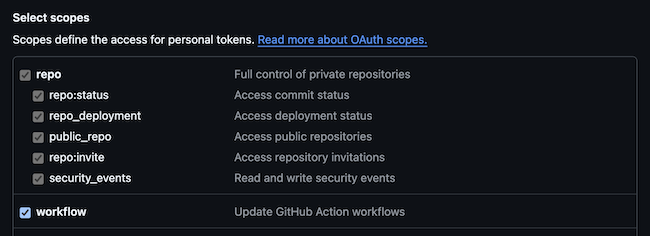
Select the required scopes:
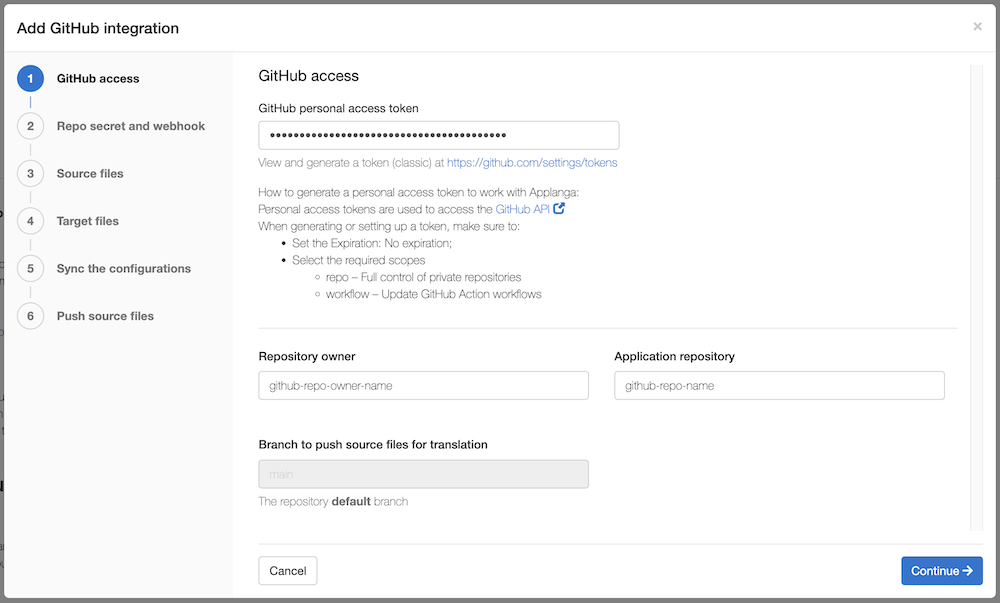
Paste your GitHub access token in the "GitHub personal access token" text field.
Enter the repository owner and the application repository. The integration only supports the default branch for now, so the default branch of the filled out repository is selected by default.
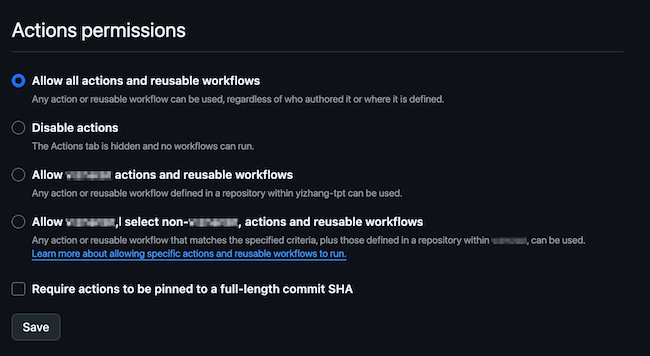
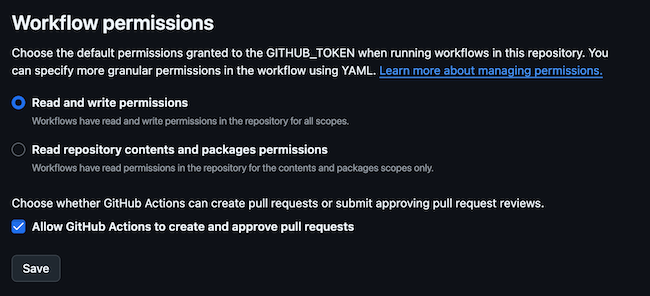
The following Actions and Workflow permissions must be enabled in GitHub to move to the next step of the configuration.
Navigate to your application repository > click Settings > Actions > General.
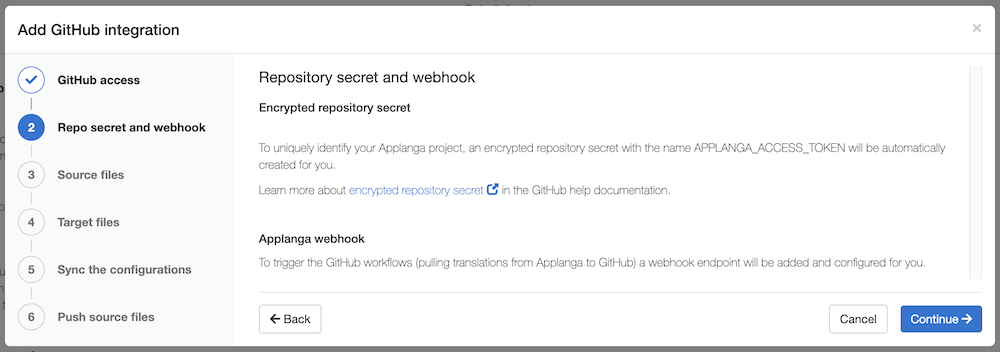
This step configures and creates a new Applanga webhook or updates an existing one if the current integration is loaded from an existing webhook. It also retrieves the Applanga project API token and saves it as an encrypted repository secret on GitHub.
To complete this step, click Continue.
In this step, you should select the source files. This dialog shows the folder structure and files from your repository. To view only a specific file format, use the dropdown from the top and select any of our supported file formats.
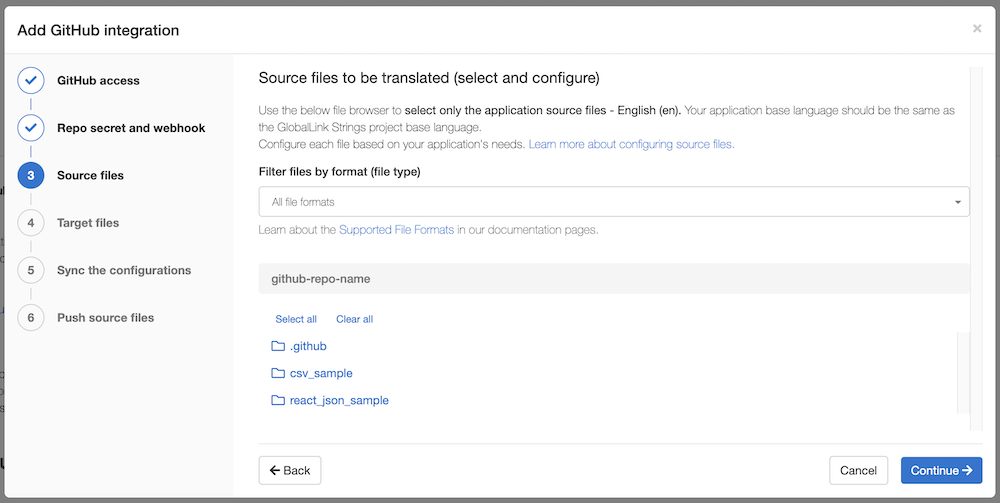
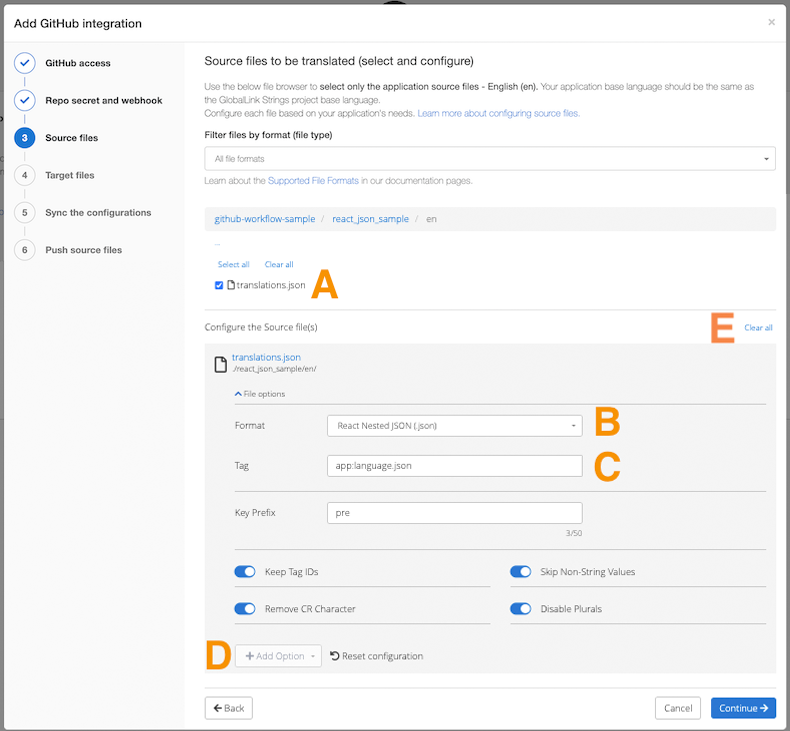
Click on the folder name(s) to navigate the folder structure and select the file. To go back to the previous folder, use the breadcrumbs. (screenshot below, marker A).
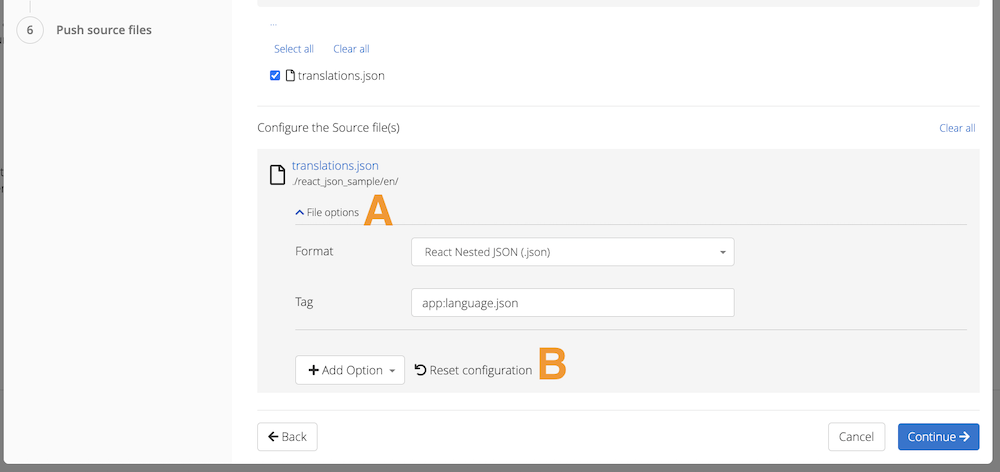
Select the file format and enter a tag.
Click + Add Option (marker D) to add more configuration options to the push action: add a key prefix, keep tag IDs, skip non-string values, remove CR character or disable plurals among others.
To clear the file selection, click on "Clear all" (marker E).
📝 Notes:
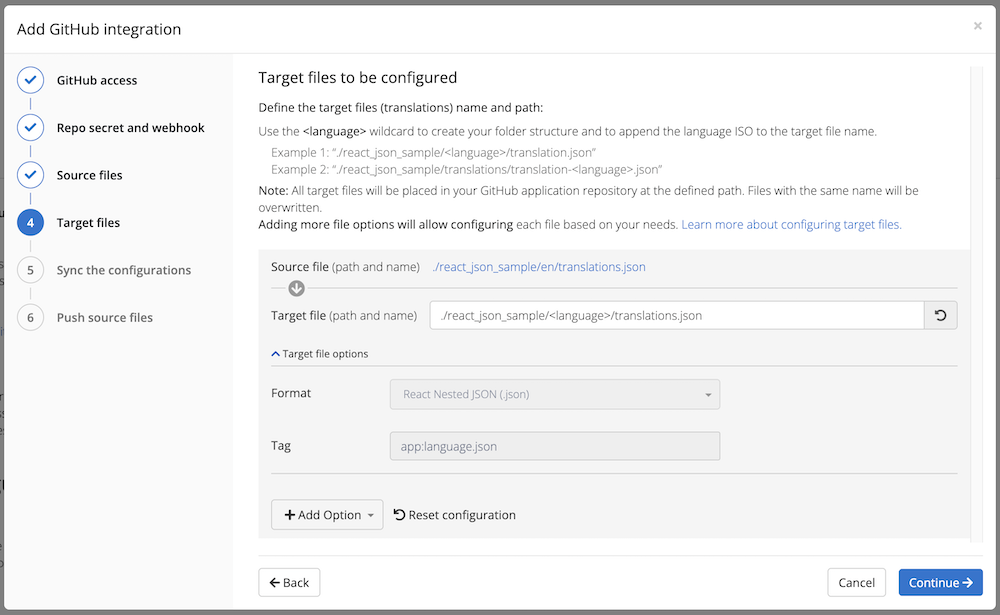
The target files are defined in this step. The total number of inputs provided to fill out is dependent on how many source files were selected in the previous step. If only one source file was selected in the previous step there will be only one input provided to fill out for the target file.
Use of the <language> wildcard allows you to replace language folders or files named with valid ISO language codes in your directory.
Examples:
de, es subfolders in translations folder./translations/<language>/translation.json
de, resolves to ./translations/de/translation.jsones, resolves to ./translations/es/translation.jsonde.json, es.json files in translations folder./translations/<language>.json
de, resolves to ./translations/de.jsones, resolves to ./translations/es.jsonClick the + Add Option dropdown to add more configuration options to the pull action: include invisible ID, include metadata, export empty or ignore duplicates among others.
Click Continue.
📝 Note: All the additional file configuration options are also available in our manual import feature and our CLI.
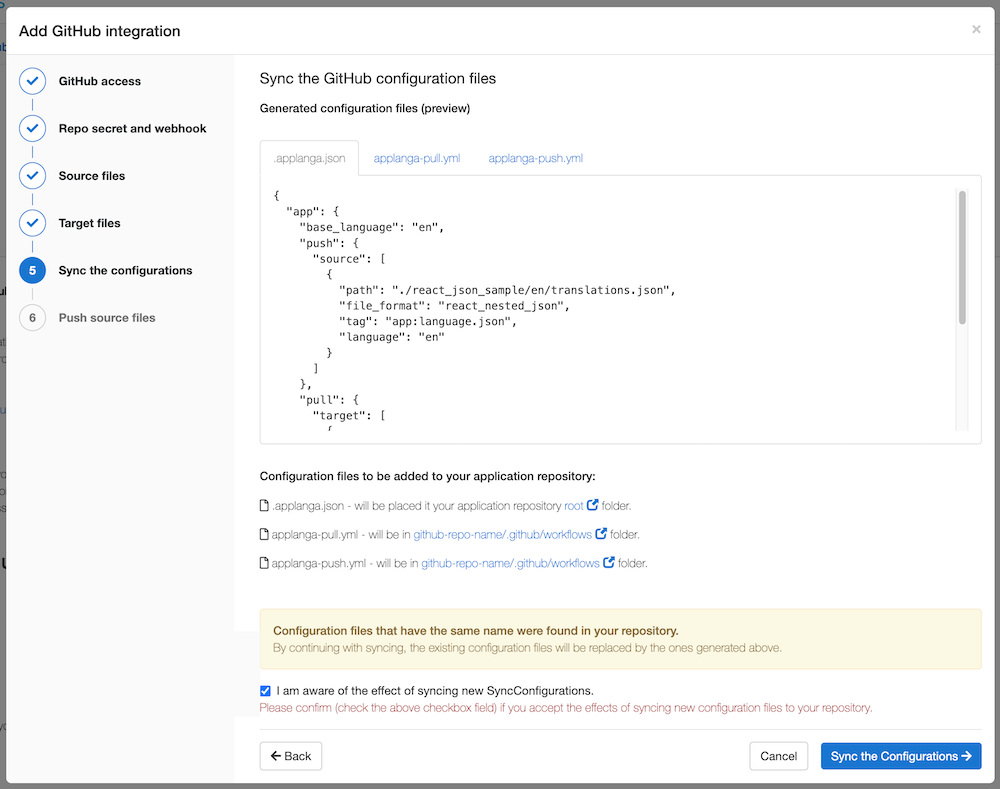
This step allows you to preview all the generated config files:
.applanga.json contains a list of all the selected source and target files including any additional file configuration options.applanga-pull.ymlapplanga-push.ymlThese files have to be pushed to the specified repository. This also means a commit is created for the operation, which is why you will be required to confirm by ticking the checkbox.
Once confirmation is checked, click Sync the Configurations.
This step is not a strict requirement. However, if your translation files have not been uploaded to Applanga initially or you need to upload new ones, then there are two push options:
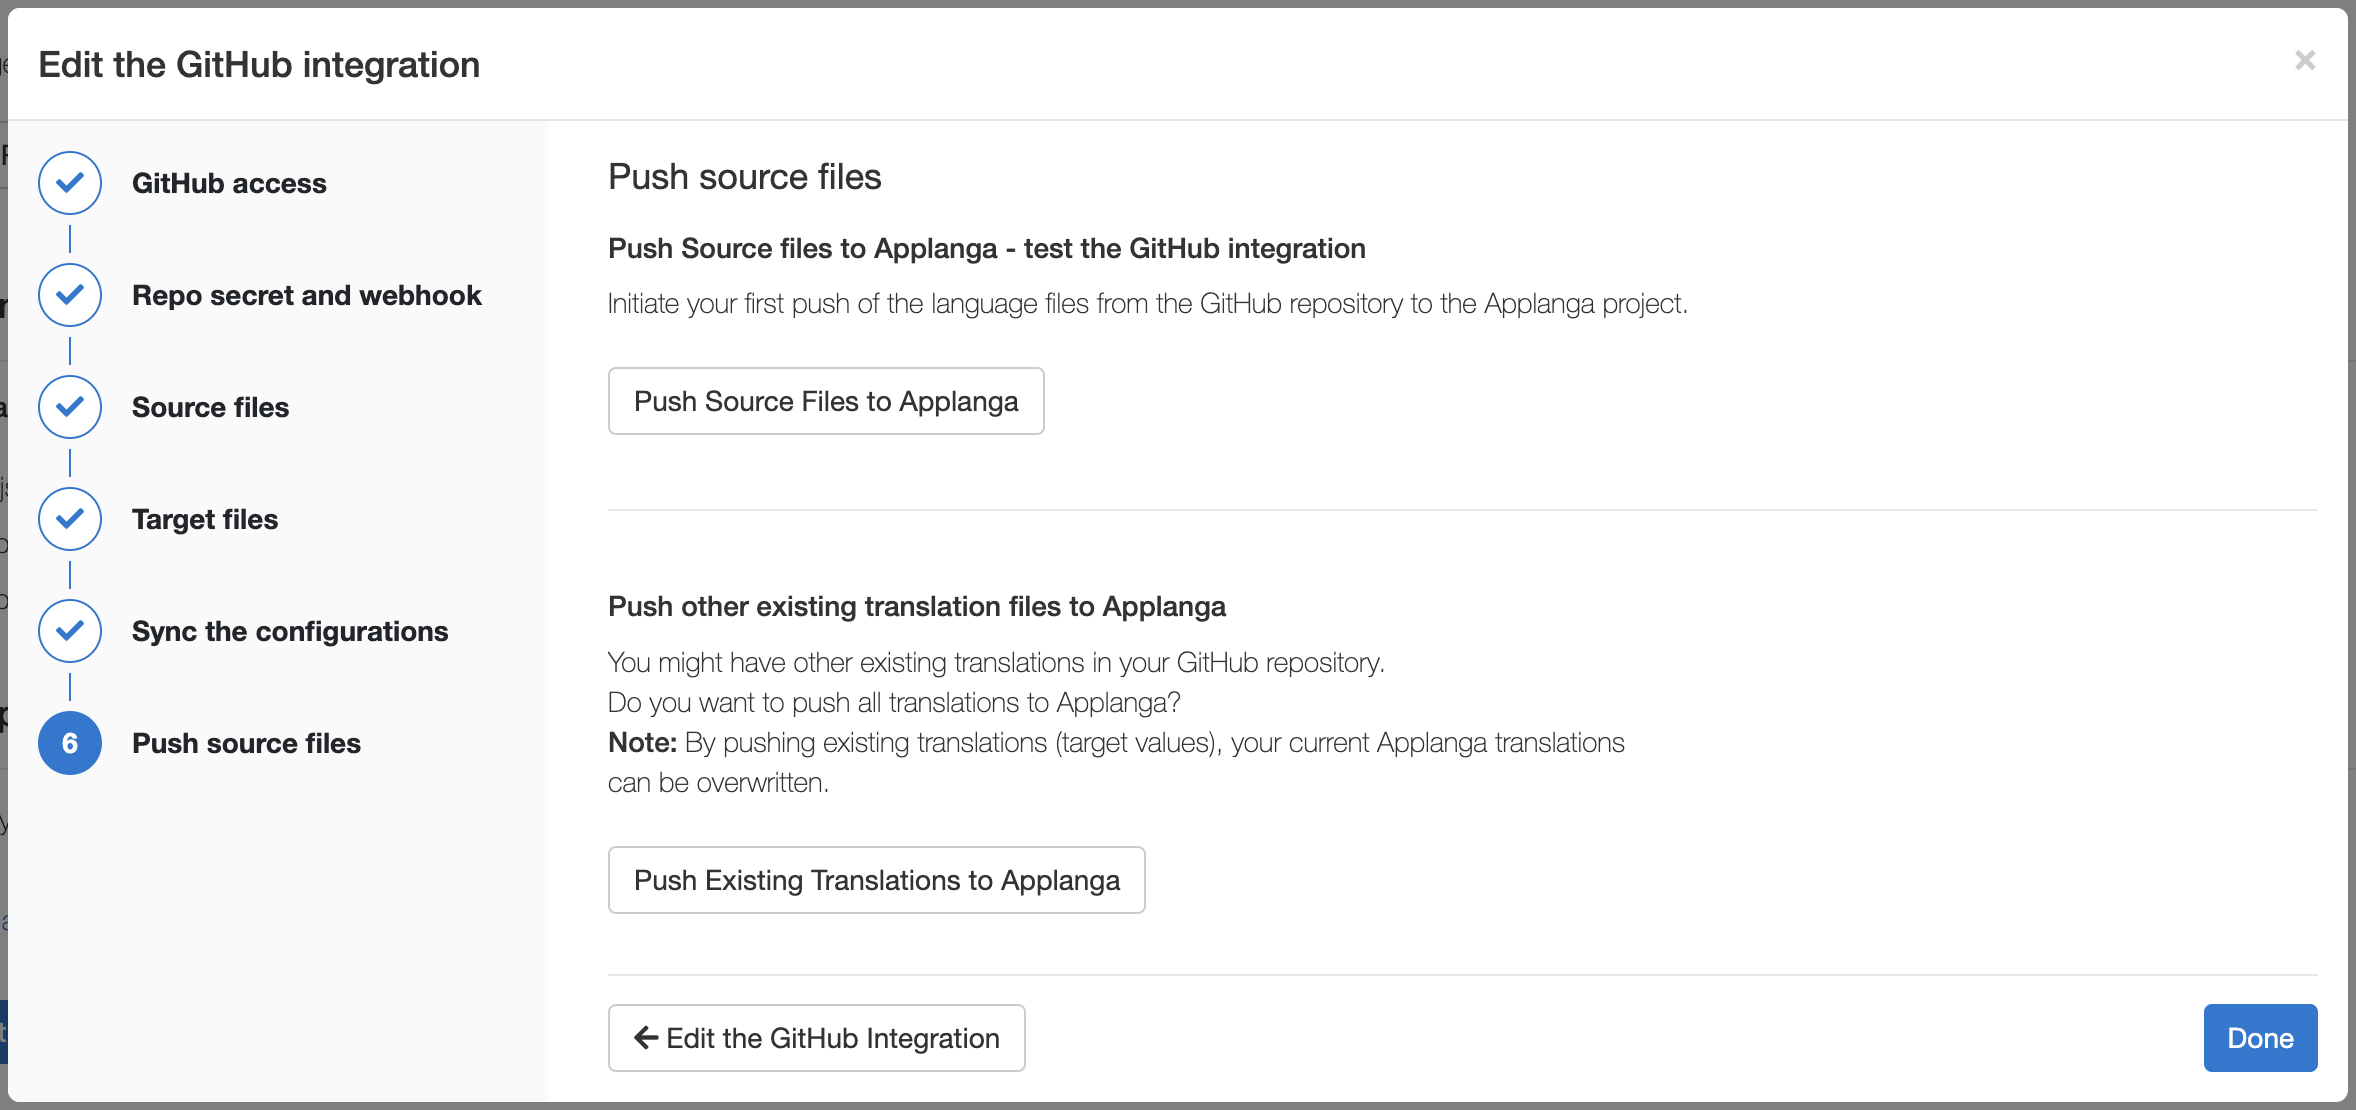
push action on GitHub.pushtarget action on GitHub.📝 Note: Pushing existing translations can overwrite existing ones on Applanga.
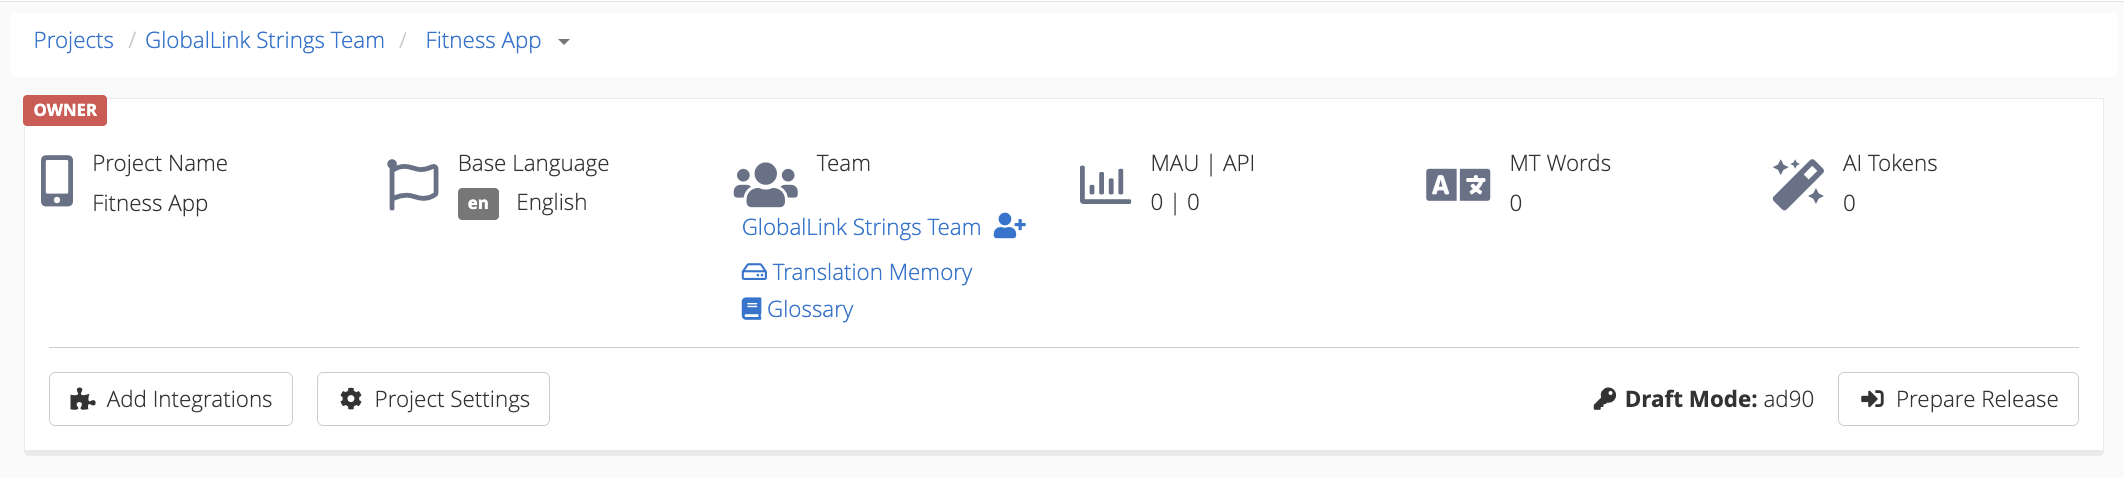
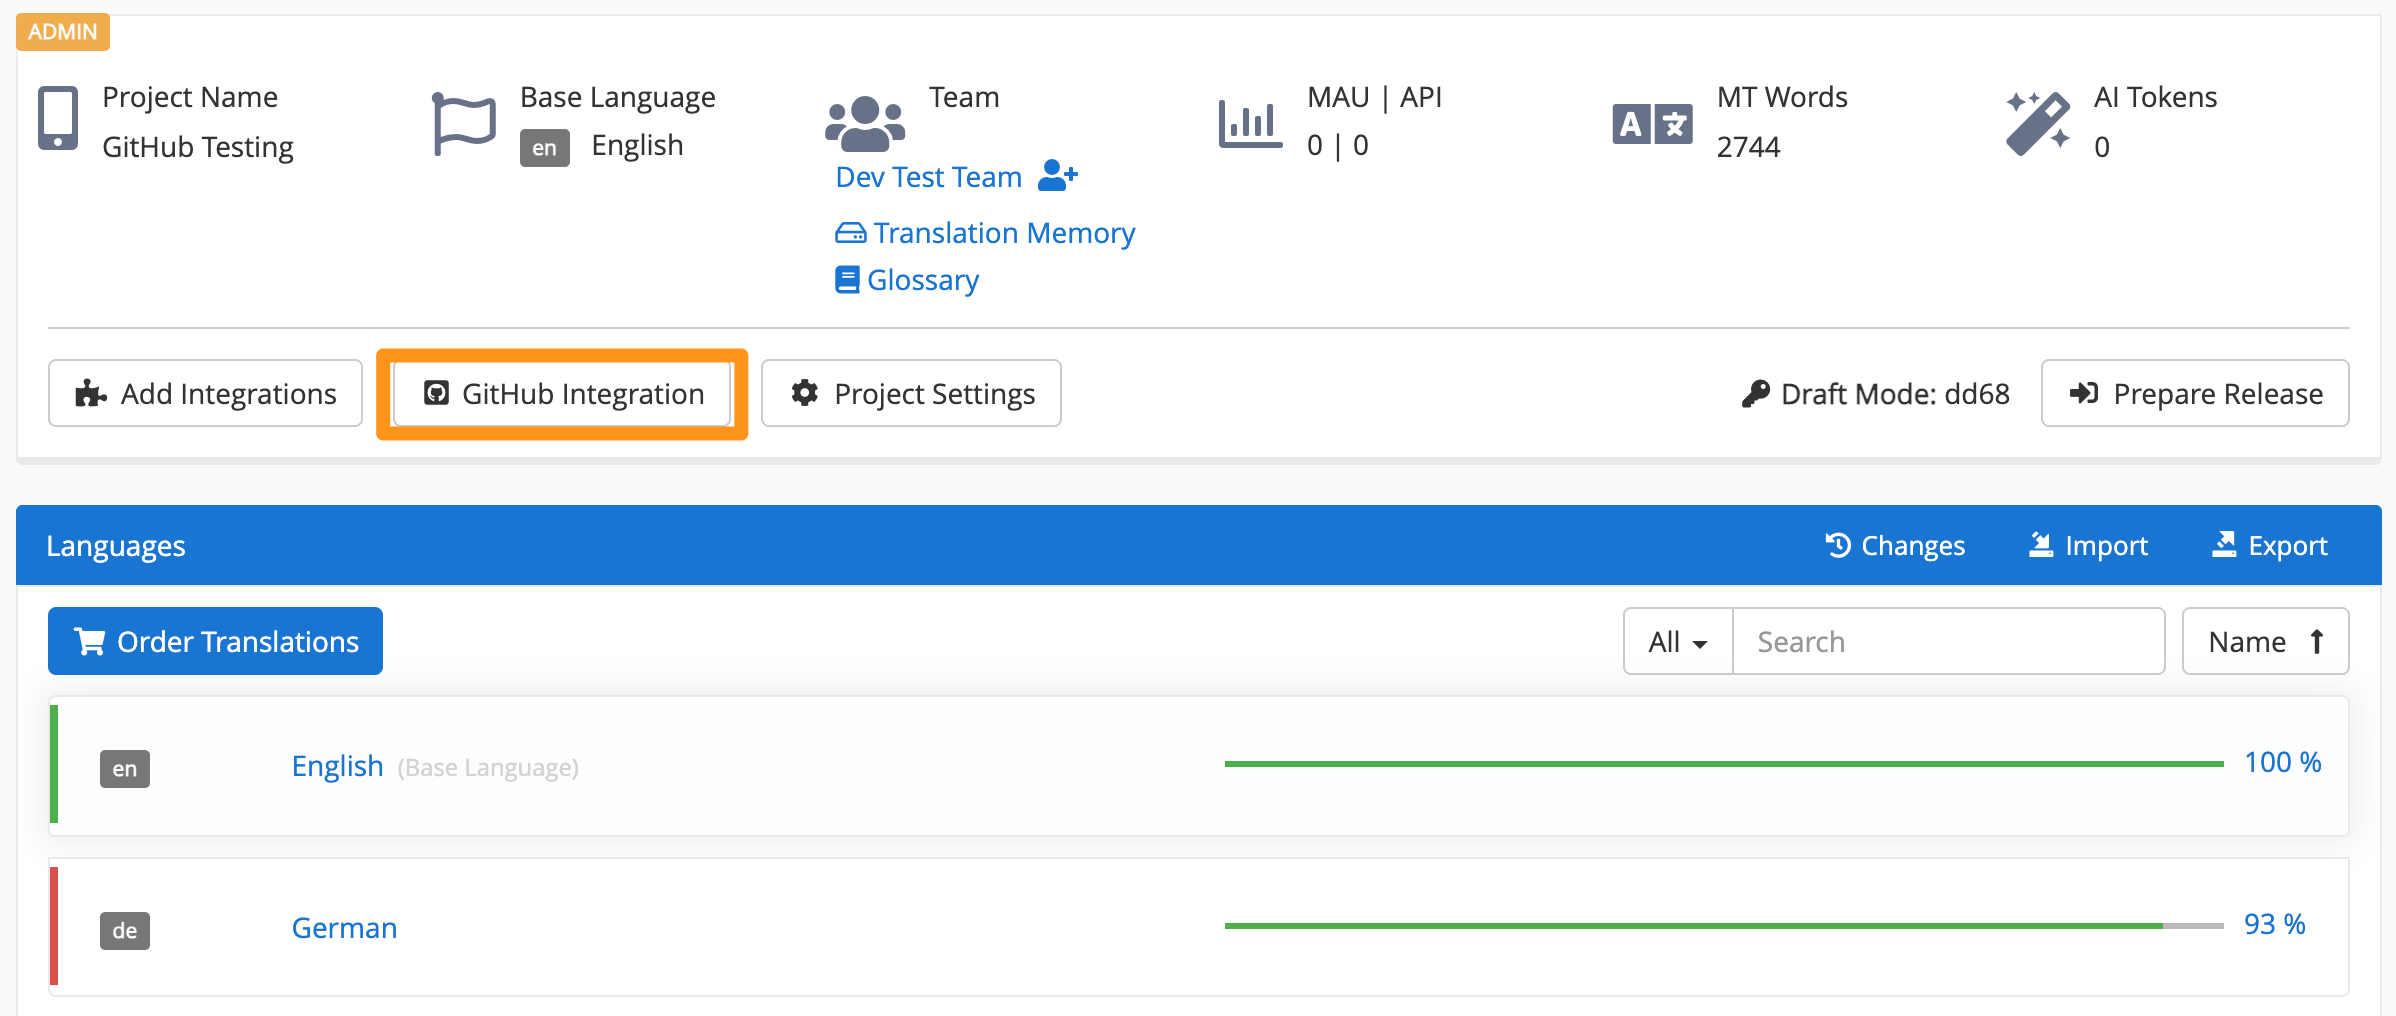
In project > click Github Integration to manage an existing GitHub Workflows integration.
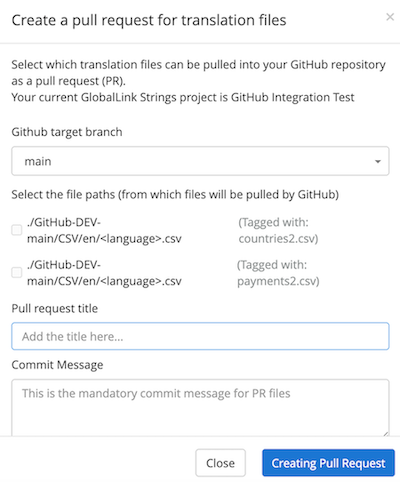
📝 Note: Applanga will not allow paths to be selected for a PR if the tag is missing from the Applanga project or from the path. If the tag (“tagged with”) is the same across multiple paths, these also cannot be selected for a PR.

At deletion:
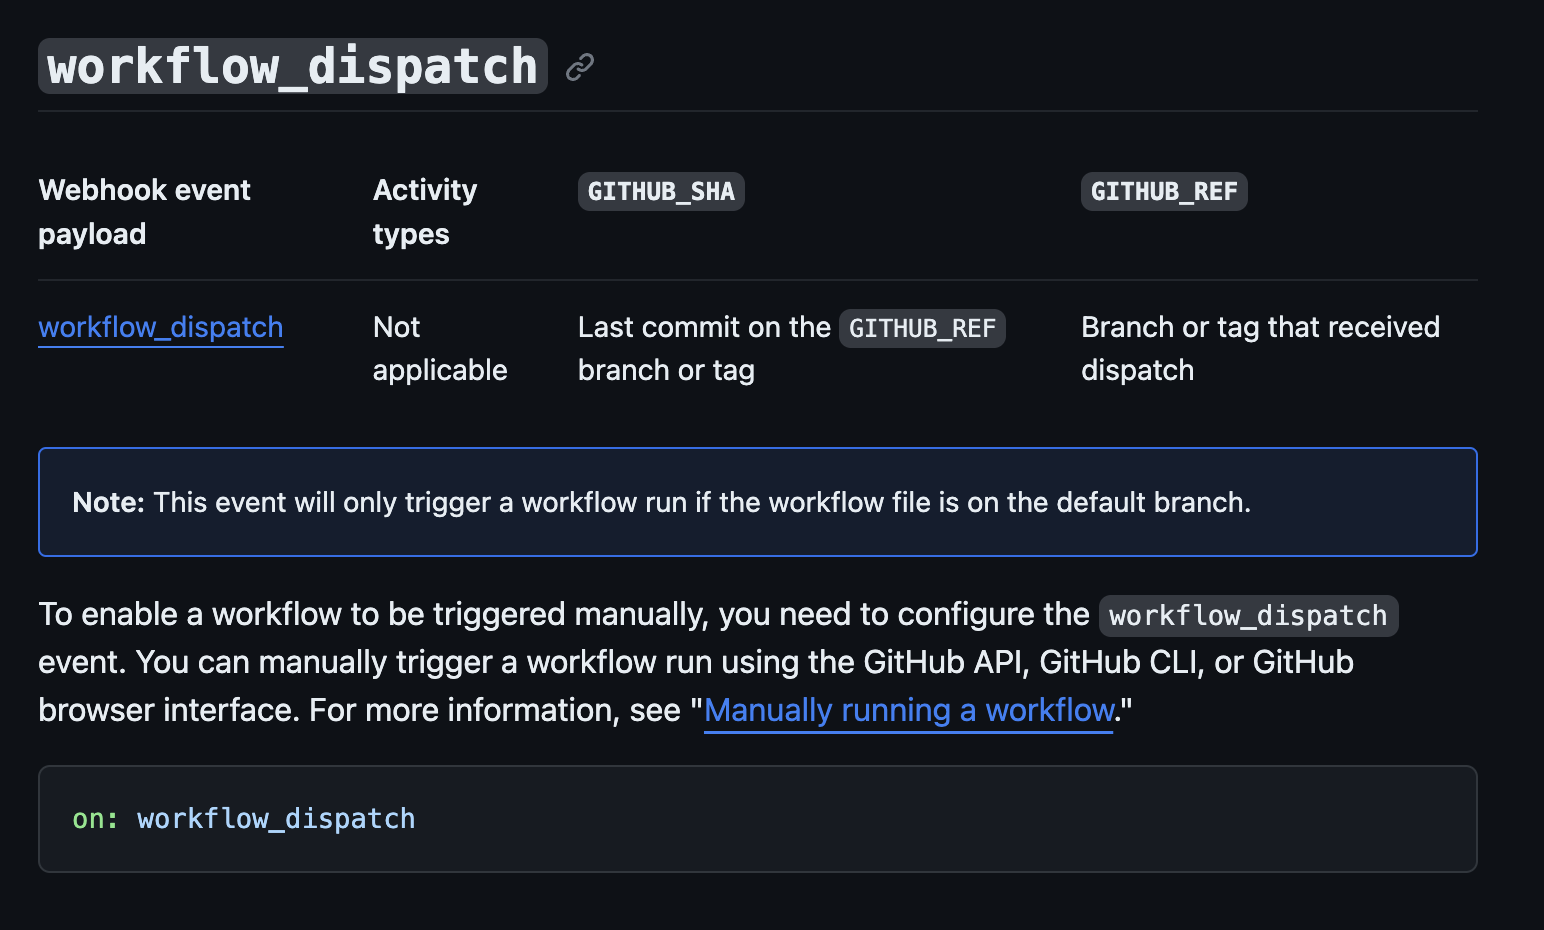
.applanga.json, applanga-pull.yml, and applanga-push.yml will be deleted from the GitHub repository.As mentioned earlier, the current version of Applanga GitHub workflow integration UI only supports setting up the integration on the default branch at the moment. The reason for this is because of a limitation with GitHub's workflow_dispatch event which is what powers Applanga GitHub actions. According to GitHub's documentation This event will only trigger a workflow run if the workflow file is on the default branch..
However it is still possible to trigger a GitHub action from a non-default branch after the initial setup, this is possible because Applanga GitHub workflow integration UI ensures to place the GitHub action files in the default branch on GitHub. You can then change the Applanga webhook configuration that was generated during the setup to point to the preferred branch.
On the GitHub workflow integration page of an existing integration scroll to the "Repository Secret and Webhook" section and under "Applanga webhook" click the link that says "Projects settings > Webhooks".

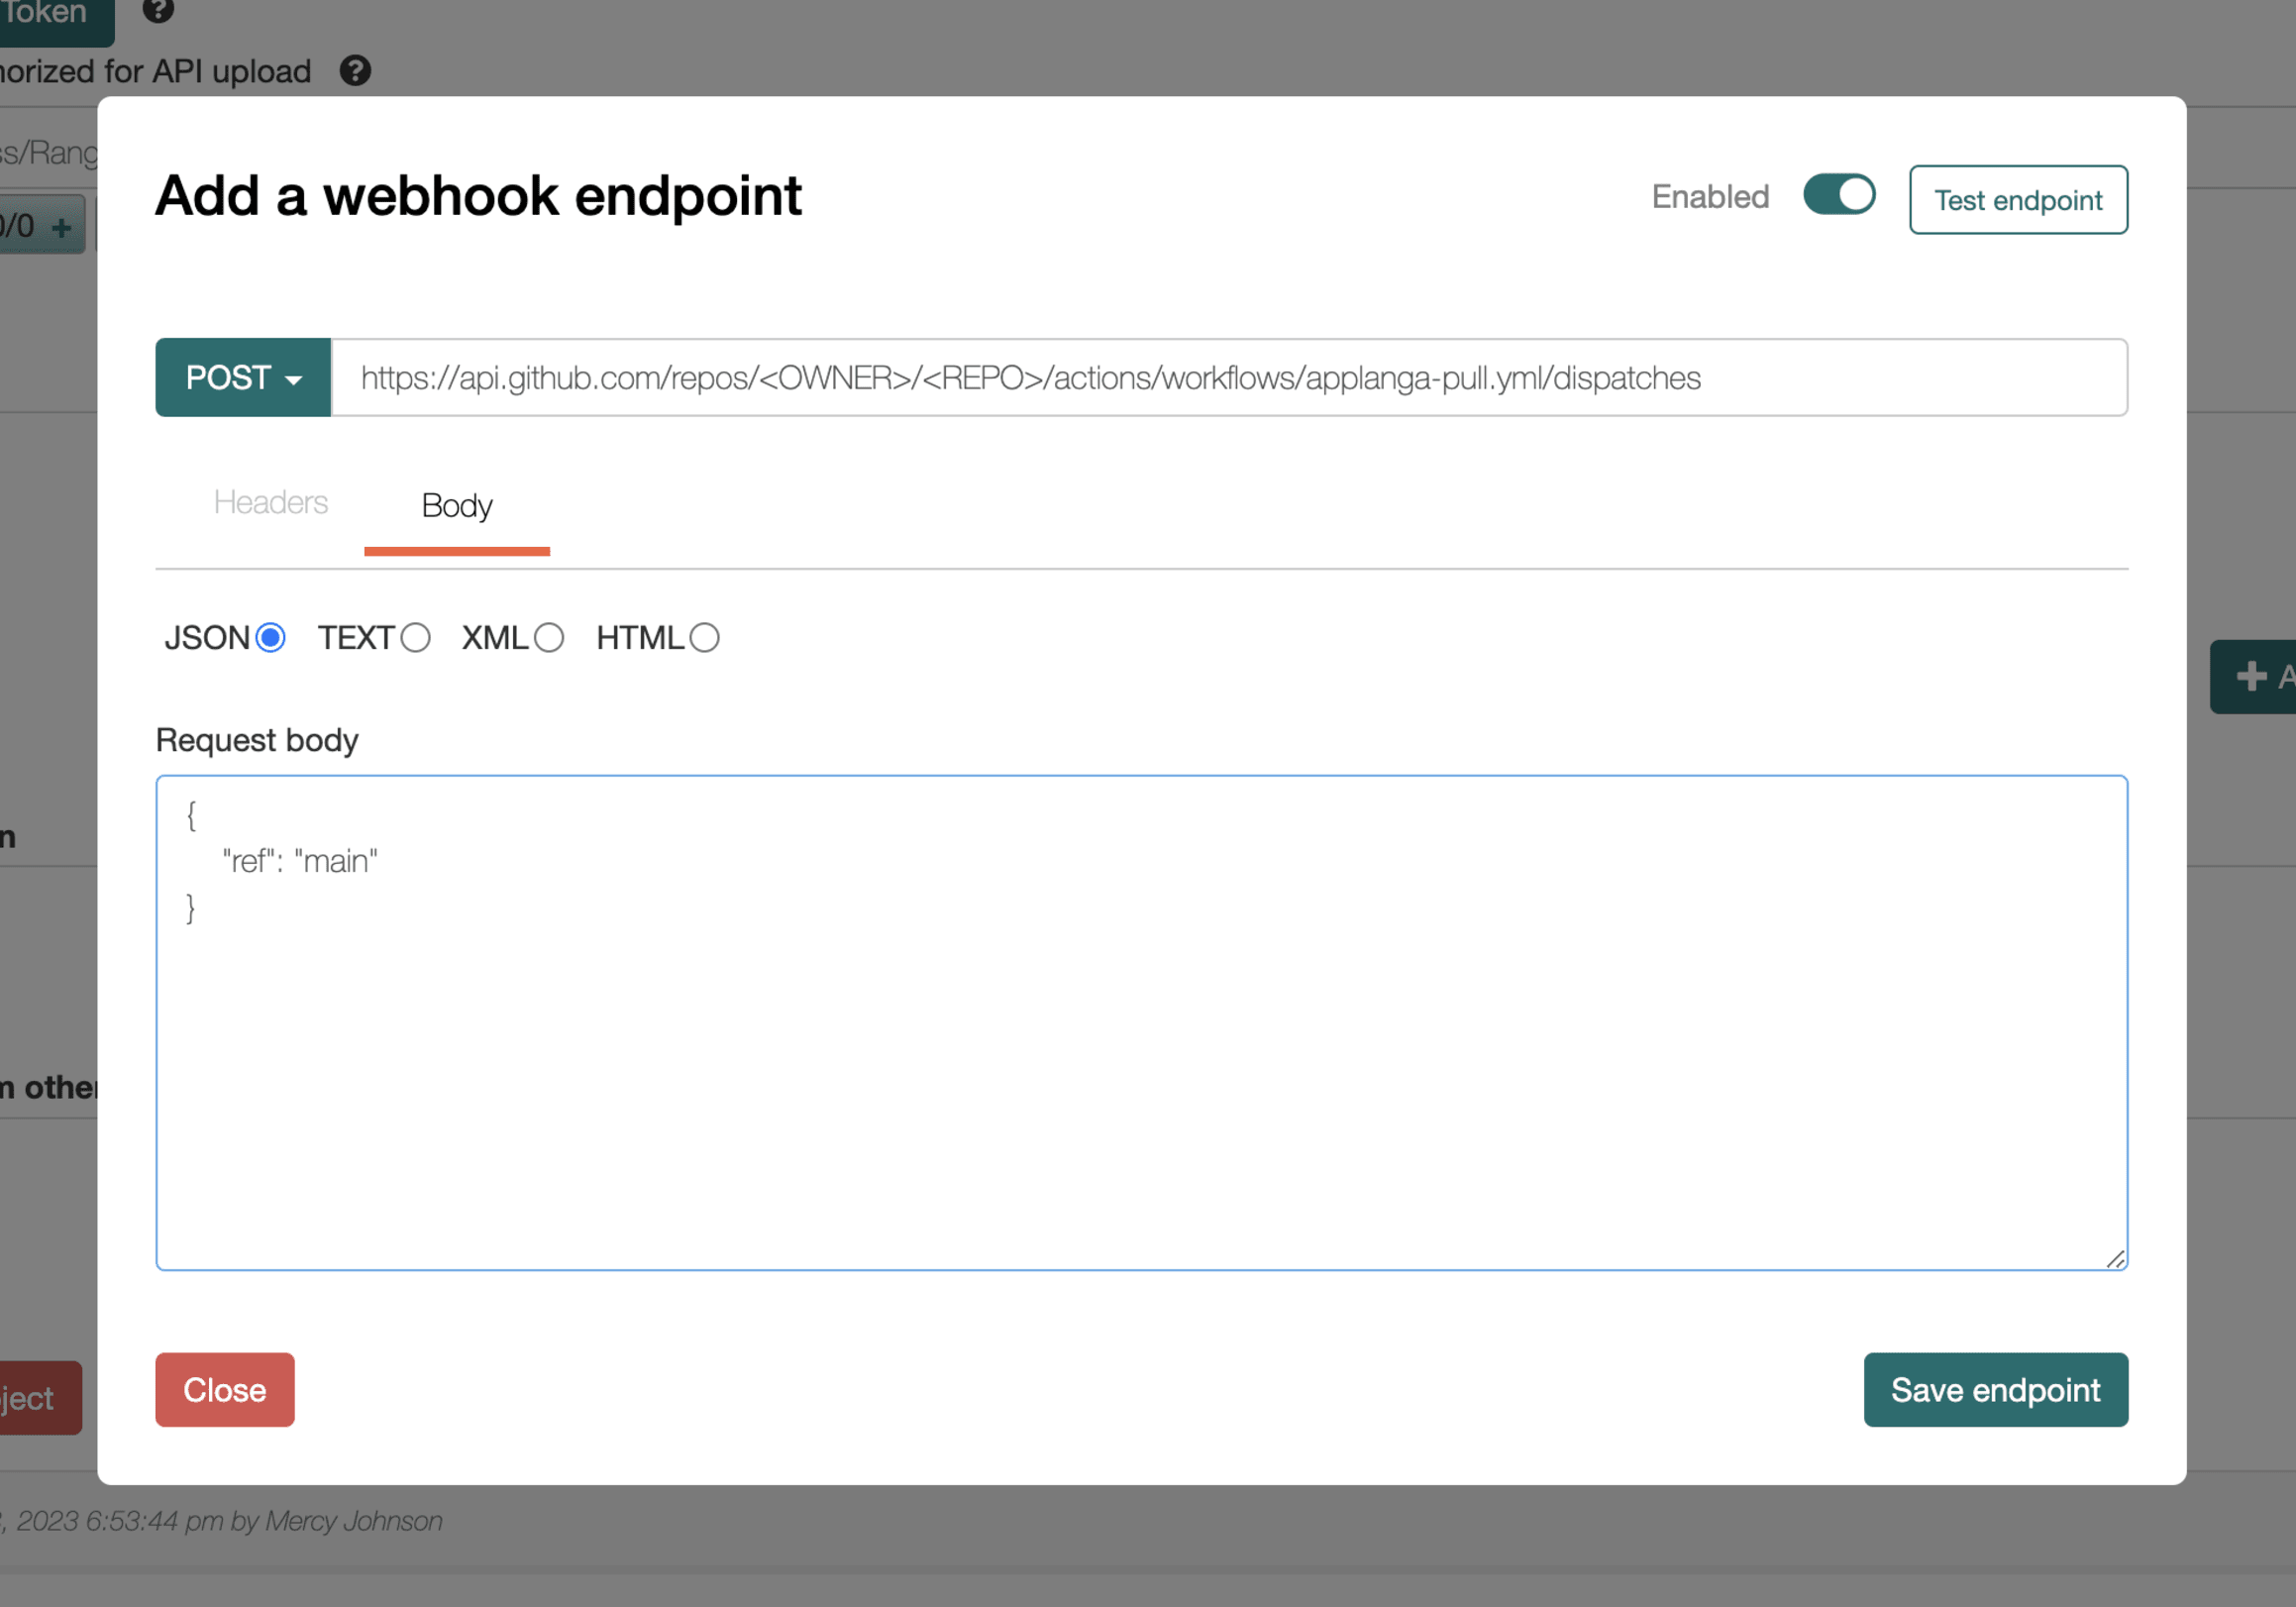
This should open a new tab that opens the webhook of the GitHub integration. Click the "Endpoint" tab to show the webhook endpoint configuration, then click "Body".
In the "Request body" section you should see a json object, with a key "ref" and an associated value which is the default branch of GitHub repository for which the integration was done. Simply change this value to the preferred branch name which you want to trigger Applanga GitHub actions and click "Save endpoint".

The example repository showcases a full cycle GitHub workflow setup integration with the Applanga Localization Platform.
The benefit of using GitHub workflows is that you can automate your localization process without the need to share any repository credentials with your localization provider.
To use GitHub workflows on your repository you need to create a folder called .github/workflows/ and place the workflow configuration .yml files in there.
For a more detailed introduction to GitHub workflows please see the GitHub Documentation
The repository contains 2 workflows. Running and past workflow actions can be tracked under the Actions Tab.
.github/workflows/applanga-push.yml will push any .json source files under the directory react_json_sample/en/ to Applanga whenever they are changed in the repository. Depending on your folder structure and file format you need to modify the paths for your repository workflow config.
Note that for the above workflow file the Applanga Push Action will only get triggered when there is a push to the main branch as specified in the config. It is also possible to specify a different branch or add more branches as needed.
.github/workflows/applanga-pull.yml pulls new translations available from Applanga and then creates a pull request in the repo with the newly added languages or updated translation files. The workflow configuration is configured to run on any given branch. To set this up successfully there are 2 important requirements
master or main branch(whichever is the default) of the repository, which allows GitHub to pick up the workflow. This is a GitHub limitation, and more info can be found on the following GitHub issueNote that if you are already having a project setup on Applanga and you want to test the pull command, all keys that you want to pull should be tagged with app:translations.json, because of the current Cli configuration example. For more info see the Applanga Cli documentation.
To trigger the applanga-pull workflow a webhook endpoint has to be configured in the projects settings page on applanga.
The webhook is triggered at least 15 minutes from when there is no translation change. This means whenever translation is added or edited a webhook request is scheduled to be sent to all configured endpoints for the project 15 minutes later. The scheduled request will be sent as planned unless there is a new change to translation before the scheduled time, in which case it is rescheduled to be sent 15 minutes later.
Here are the steps to setup the Webhook Endpoint

https://api.github.com/repos/<OWNER>/<REPO>/actions/workflows/applanga-pull.yml/dispatches. The following values <OWNER> and <REPO> should be replaced with the correct values.Please refer to the following screenshot
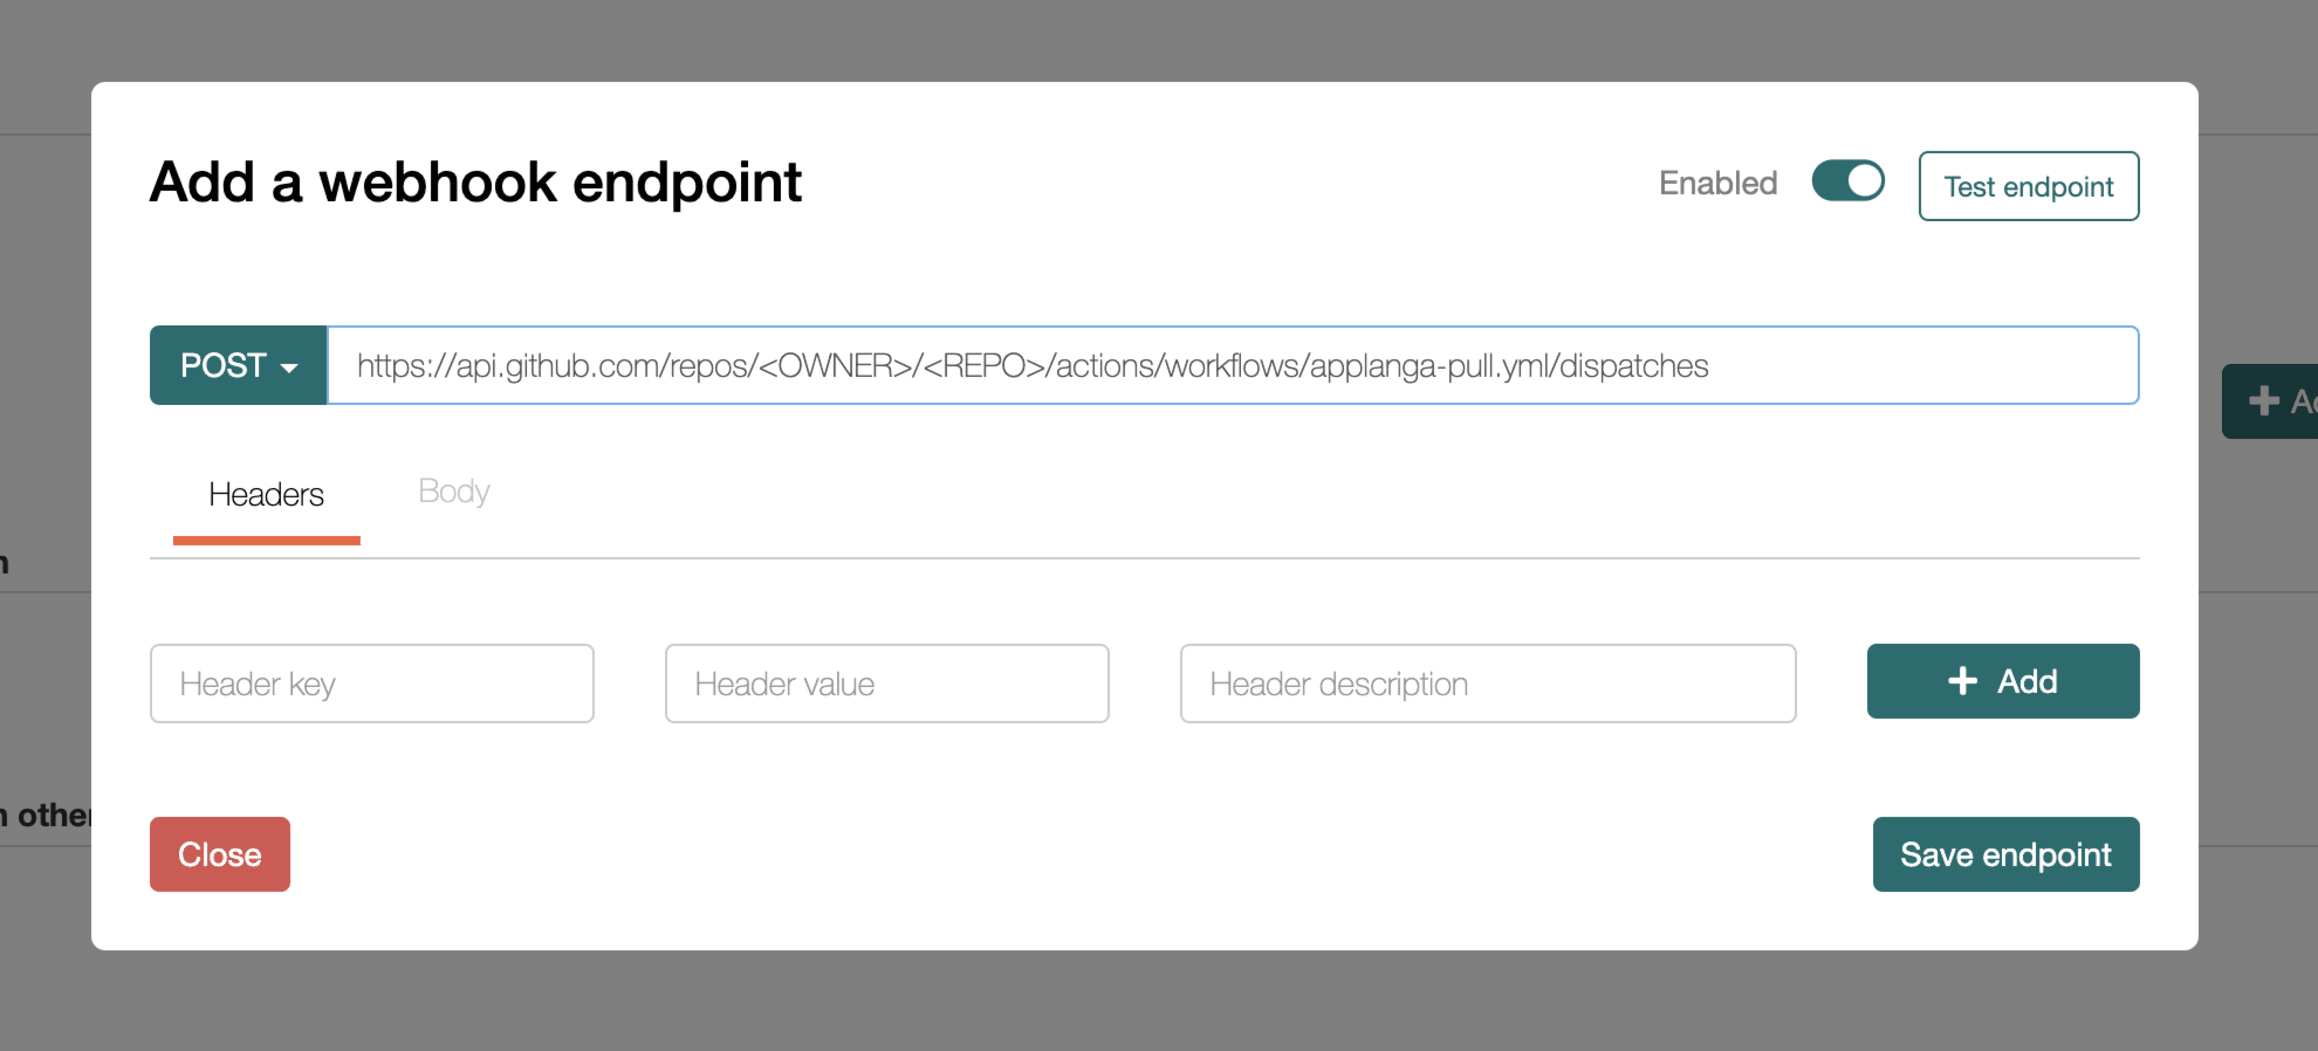
Authorization header. The Authorization header value is a valid GitHub personal access token with repository permissions combined like so token <GH_PERSONAL_ACCESS_TOKEN> where <GH_PERSONAL_ACCESS_TOKEN> is the personal access token generated on GitHub. For example if you had an access token ghp_zWAdtUqmtFTY7qkqJS1wmuEx8ytX0SpIPv then the Authorization header would be set like so token ghp_zWAdtUqmtFTY7qkqJS1wmuEx8ytX0SpIPv. Please refer to the following GitHub documentation on how to generate an access token.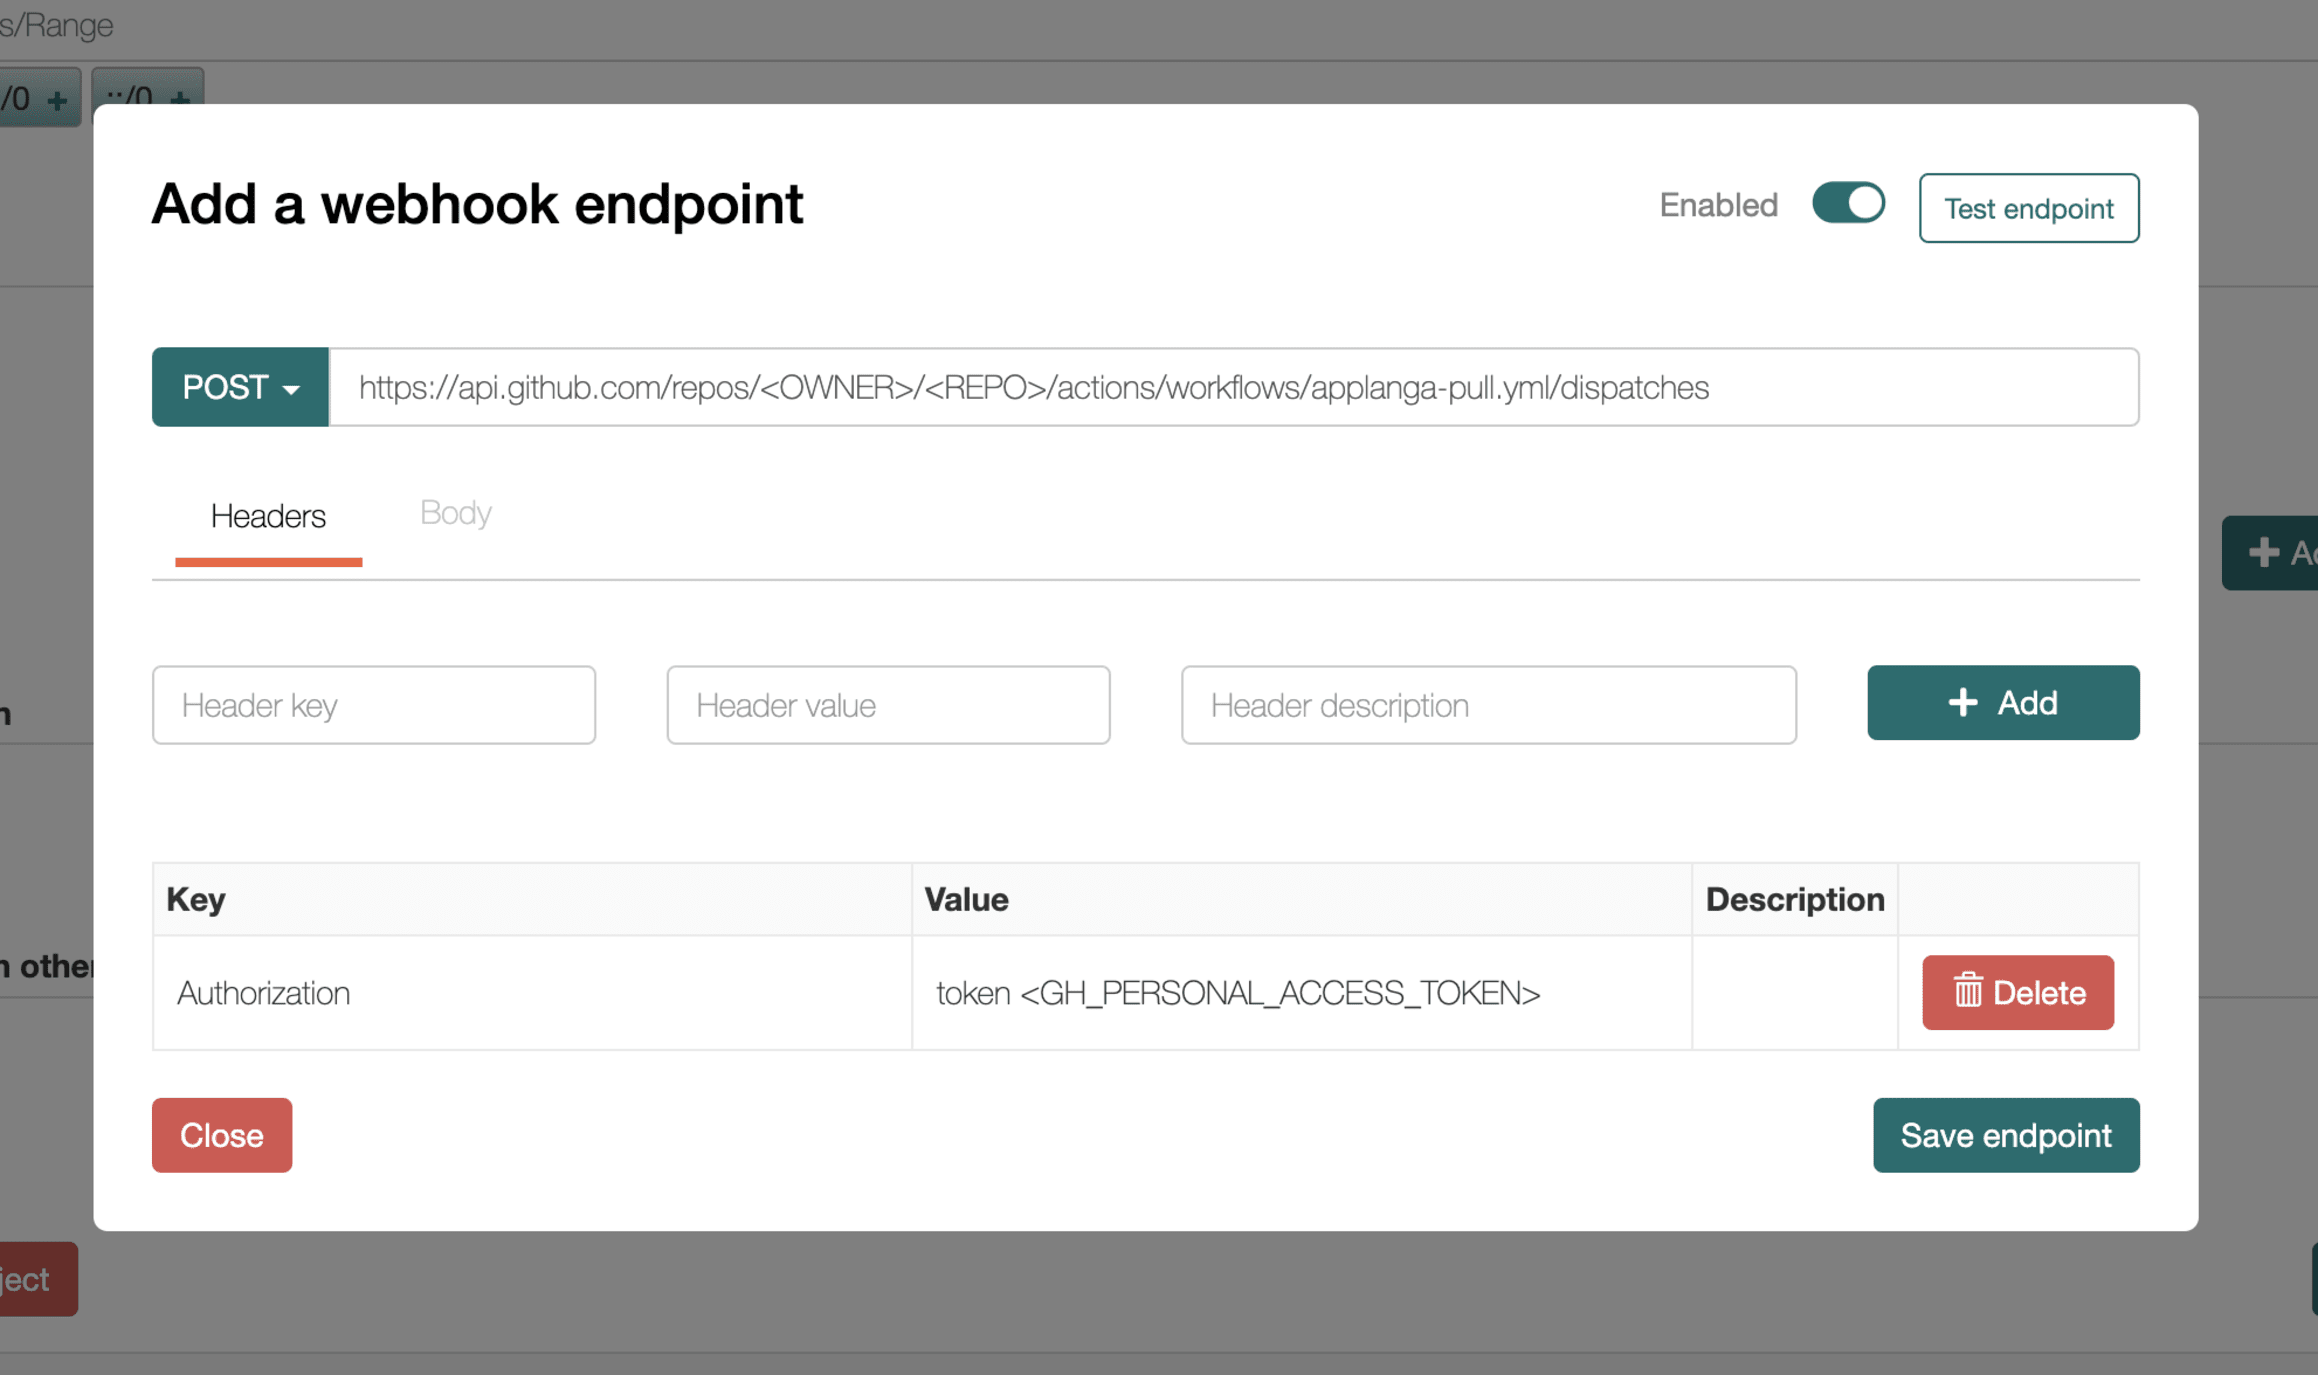
ref which should be set to the name of the branch in which the workflow is intended to be triggered. For example if the workfow should be triggered in a branch named main then the text to be pasted would be as follows{
"ref": "main"
}
Next click Save endpoint.
For more information about triggering a workflow dispatch event via REST API check here.
Because the workflows make use of the Applanga Command Interface you also need to add a .applanga.json configuration file to your repository.
To uniquely identify your project you need to provide your API Access Token which can be found on the API section in the Applanga Project Settings in the Applanga Dashboard. Select your project, click Project Settings, click on “Show API Token” and copy the Token. The token can be stored as a Encrypted Repository Secret labeled APPLANGA_ACCESS_TOKEN or as plain text directly in the config e.g.: "app": { "access_token": "<APPLANGA_API_TOKEN>", ... }.
The included config is set-up to push all changes to translations.json file under the directory react_json_sample/en/ to Applanga and pull all other languages from Applanga as well as create the needed directories on the daily schedule or via the commandline request as described above.
The example configuration is set-up to use the "react_simple_json" file format but Applanga supports a wide variety of other file formats and folder structures. Also the example works with only one file per language if you need to support more you need to provide a tag per file for details on that and more see the Applanga CLI Documentation.
{
  "app": {
    "pull": {
      "target": [
        {
          "file_format": "react_simple_json",
          "exclude_languages": ["en"],
          "tag": "app:translations.json",
          "path": "./react_json_sample/<language>/translations.json"
        }
      ]
    },
    "push": {
      "source": [
        {
          "language": "en",
          "file_format": "react_simple_json",
          "tag": "app:translations.json",
          "path": "./react_json_sample/en/translations.json"
        }
      ]
    }
  }
}