The article will show users how to manually upload new screenshots or edit existing screenshots in GL Strings projects.
Table of Contents
- How to Open the Screenshot Editor
- How to Use the Screenshot Editor
- How to Auto-Assign Strings to a Screenshot
- How to Add or Remove Strings from a Screen
- How to Set a String Position
Users can open the Screenshot Editor to manually upload new or edit existing screenshots. With the screenshot Editor, users have the option to upload new screenshots or new variants of screenshots, add or remove the strings tagged to each screen, and set the string position on a screen. Each option ensures more accurate screenshots and context for linguists.
How to Open the Screenshot Editor
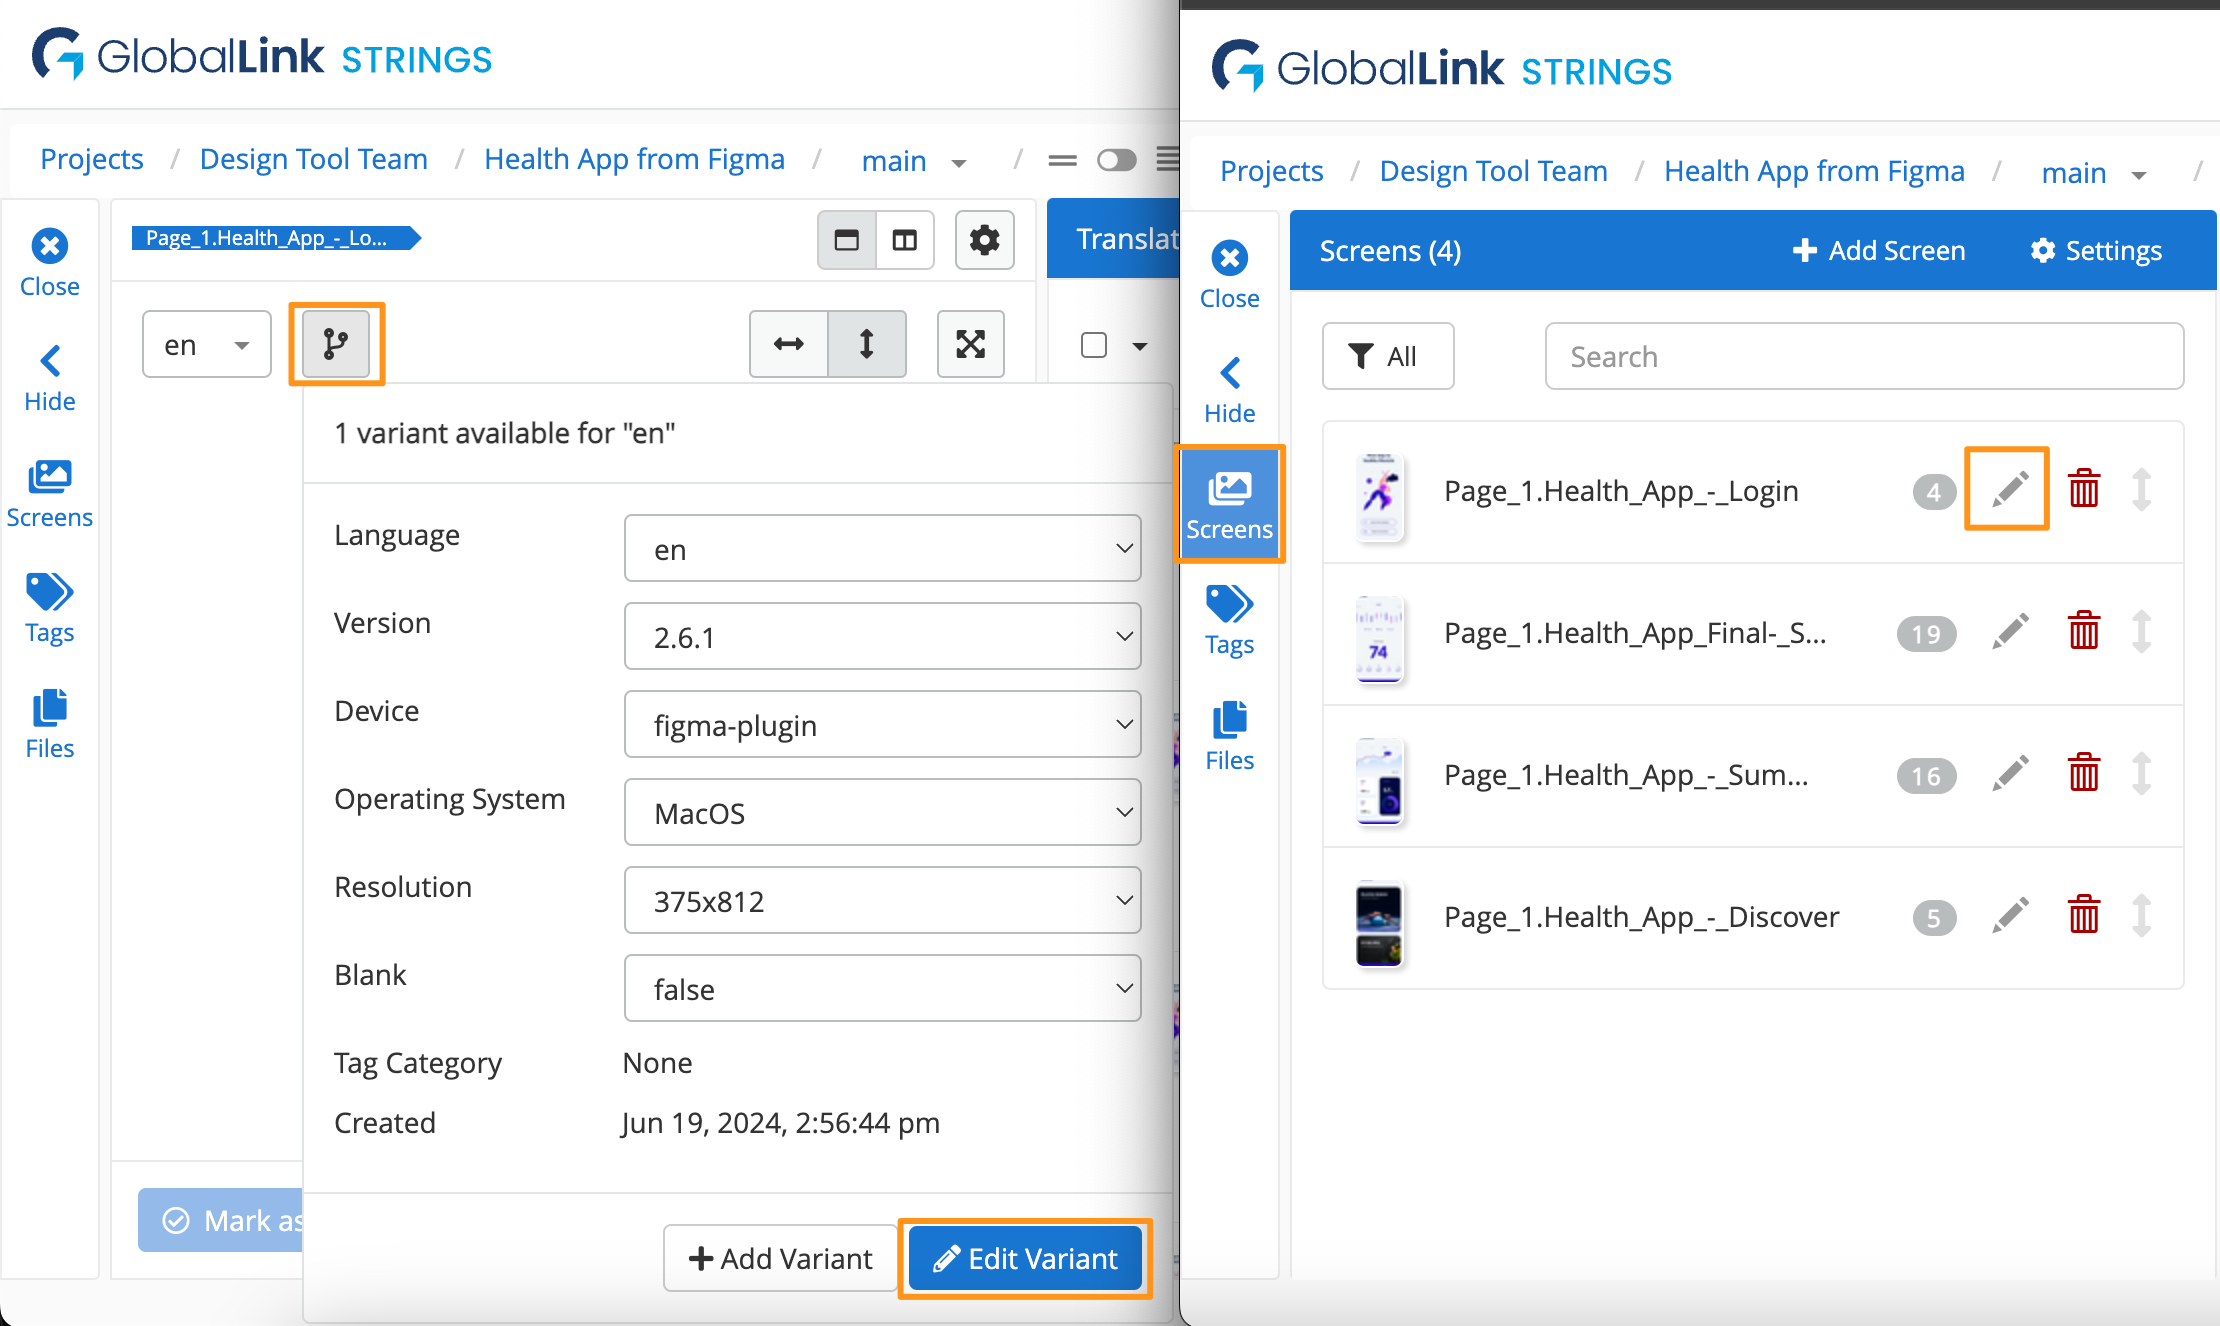
- To upload a new screenshot, open the screens list and click +Add Screen (then drag and drop the screenshot to upload or browse files to select the screenshot for upload)
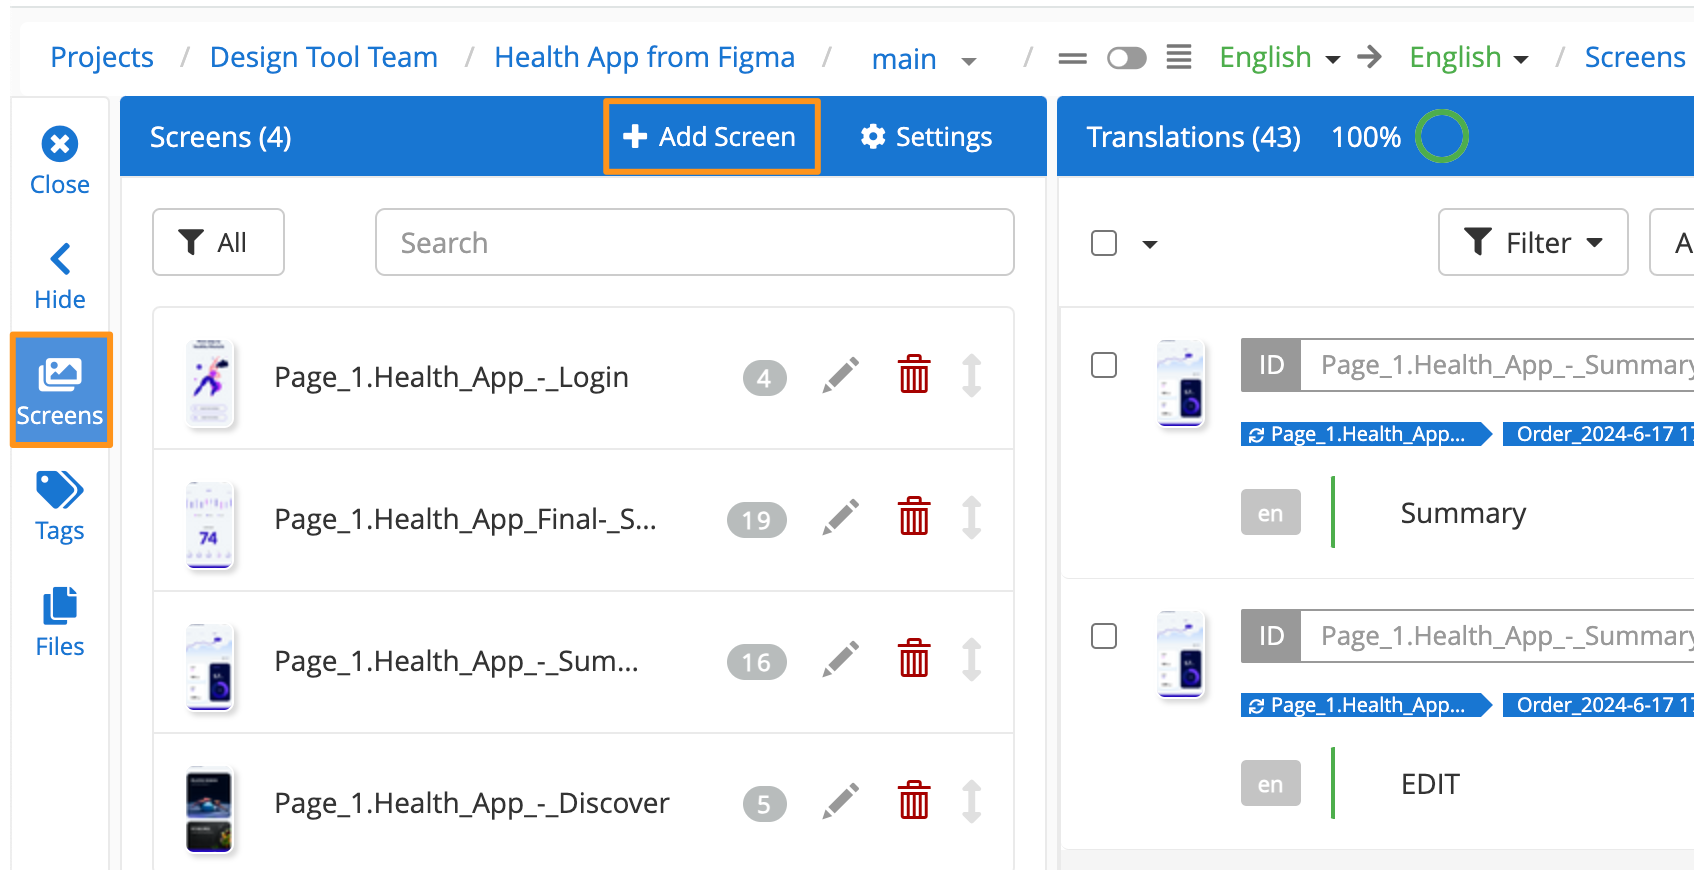
- To upload a new variant for a specific screen, navigate to the screenshot in the and click the variant icon then click +Upload Variant (then drag and drop the screenshot to upload or browse files to select the screenshot for upload)
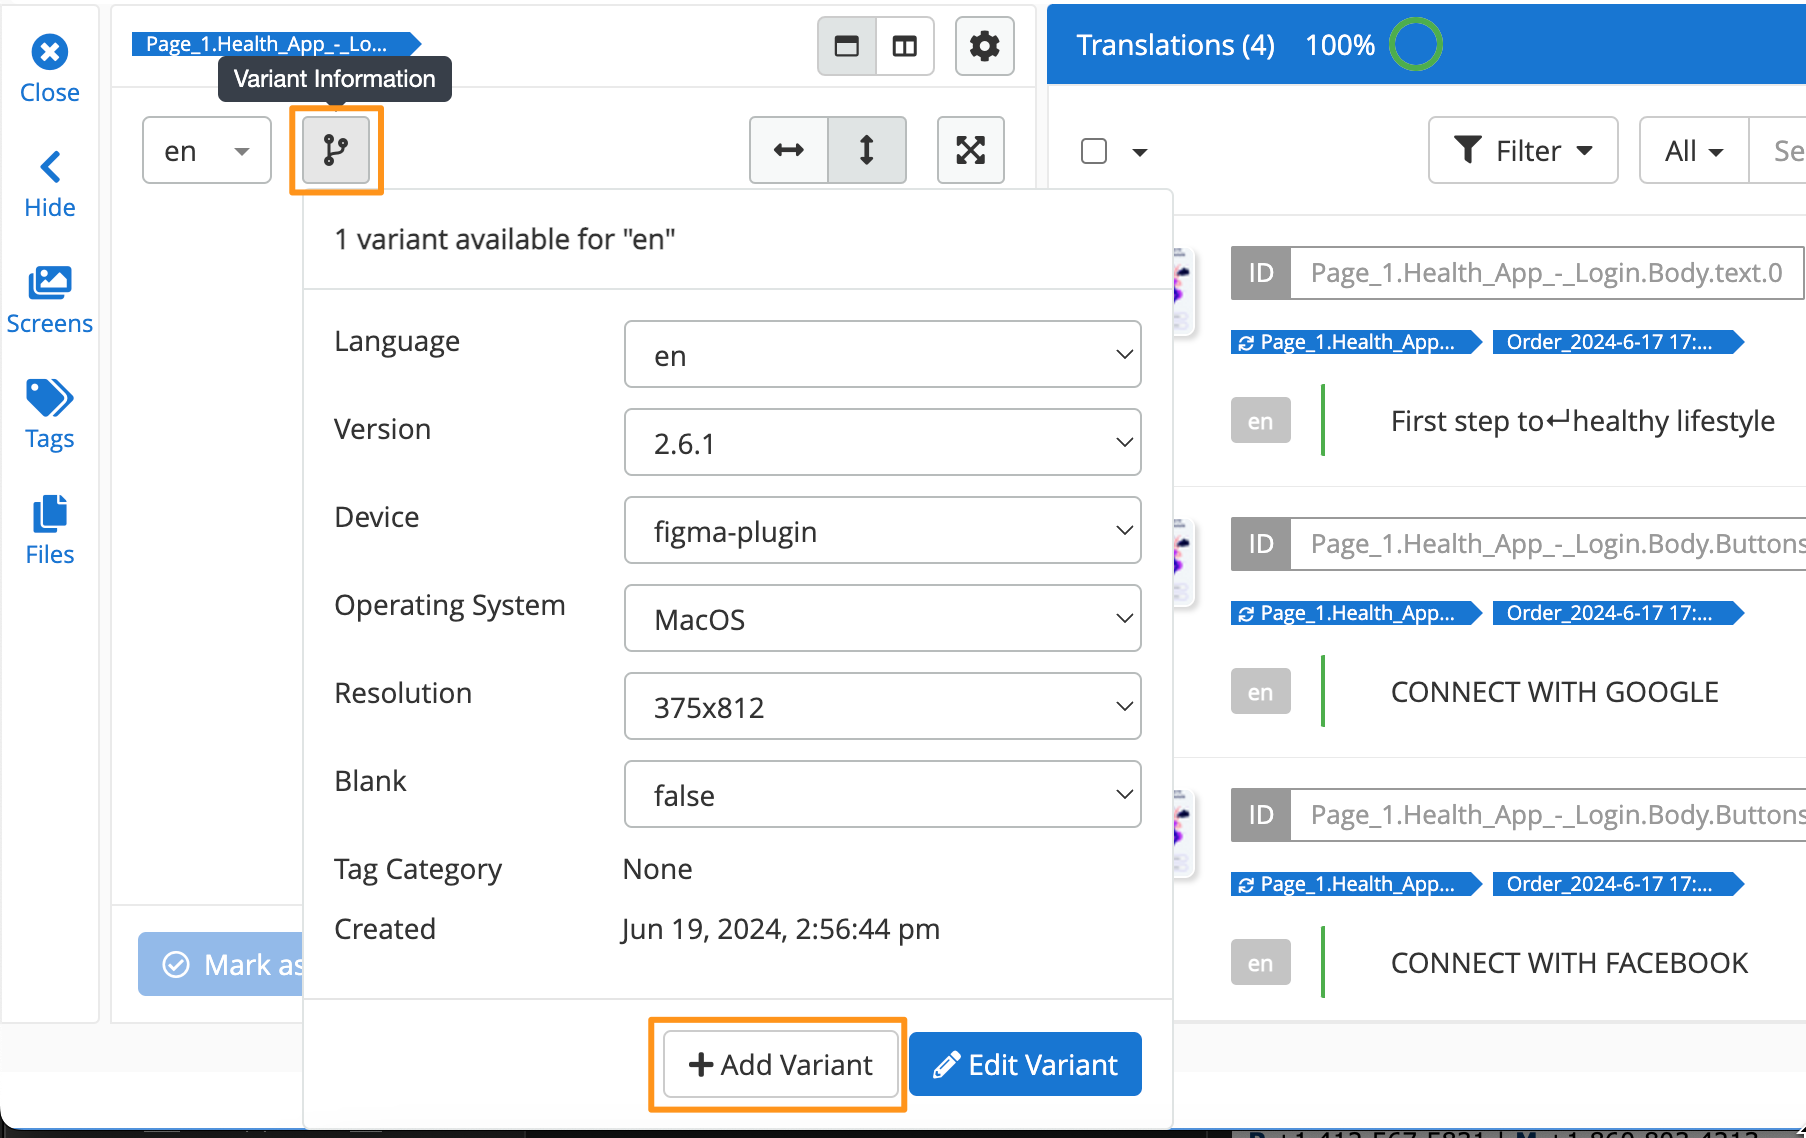
- To edit an existing screen, open the screens list and click the pencil icon or navigate to the screen and click +Edit Variant
Back to Top
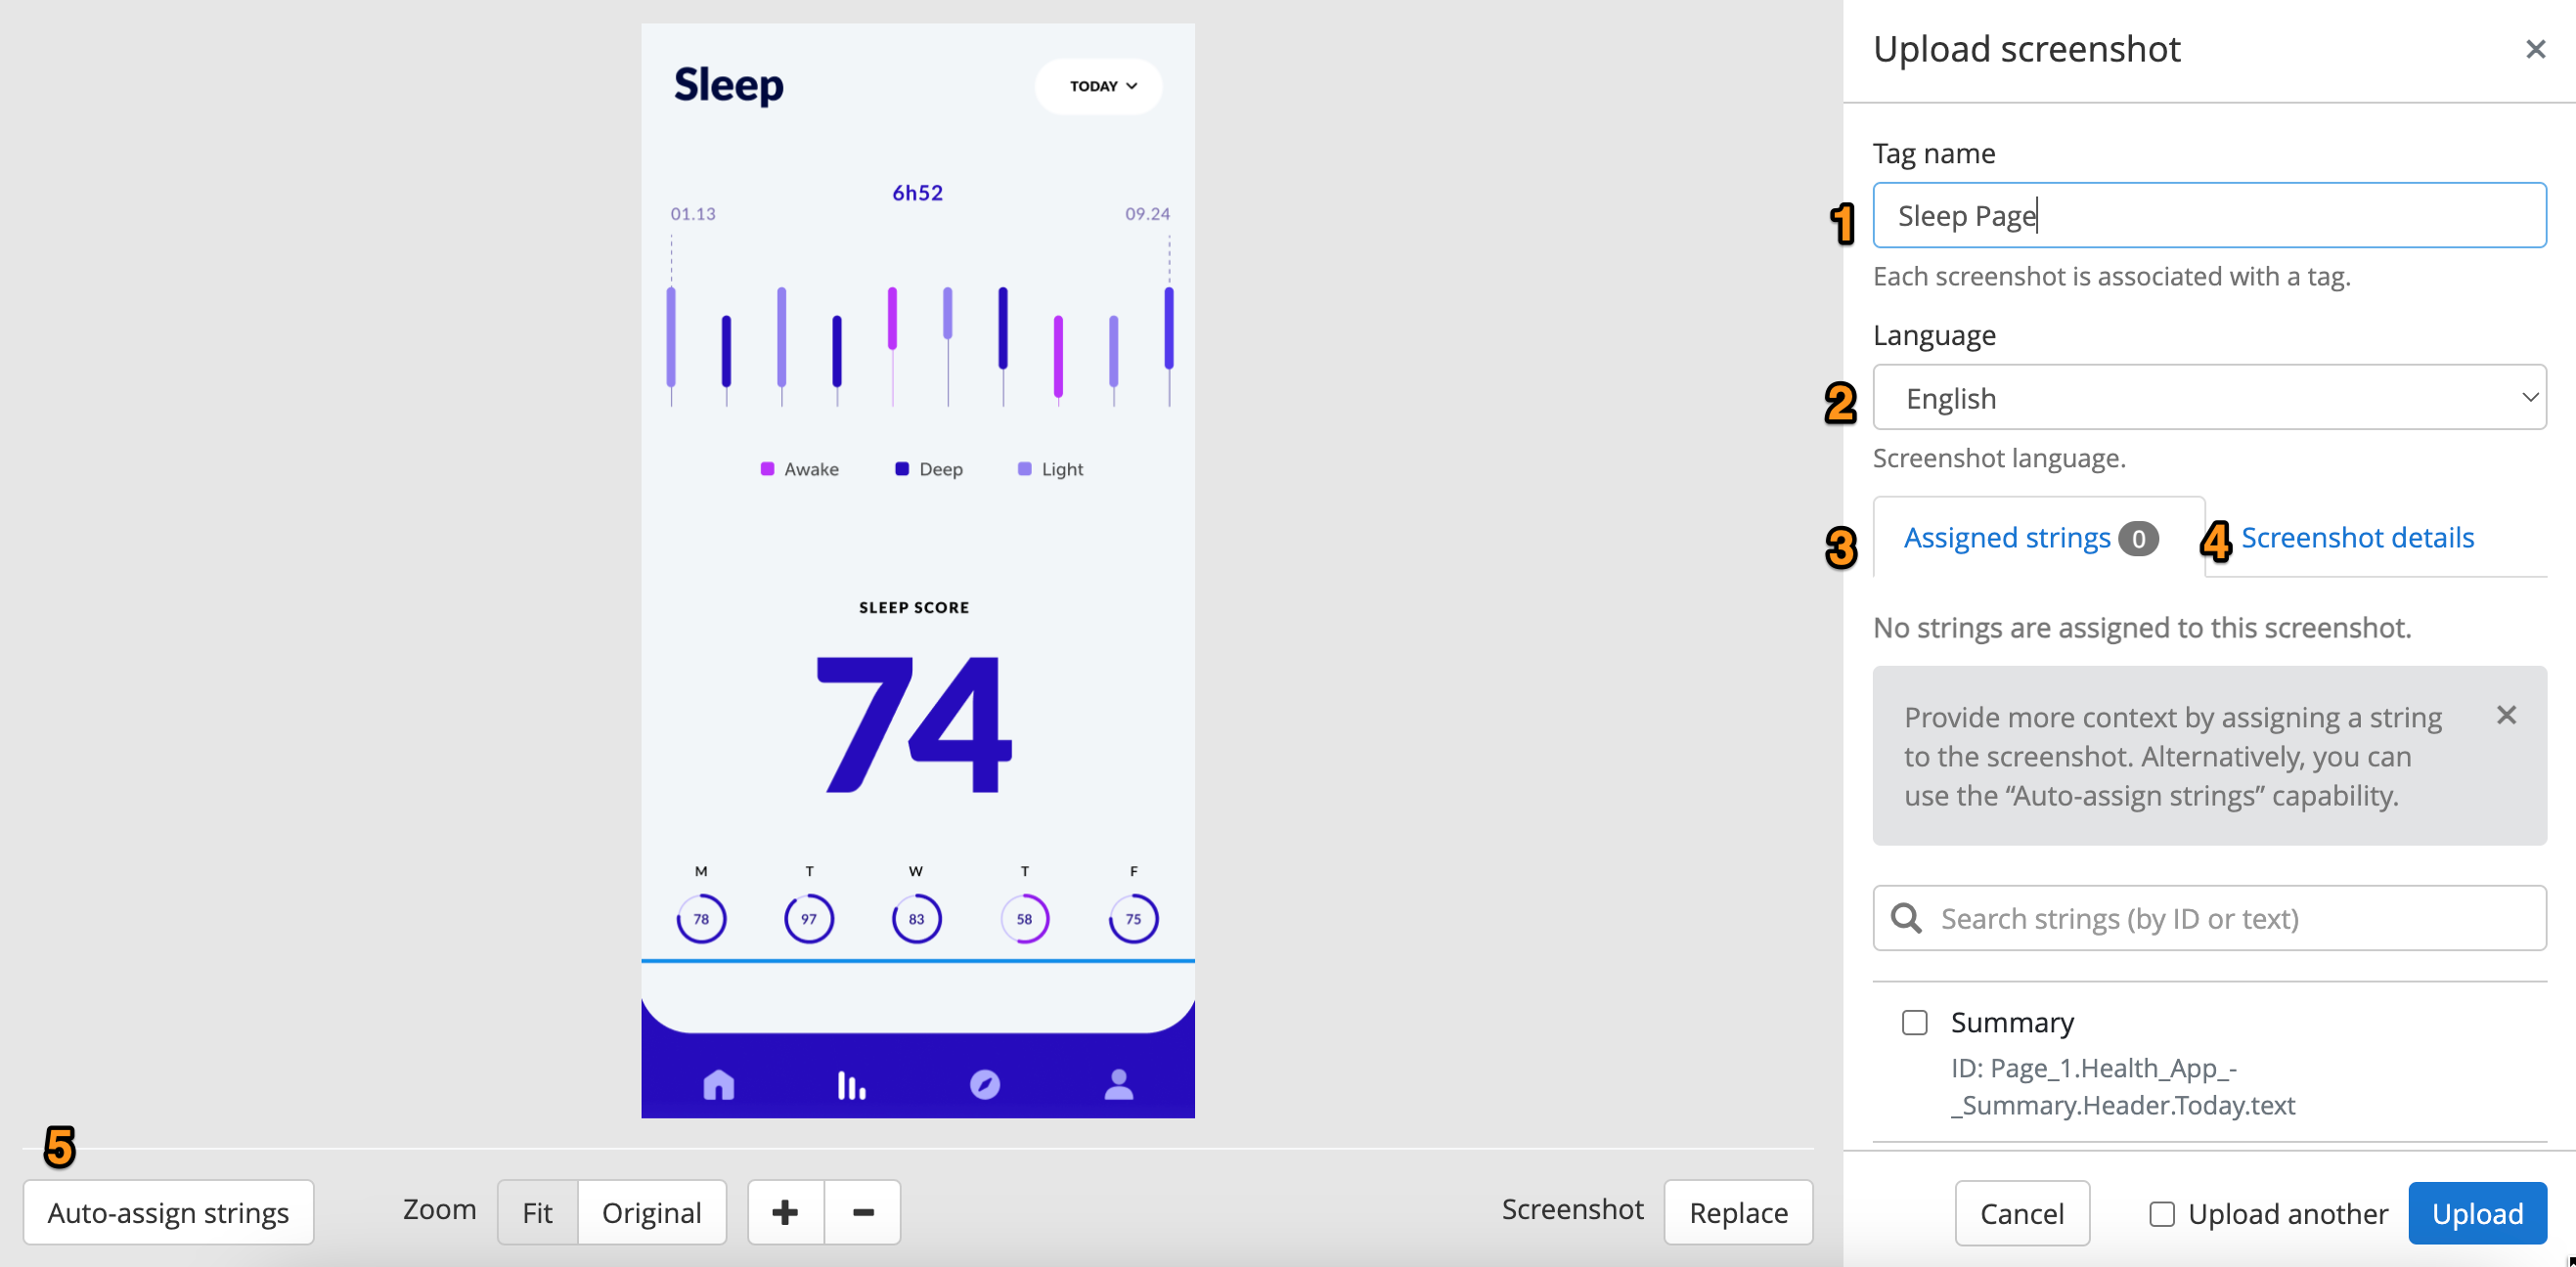
How to Use the Screenshot Editor
-
Tag Name - name of the tag used to assign strings to a screen
-
Language - the language found in the screenshot
-
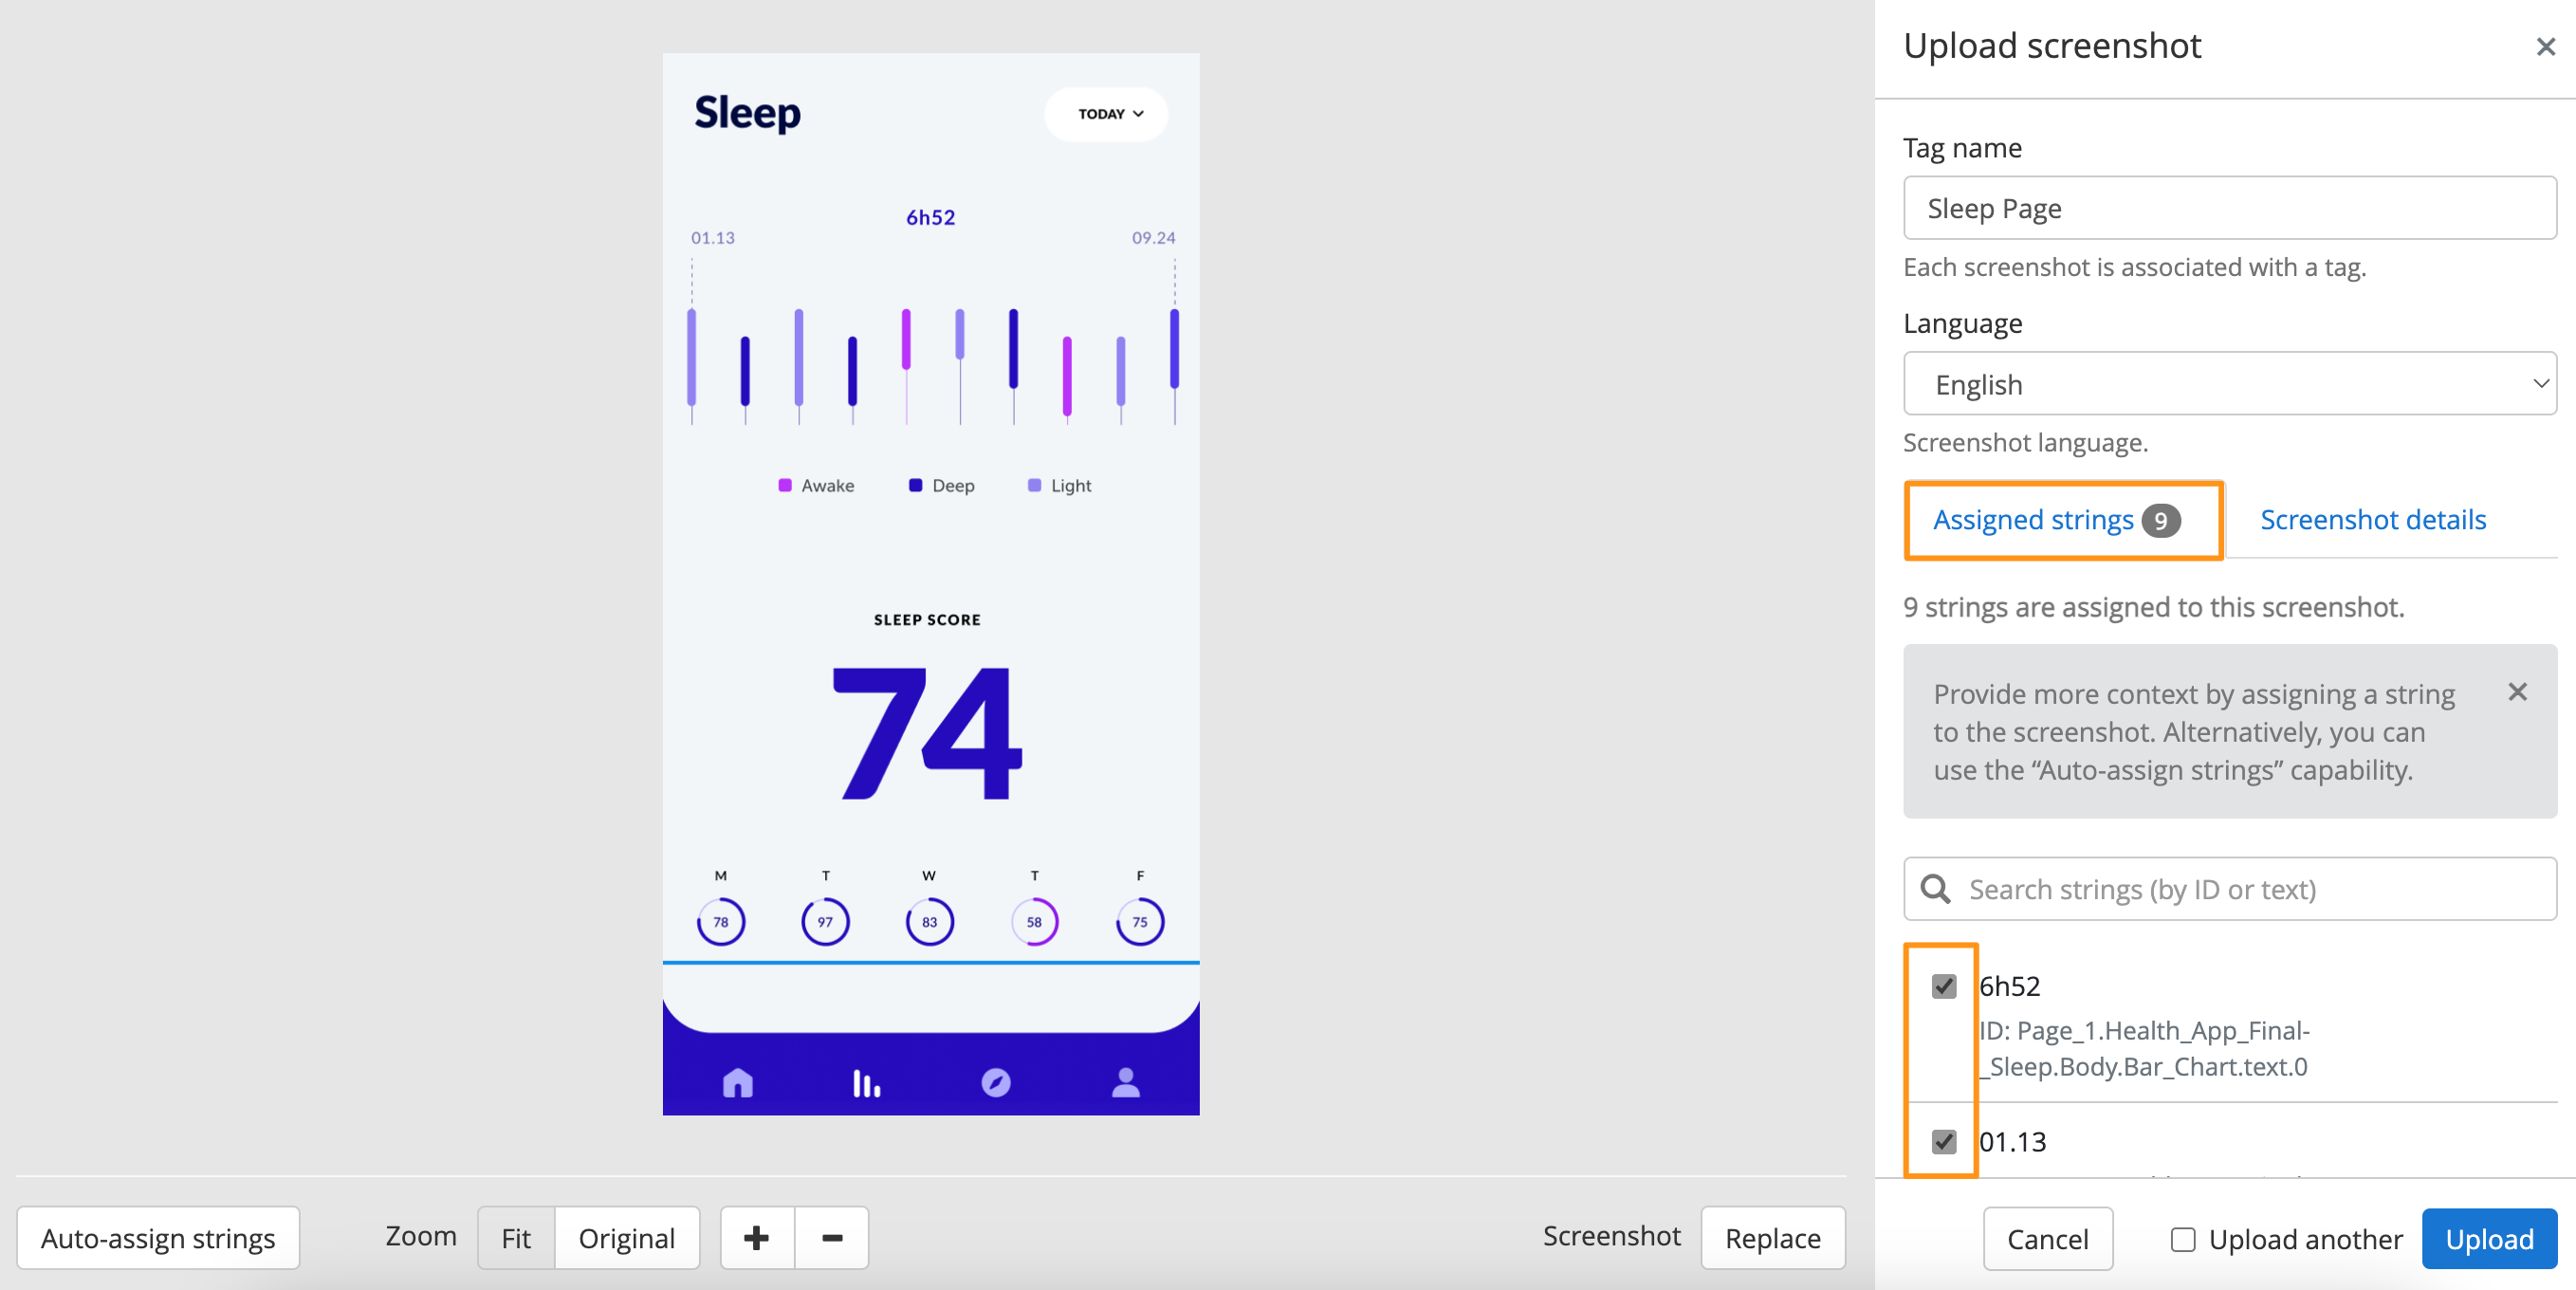
Assigned Strings - the strings with a check mark are assigned to that screen
-
Screenshot Details - basic information about the screenshot
- Tag Category - the category associated with the tag
- Uploaded File Name - the file name of the uploaded screenshot
- Version - the version of the app from which the screenshot was taken
- Device - which device the screenshot was taken on (e.g. iPhone)
- Operating System - from which operating system the screenshot was taken (e.g. MacOS)
-
Auto-assign Strings - Optical Character Recognition (OCR) option to tag or associate strings to a screen.
Back to Top
How to Auto-Assign Strings to a Screenshot
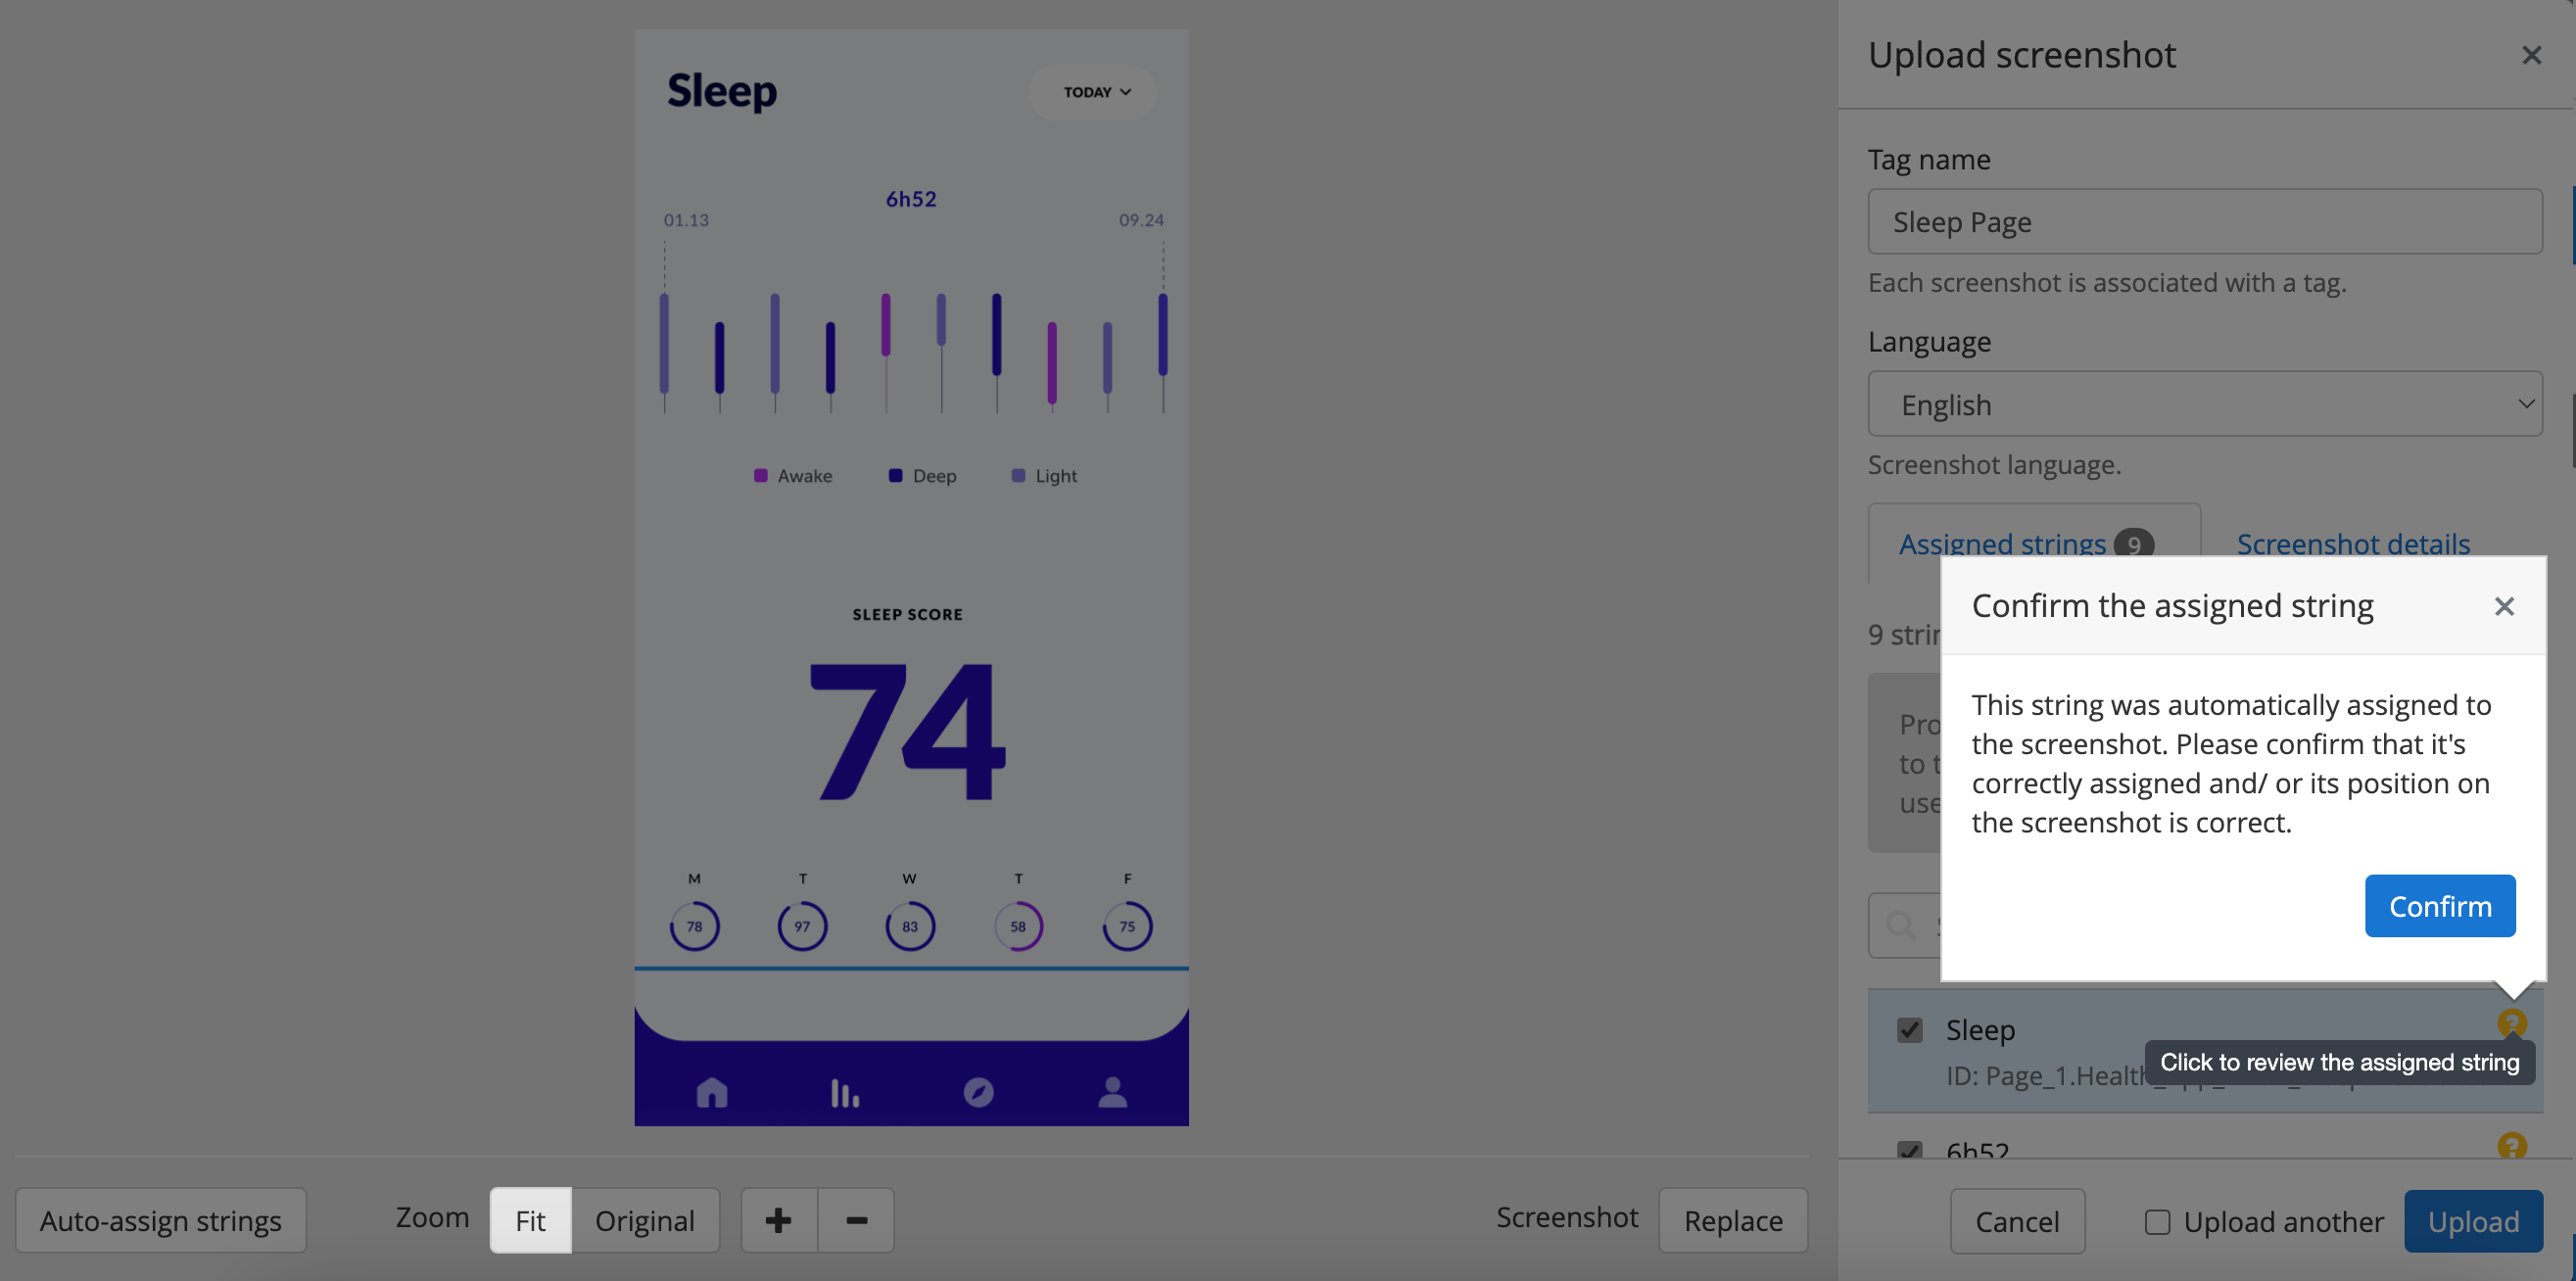
Auto-assign uses Optical Character Recognition (OCR) to tag or associate strings to a screen. OCR is not 100% accurate and users should review string associations. All auto-assigned strings are marked with a question mark '?' for easy identification.
**All strings marked with a '?' before starting the auto-assign process will be removed from the screen.
- While the Screenshot Editor is open, click Auto-Assign Strings
- Confirm the Screenshot Language and mark the checkbox to confirm you are aware of the effects, then click Continue with Auto-Assign
- In the Assigned Strings tab, review the auto-assigned strings designated with a question mark '?' for accuracy
- Click the question mark '?' to confirm the assigned string
Back to Top
How to Add or Remove Strings from a Screen
In the Assigned Strings tab, mark or unmark the checkbox next to a string to add or remove it from a screen
Back to Top
How to Set a String Position
There are two different ways of setting a string position. We recommend following option B for projects with a large number of strings and screens.
Option A
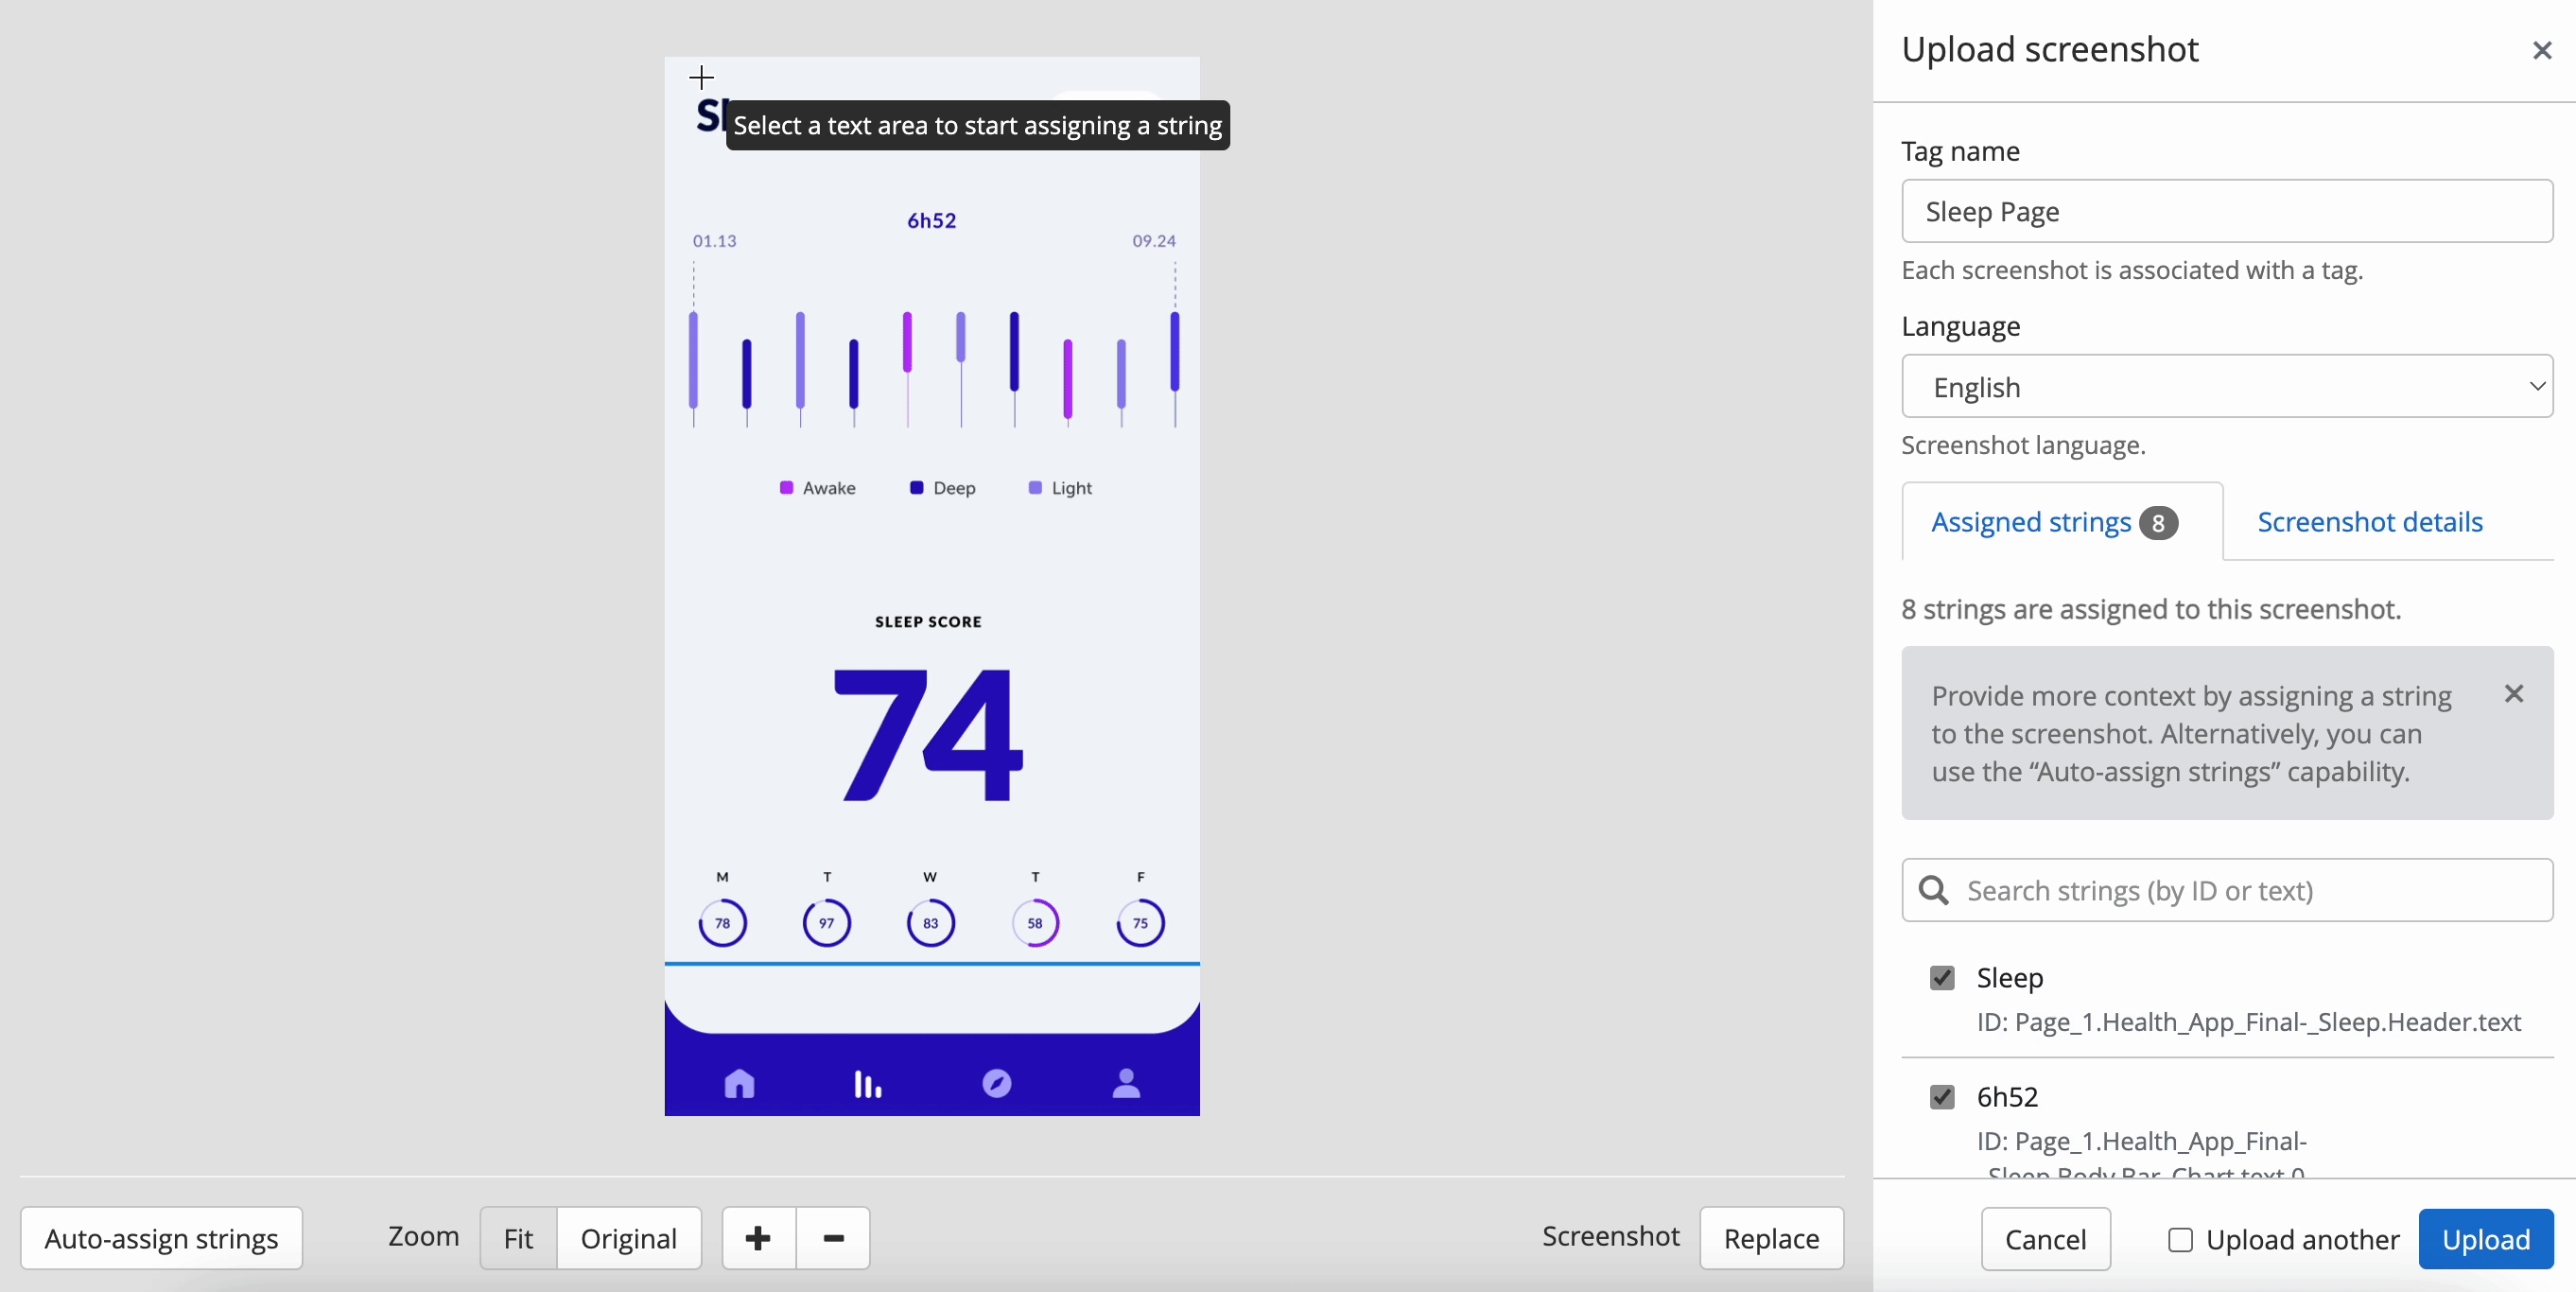
- Hover over the screenshot to activate the crosshairs
- Click and drag over the text field to designate the string position, then release
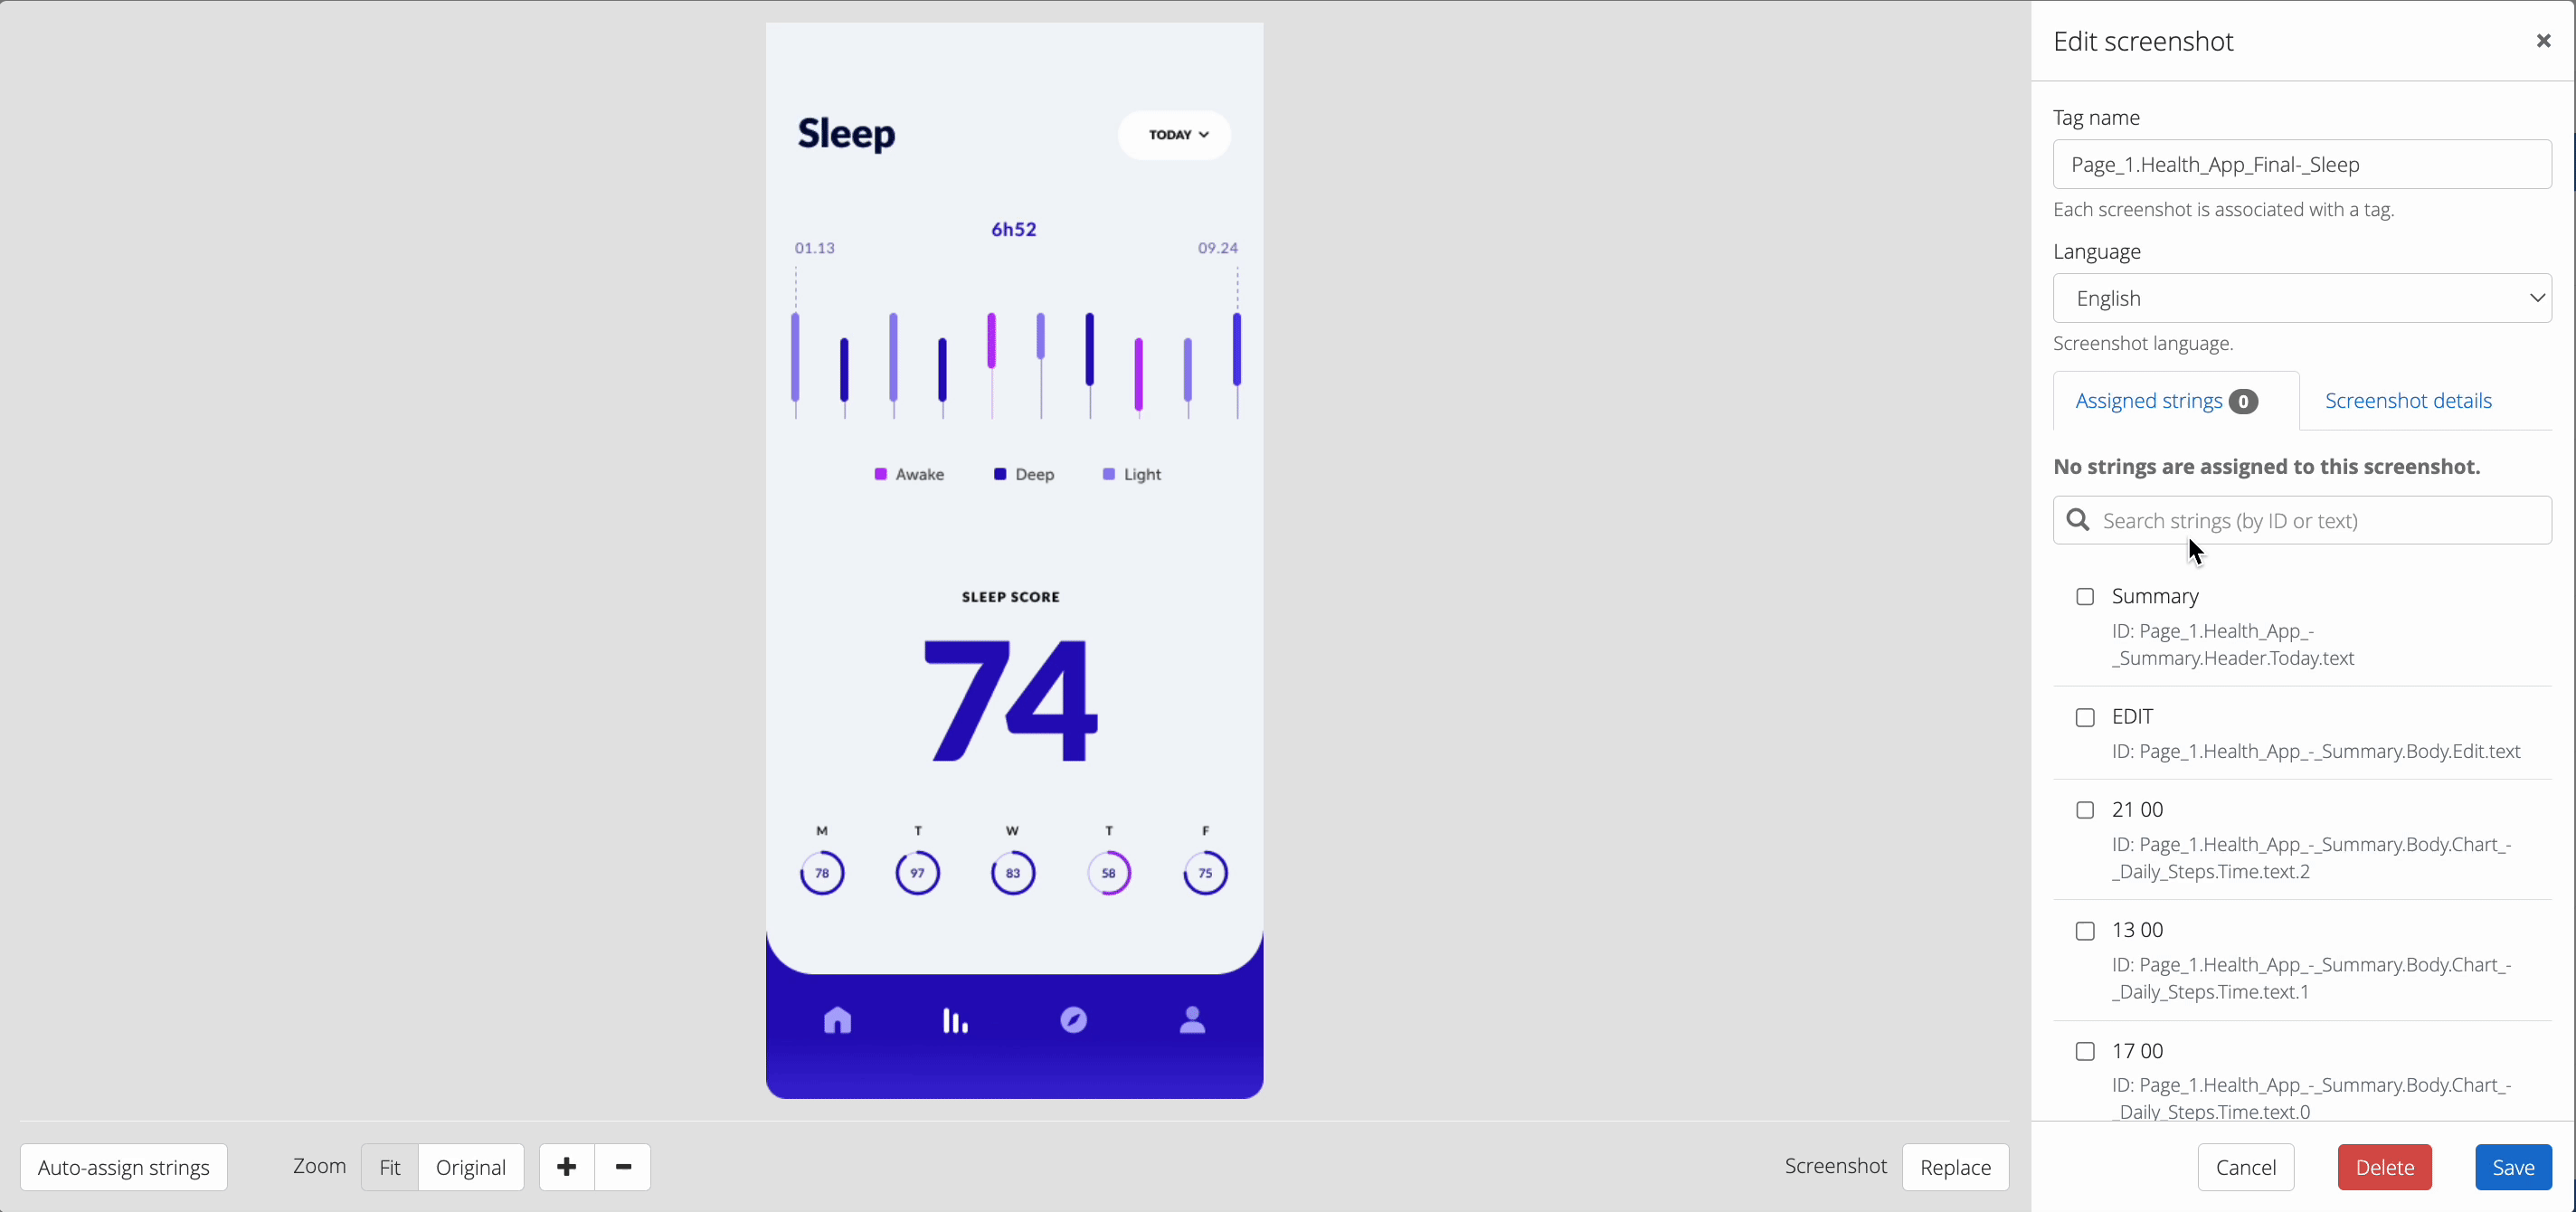
- Search for the string by ID or text and hit enter
- Click the string to add it to the screen
Option B
- Use the search bar on the right-hand side to look up a string value or ID
- Select the string you want to link to the screenshot
- Click Set Position to activate the crosshairs
- Click and drag over the text field to designate the string position, then release
Back to Top

