The GL Strings Jira integrations allows you to create Jira tickets from inside GL Strings to report translation and localization-related issues into the Jira environment for further handling.
Besides the summary and the description, tickets created via the Jira Integration will include a link to the related keys on GL Strings to easily identify where in an app the issue is located and make use of any context already gathered on GL Strings. For issue reporters, it eliminates the need to work in multiple environments at the same time.
The integration works on the GL Strings project level; every GL Strings project needs to be integrated individually. You can connect multiple GL Strings projects to one Jira project. For example, you have multiple apps and every app has its own GL Strings project, but they are all connected to one project on Jira where translation bug tracking across all apps is unified.
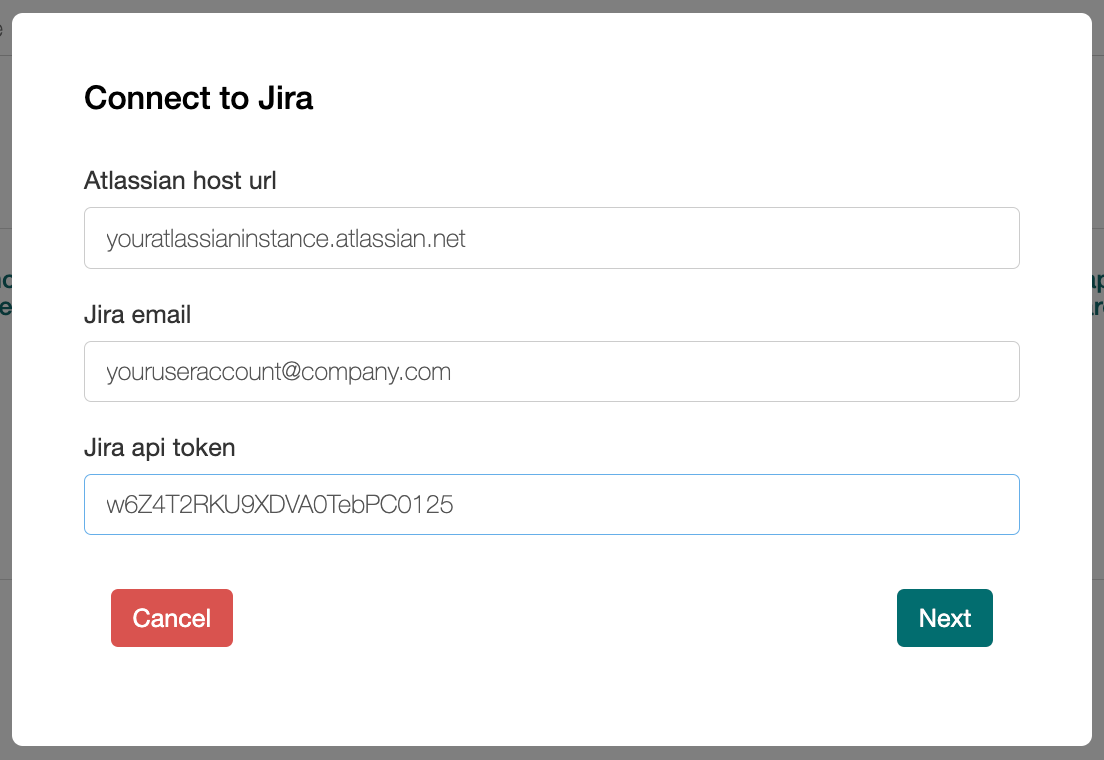
In the Project Settings page, scroll to the Jira Integration section and click Configure. In the first dialogue, you need to enter your Atlassian host URL which is the general Atlassian subdomain you use and the Jira email address of the user account you want to use. This user account will be the default reporter of all issues created via the GL Strings Jira integration.
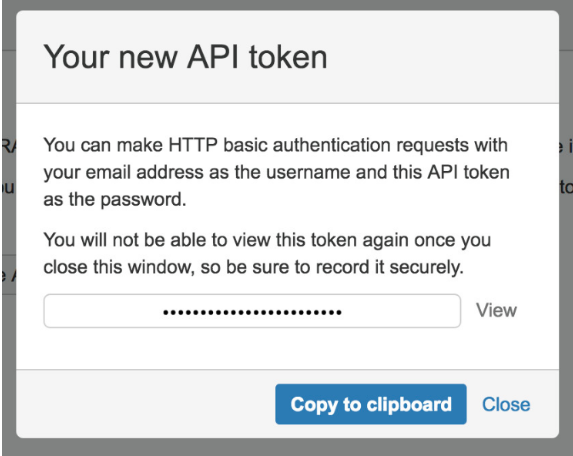
You can generate a Jira API token by following these steps:
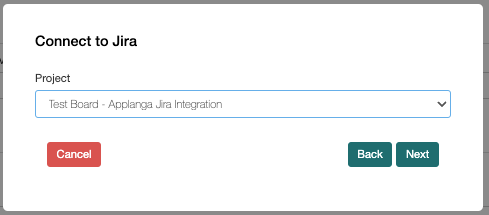
In the next step of the configuration process, choose the Jira project in which tickets created via the GL Strings Jira integration should appear.
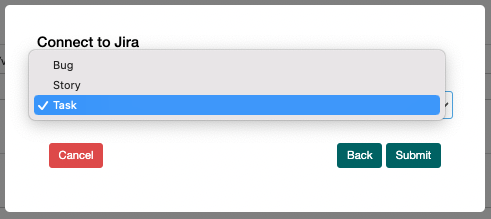
Finally, choose the default issue type which should be preselected for issues created via the GL Strings Jira integration: Bug, Story, or Task.
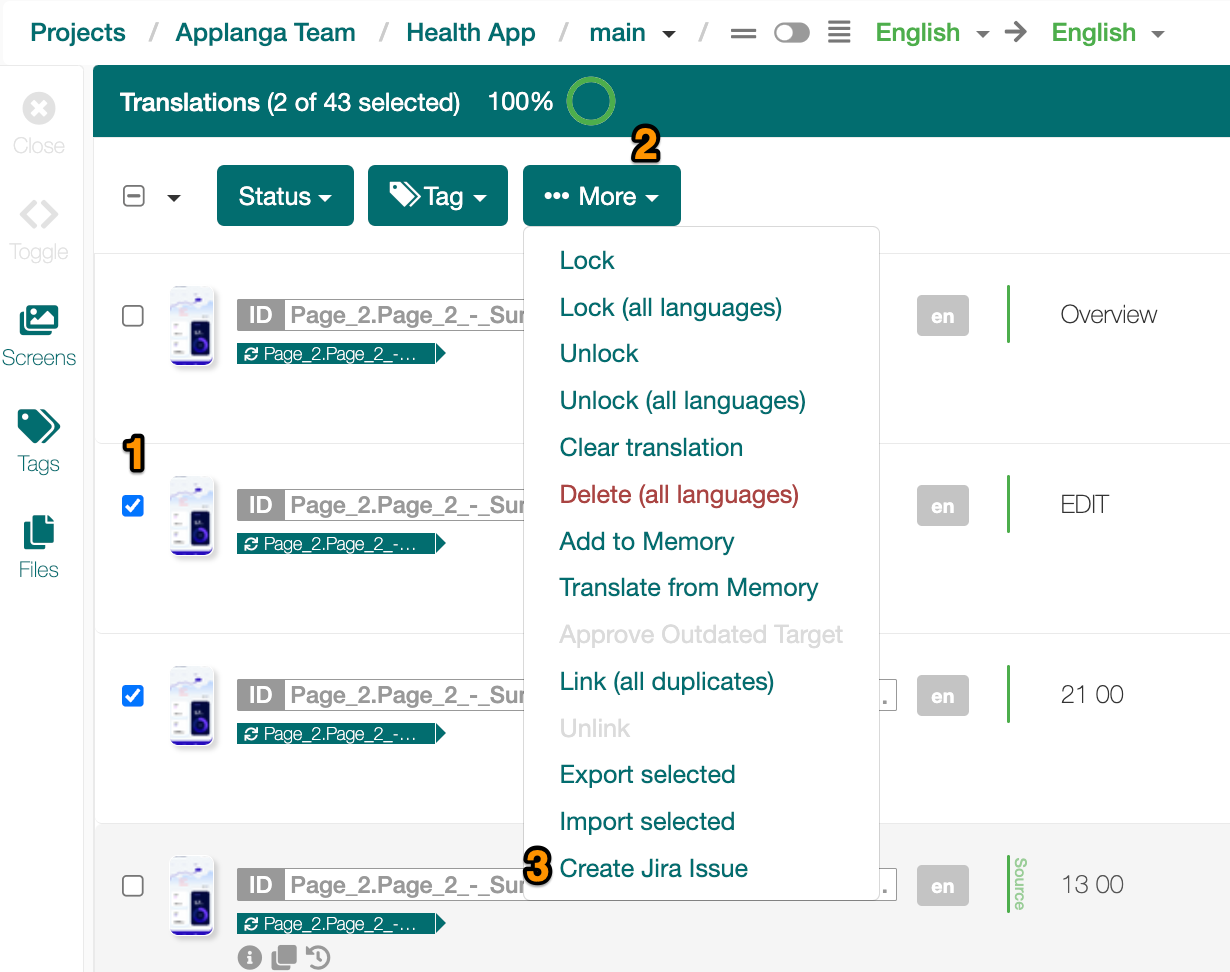
To create a Jira ticket, (1) mark all the keys you want to include in the issue report, (2) click the More button at the top of the list and (3) chose Create Jira Ticket from the dropdown menu.
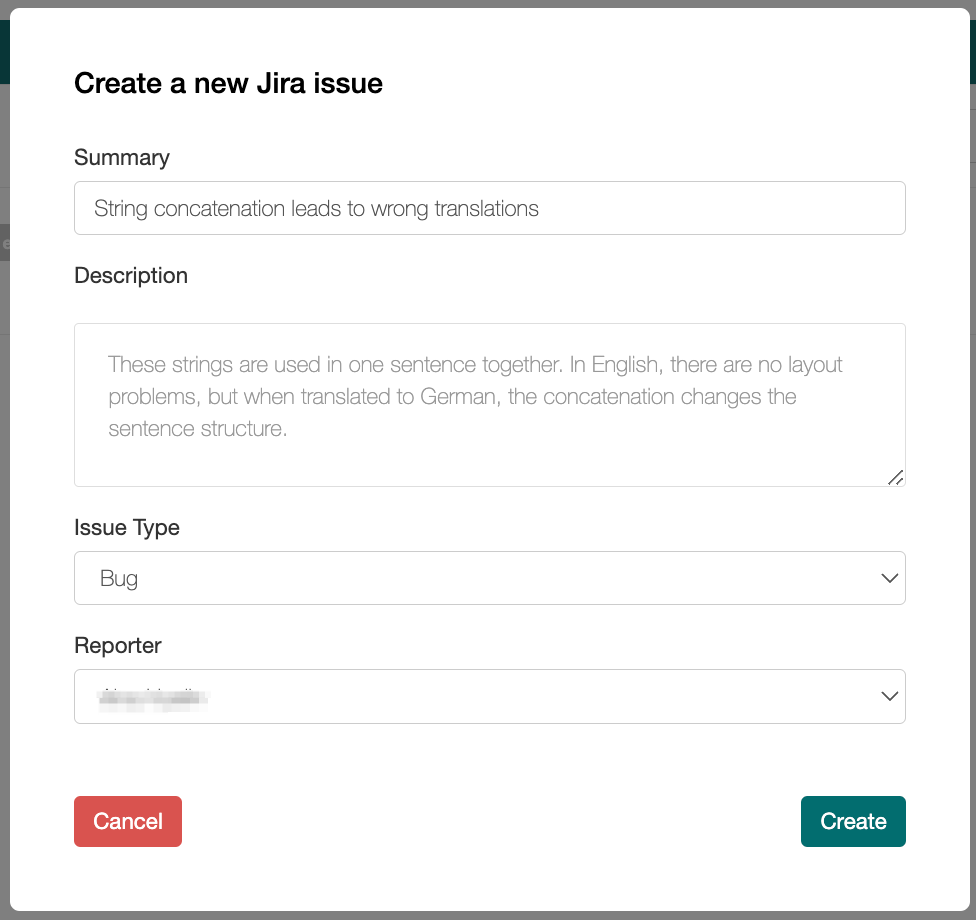
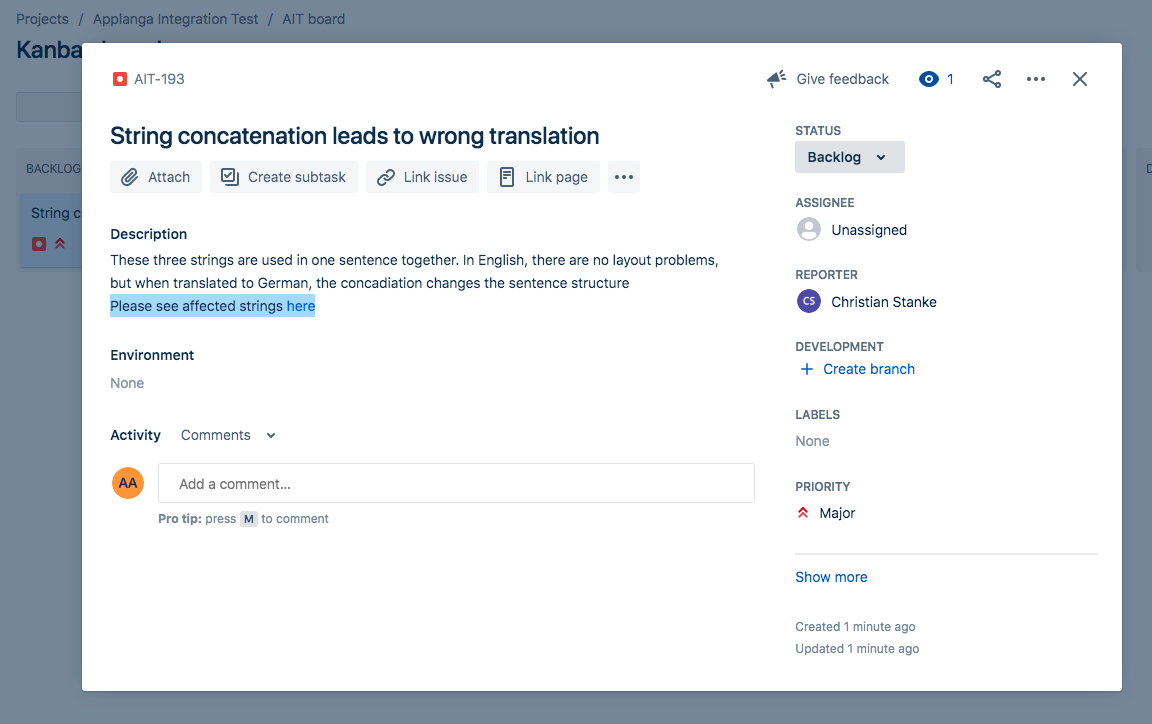
This will lead to the ticket creation pop-up where ticket details can be entered. The summary and the description are mandatory fields. The issue type and the reporter will be preselected as per your GL Strings Jira integration configuration.
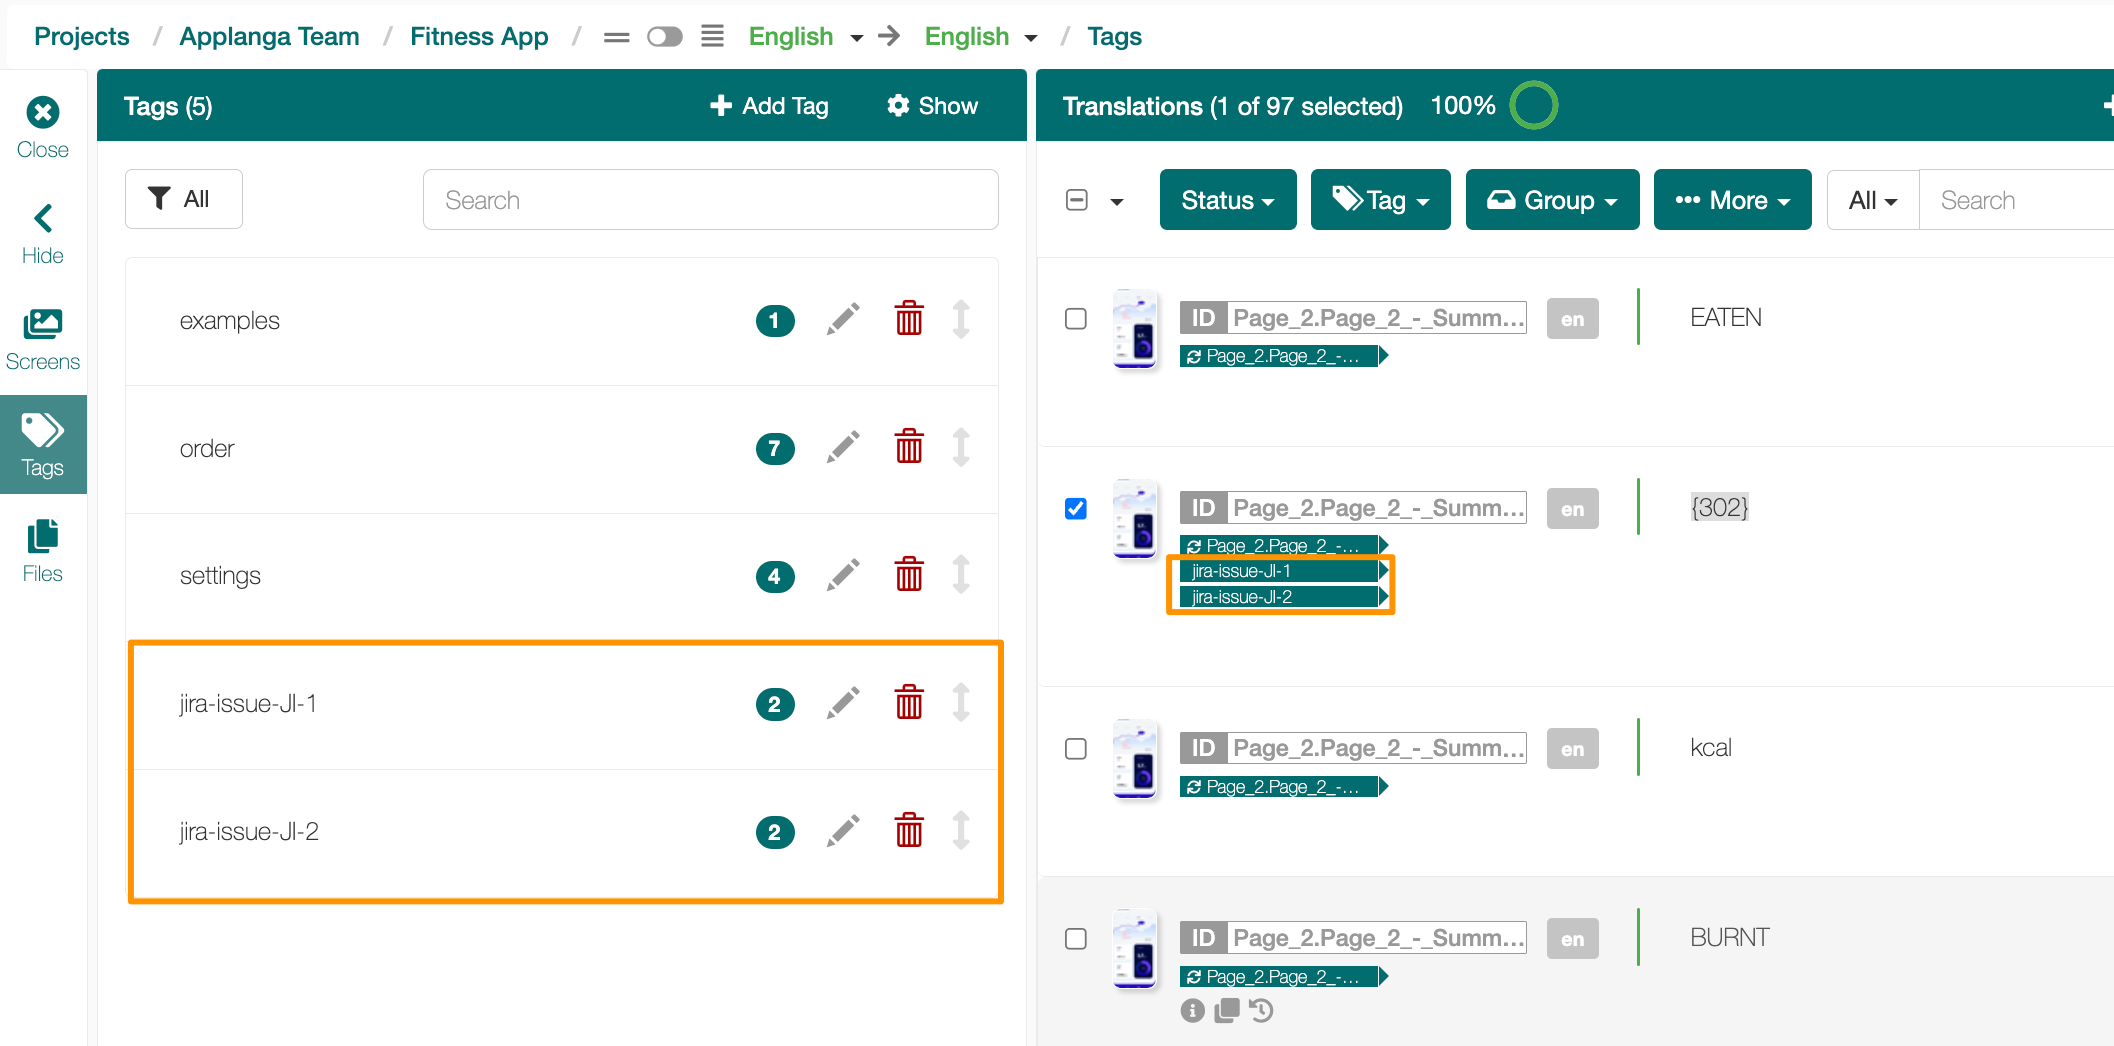
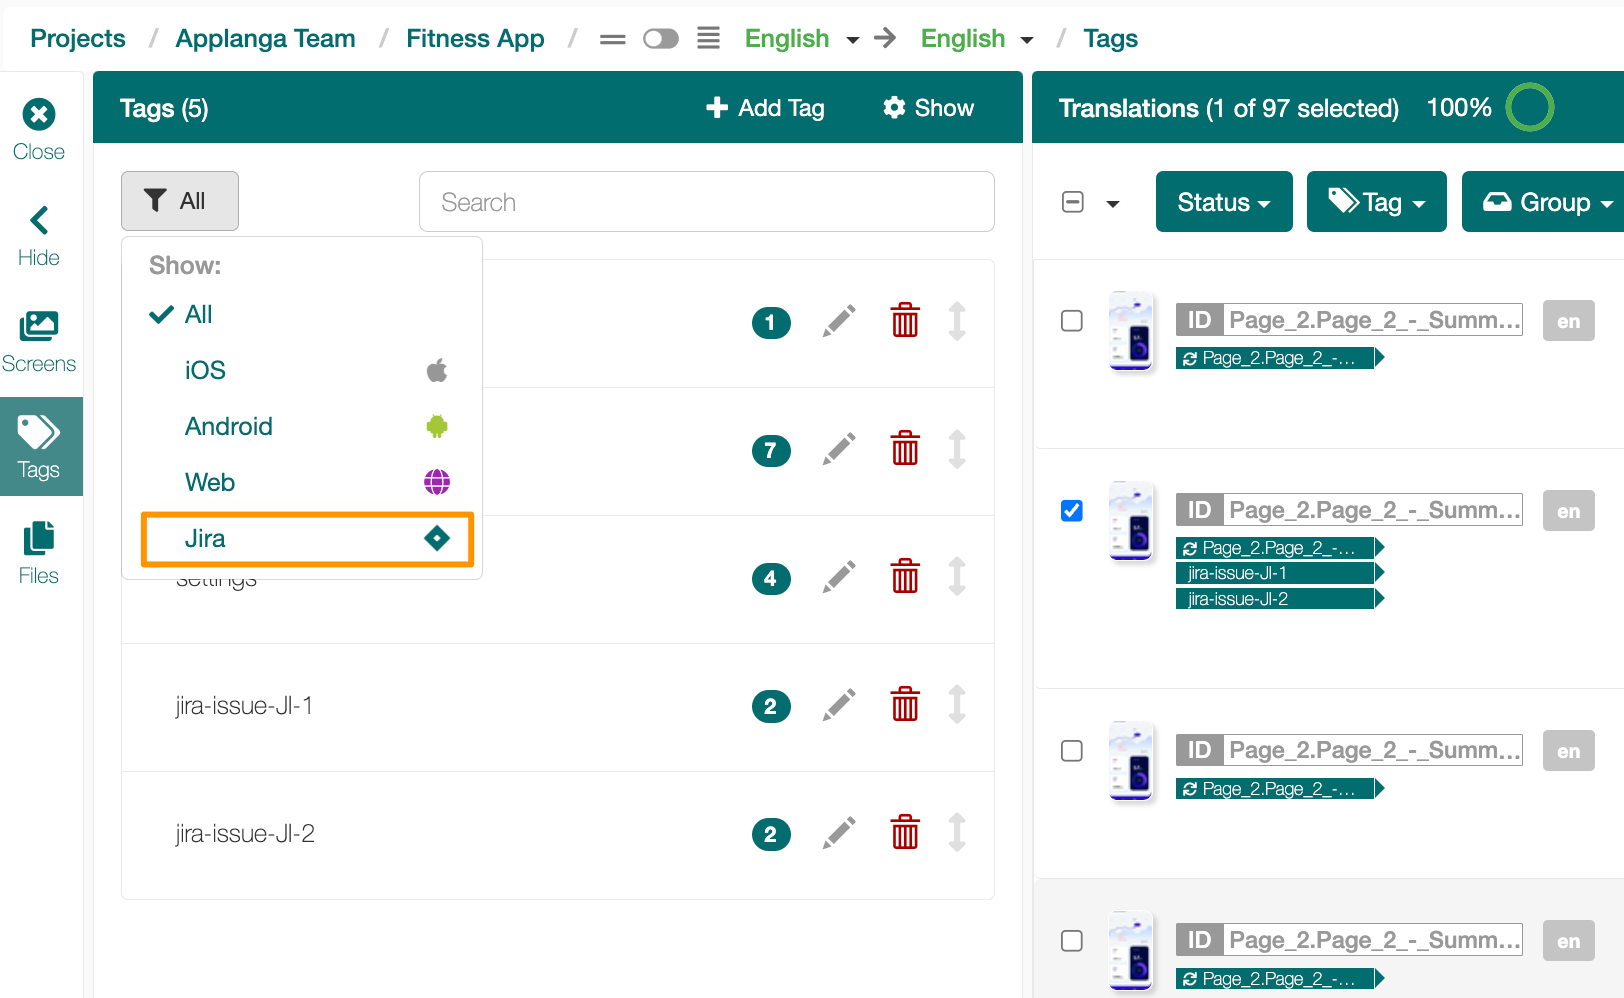
On GL Strings, Jira issues behave like tags. You can find all your Jira issues in the tag list. They will be automatically assigned to the tag category “Jira”, so if you want to see only your Jira tickets in the list, use the filter on the top left of the tag list and filter for Jira.
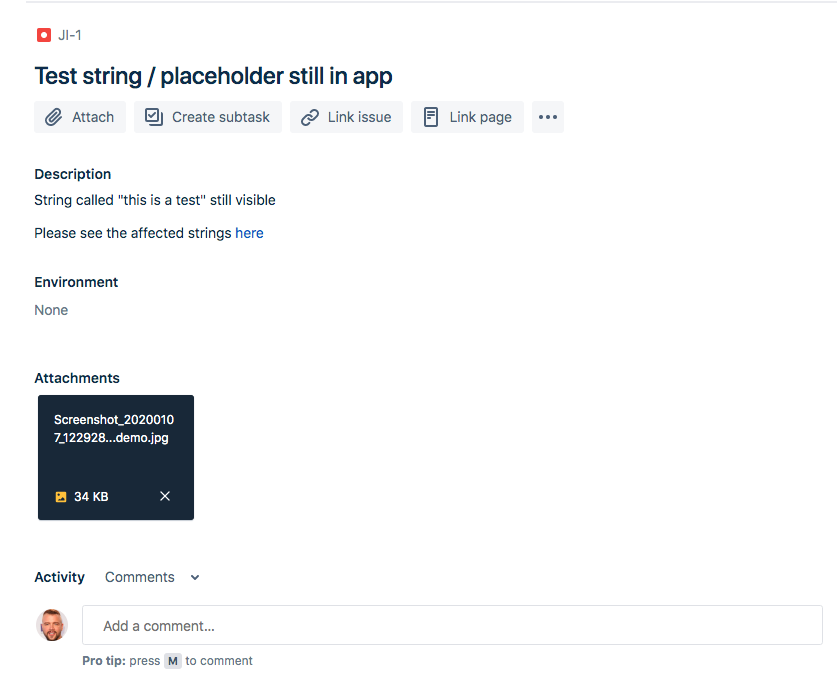
On Jira, the ticket will automatically appear in the configured Jira project. Additionally to all the information added to the ticket during the creation process, it will carry an additional sentence in the description field. This additional sentence will contain a link back to the GL Strings dashboard with the affected strings already selected.
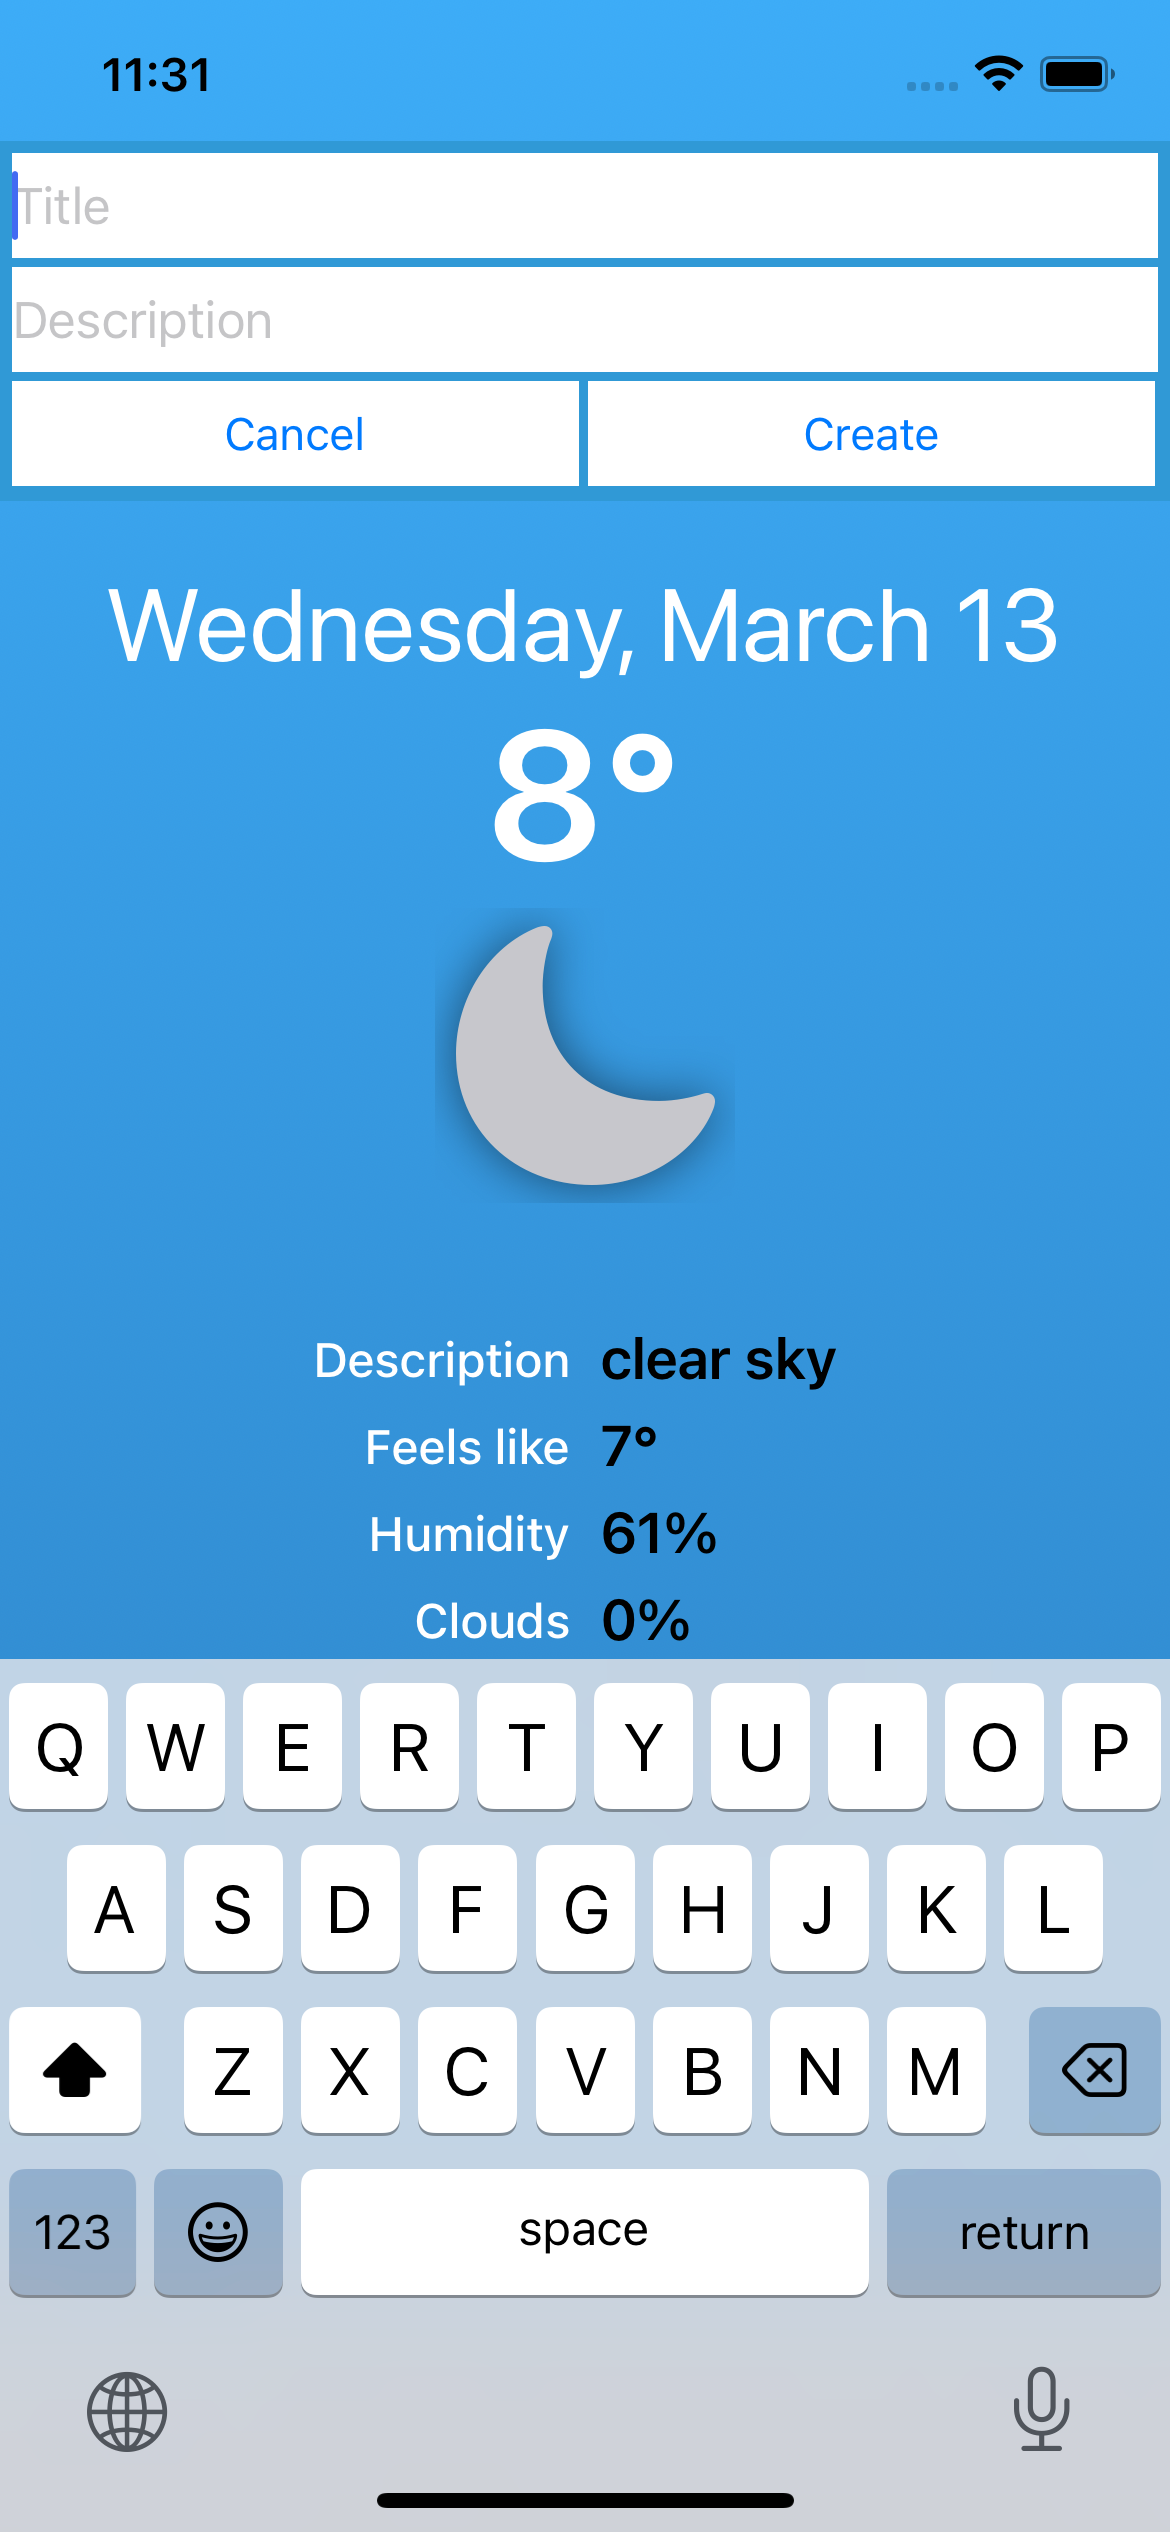
With the GL Strings Jira integration configured, Jira tickets can be created from inside the mobile app during the testing process. The Draft Mode overlay allows teams to create Jira tickets that include the issue title, the issue description, a screenshot and a link to the strings on GL Strings.
This way, whoever is working to resolve the Jira tickets has additional context; which part of the app and which strings/string IDs are affected while the process of gathering and reporting this information from the tester’s perspective is much easier compared to creating tickets manually.
When Draft Mode is enabled, swipe down with two fingers to activate the draft overlay. Press Create Issue and add a ticket title and an issue description
A Jira ticket created this way will automatically include a screenshot of the affected screen and a link to GL Strings that shows all strings found on that screen.
On GL Strings, a tag for the Jira ticket is created, the screenshot is attached to this tag, and all strings found on the screen when the ticket was created are tagged accordingly (note: not all strings might be found automatically).