

Branches allow for separate, independent versions of all content in GL Strings Projects.
The Branching feature is currently only available for Enterprise plans. The number of Project Branches you can create is determined by your account license. Please reach out to the GL Strings support team for more details.
A branch is one separate, independent version of all the content in your GL Strings project. Based on what’s included in your license, you can have a certain number of Branches. They can be pretty similar or differ greatly depending on your needs.
In the dashboard, you can switch between different Branches, create new Branches, and merge 2 Branches into each other. Some GL Strings features are branch-specific, while others work across all branches. Details on how Branching impacts GL Strings features can be found below.
All GL Strings integration options can be configured to point to a specific Branch of your GL Strings project. How you configure that depends on how Branches in your GL Strings project should mirror your application’s development processes, release management, or app environments. How an integration is configured to work with Branching is noted in the integration documentation section for each integration.
Among all Branches in your GL Strings project, one must be the Default Branch. The Default Branch can be selected in the Project Settings. The Default Branch is the one shown by default when accessing the Project in the dashboard
You will only have access to the Branching feature to the extent it is included in your license. Certain limits will apply.
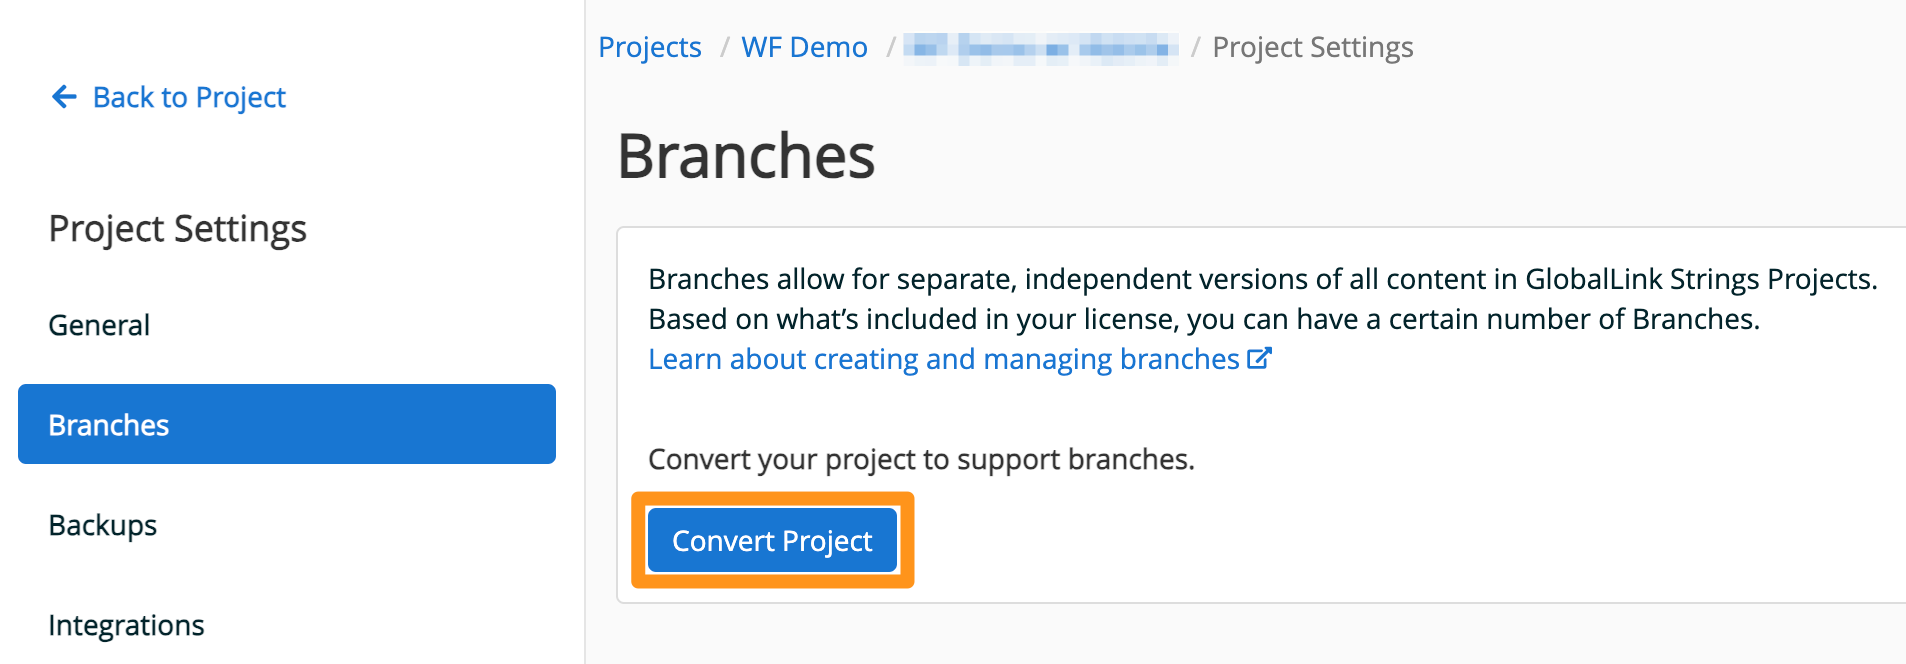
In the Project Settings, you can find Branches under its own category. For existing projects, activating Branching means migrating the project to a new setup. Please read the details in the next section below for more information on the migration process.
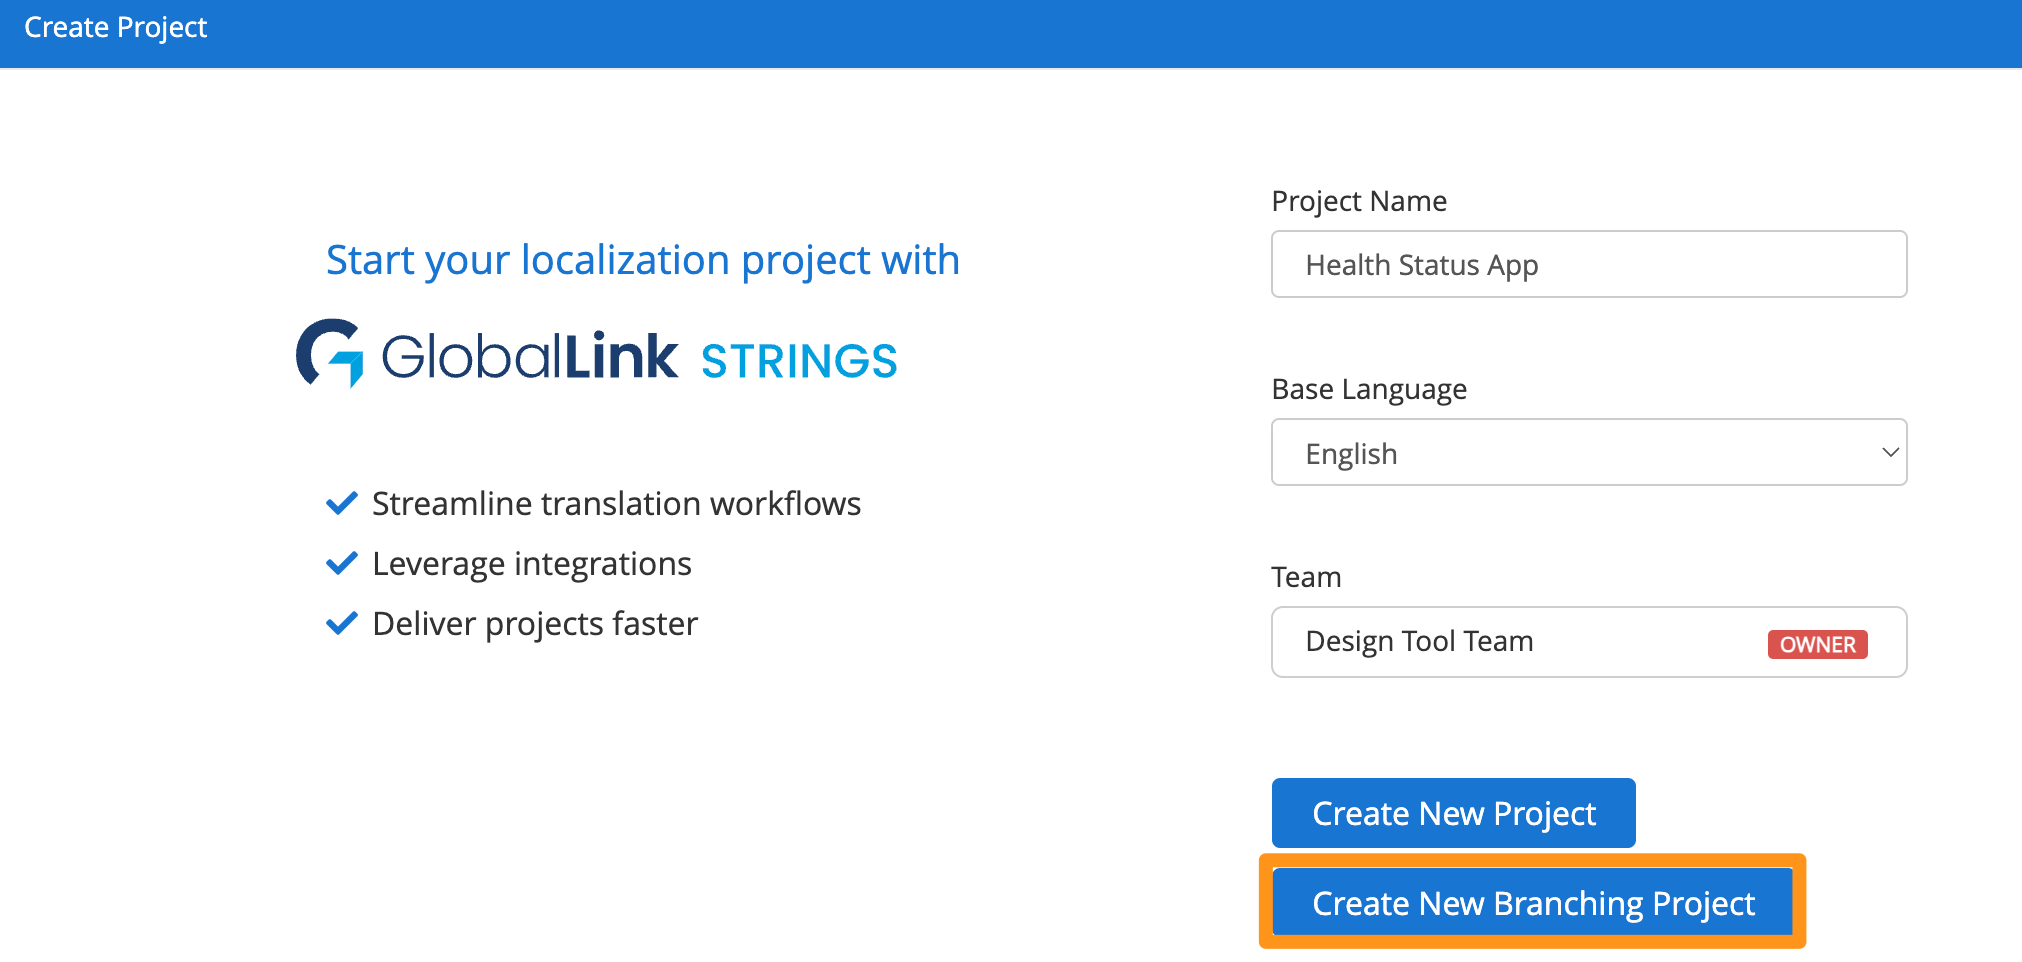
When creating new projects, there will be a checkbox for you to choose either a legacy configuration with Drafts or use Branching from the start.
Enabling the Branching feature for an existing Project means migrating the project from Drafts to Branches. This process can’t be undone!
In the migration process, 2 Branches are created. The “main” Branch will contain all the Project content besides Draft translations. The “Draft” Branch will contain the same content, but for every key that had a Draft in any language before, this Draft will be its new translation. Basically, on the “Draft” Branch all pre-existing Drafts are now published/target translations.
After starting the migration process, the project will no longer contain Drafts. Meaning principles like adding Drafts, import and order delivery as Drafts, publishing Drafts, or the Draft Mode will be replaced by updating the translation on the “Draft” Branch, imports and deliveries into the “Draft” Branch, merging the “Draft” Branch into “master” and configure the SDK integration to show content from the “Draft” Branch.
All integrations in a project with Branching can be configured to point to a specific Branch for either upload, download, or both. If no Branch is configured in an integration, but the Project is migrated to Branching, all integrations without a specific configuration will point to the "main" Branch, to keep backwards compability with old integrations.
For example, if you have a mobile app integrated with the GL Strings SDK and your users still have a version of your app installed without a Branching configuration in the SDK, if you want to push Over-the-air updates to these users, you have to make updates to your new "main" Branch.
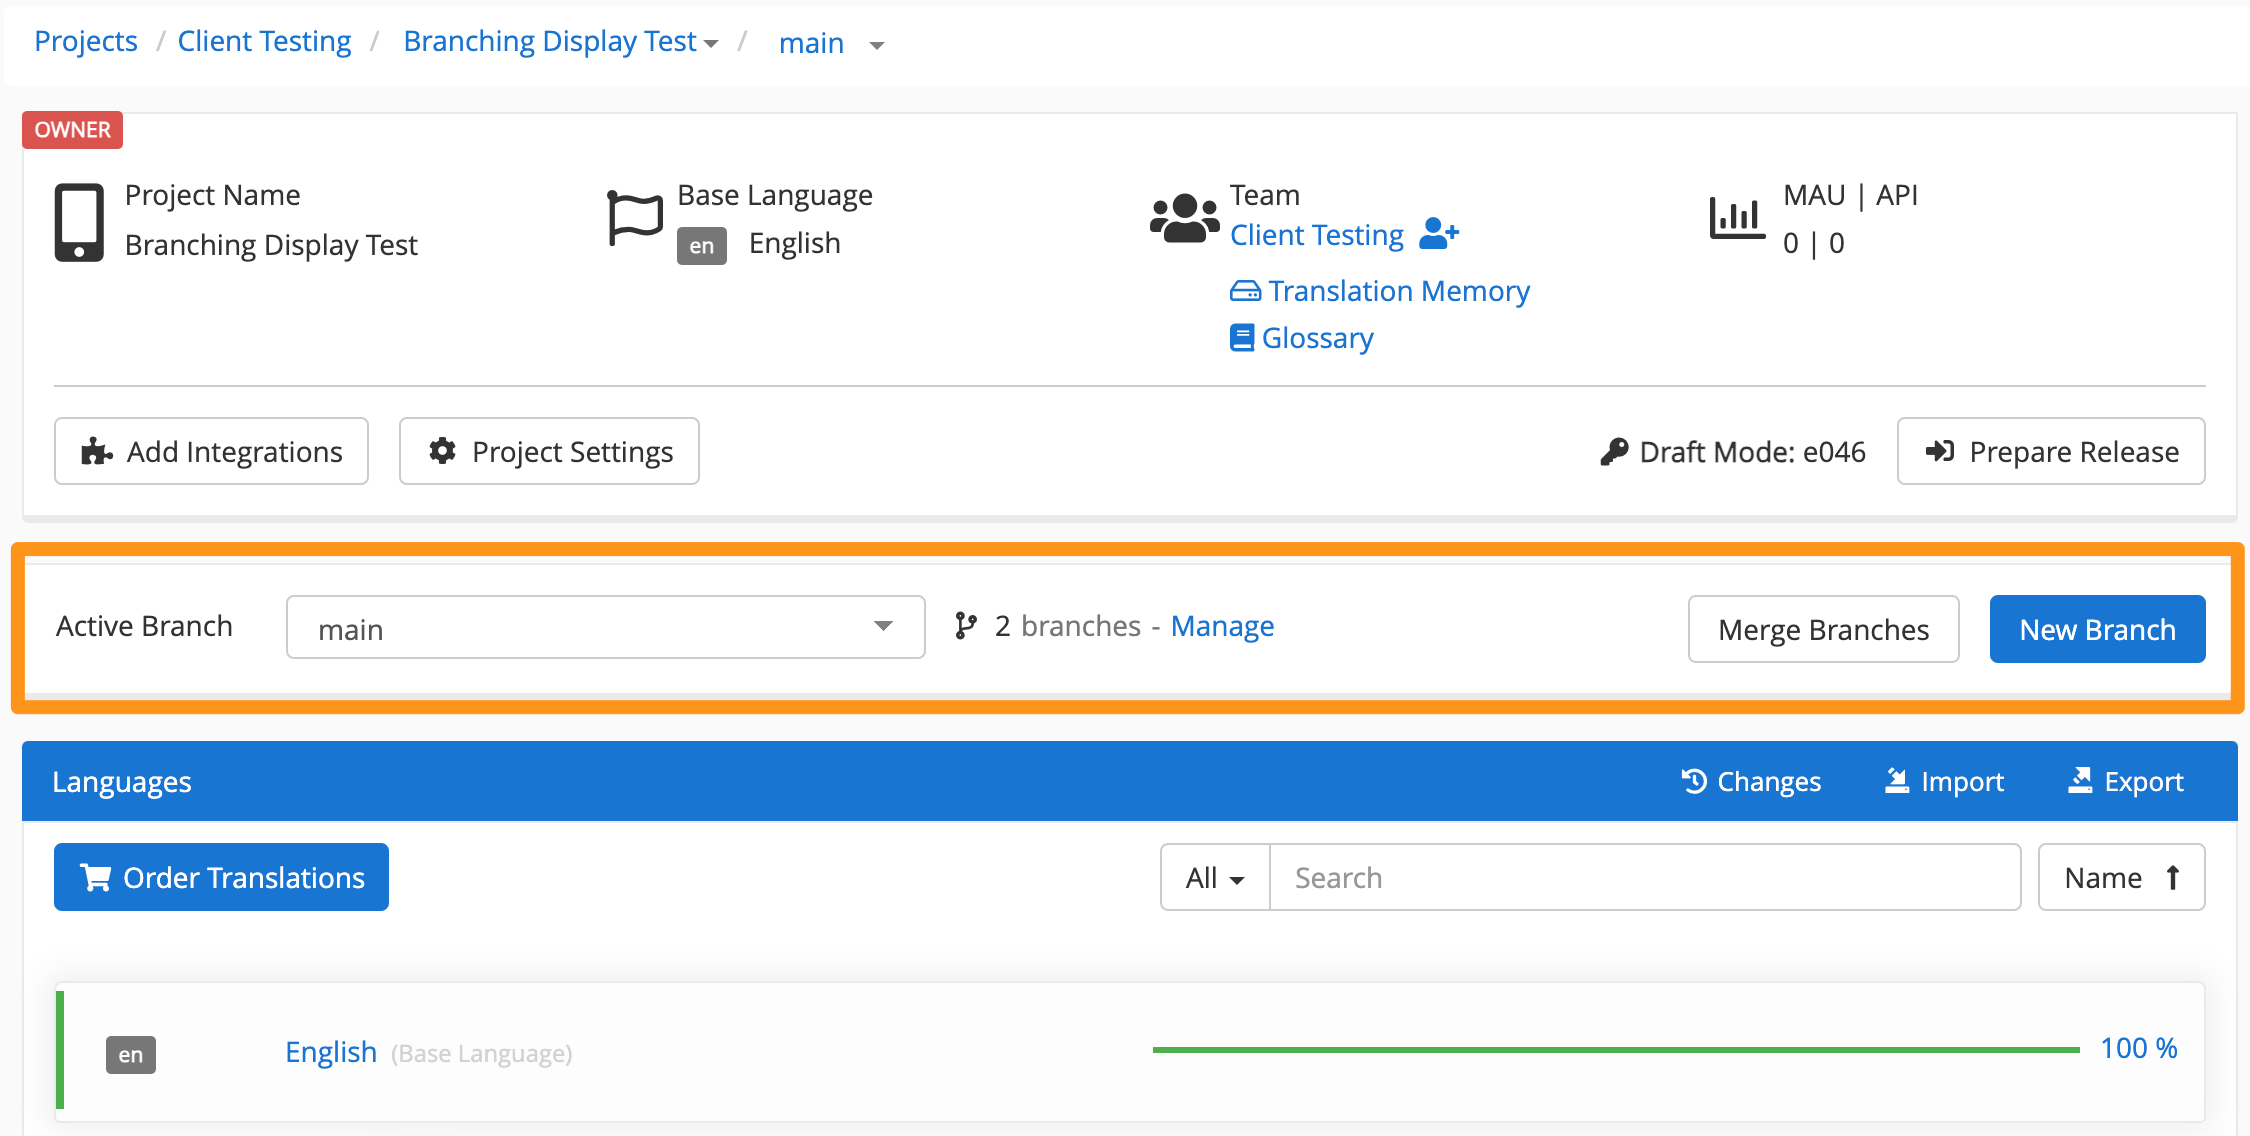
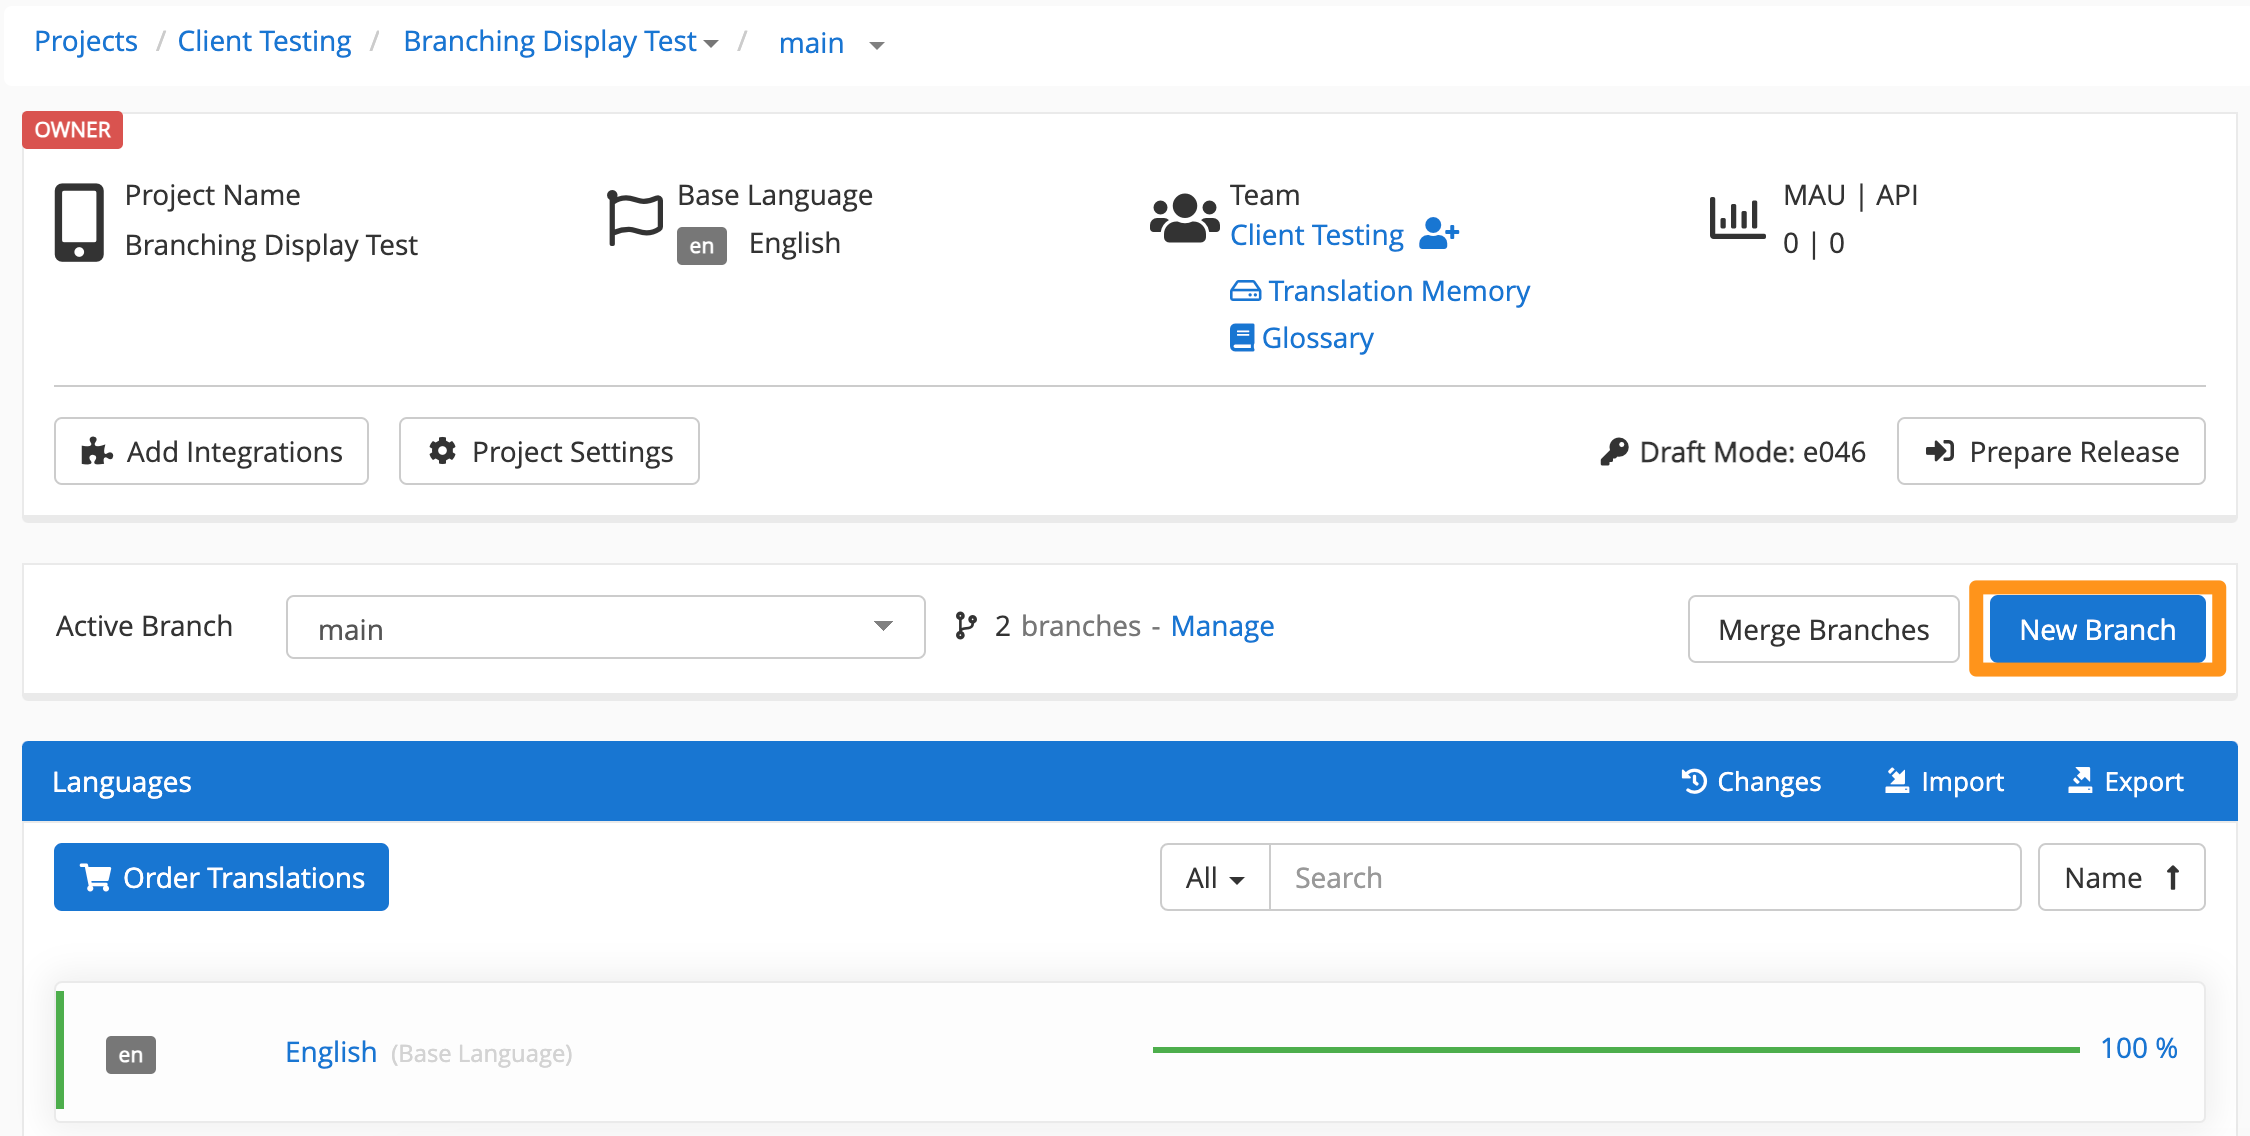
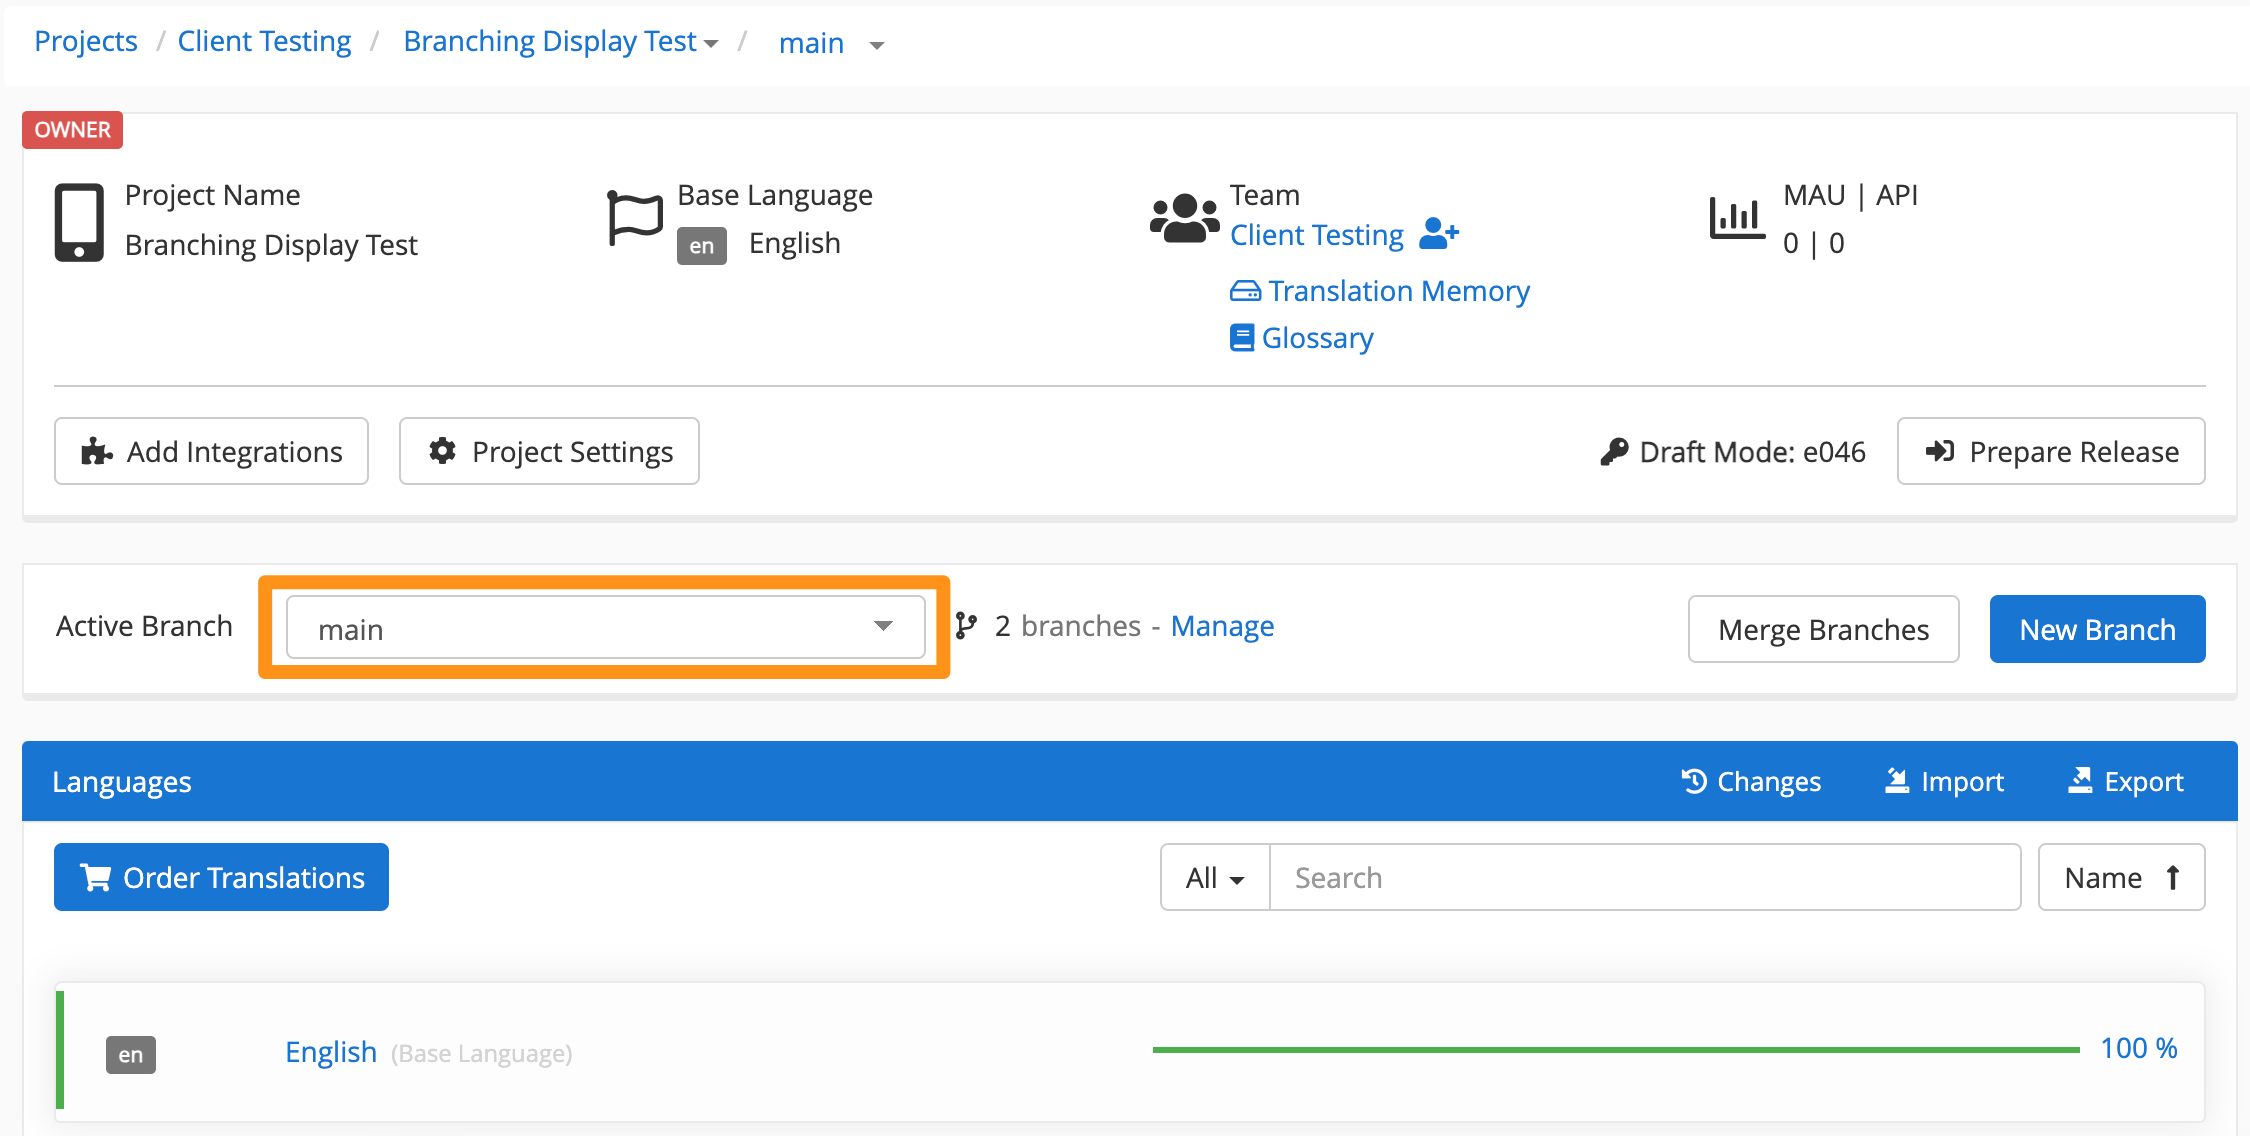
Branches can be created on the Project Overview page.
Alternatively, new Branches can be created in the Project Settings.

To create a new Branch, you will need to name the Branch and select a source of content for the Branch.
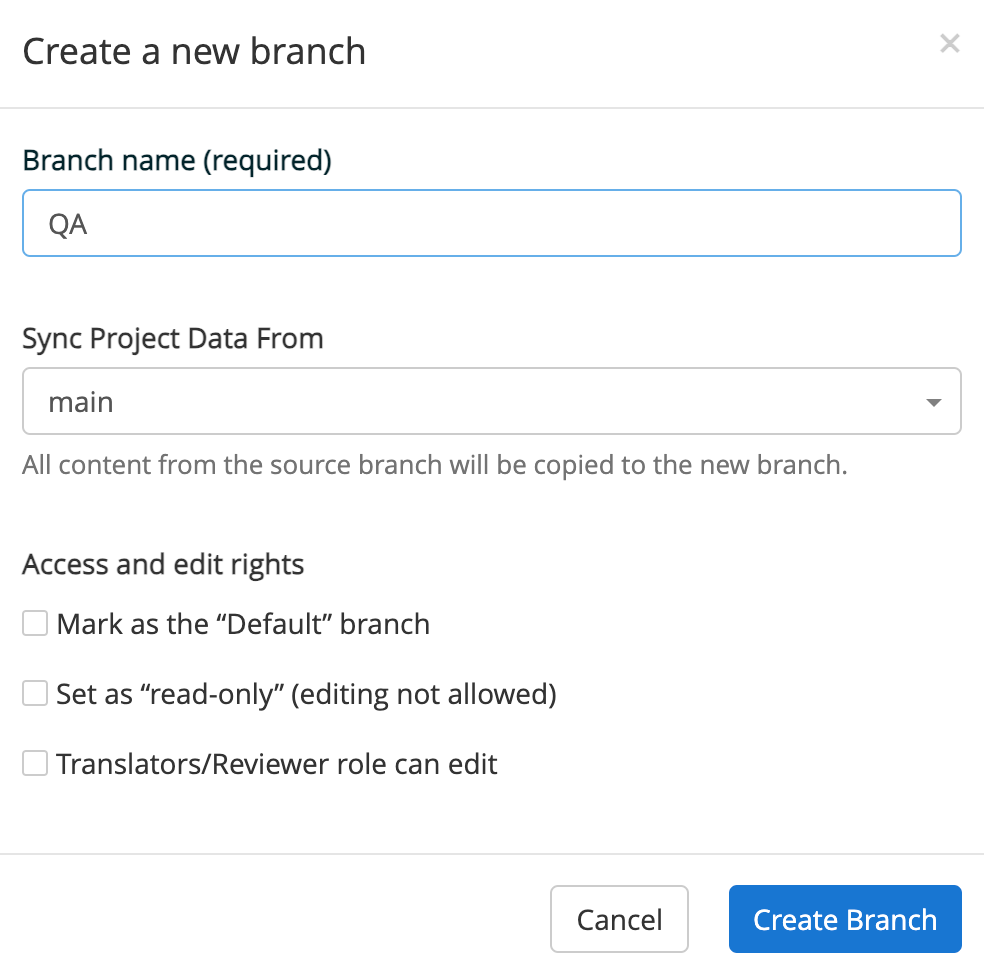
Specifications for Branch names:
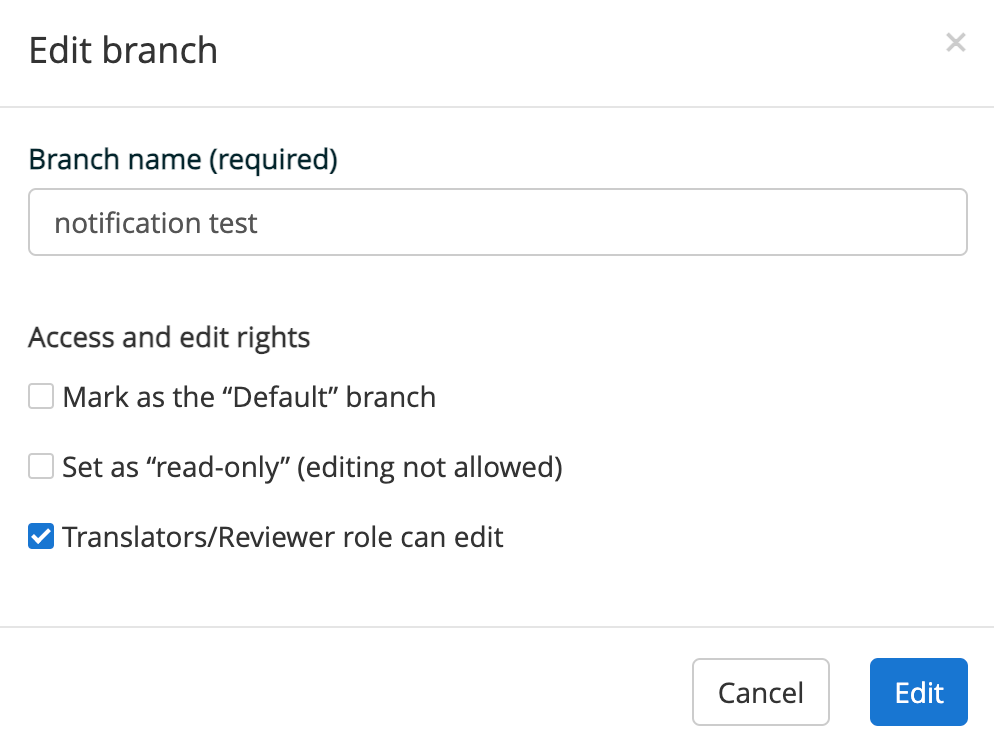
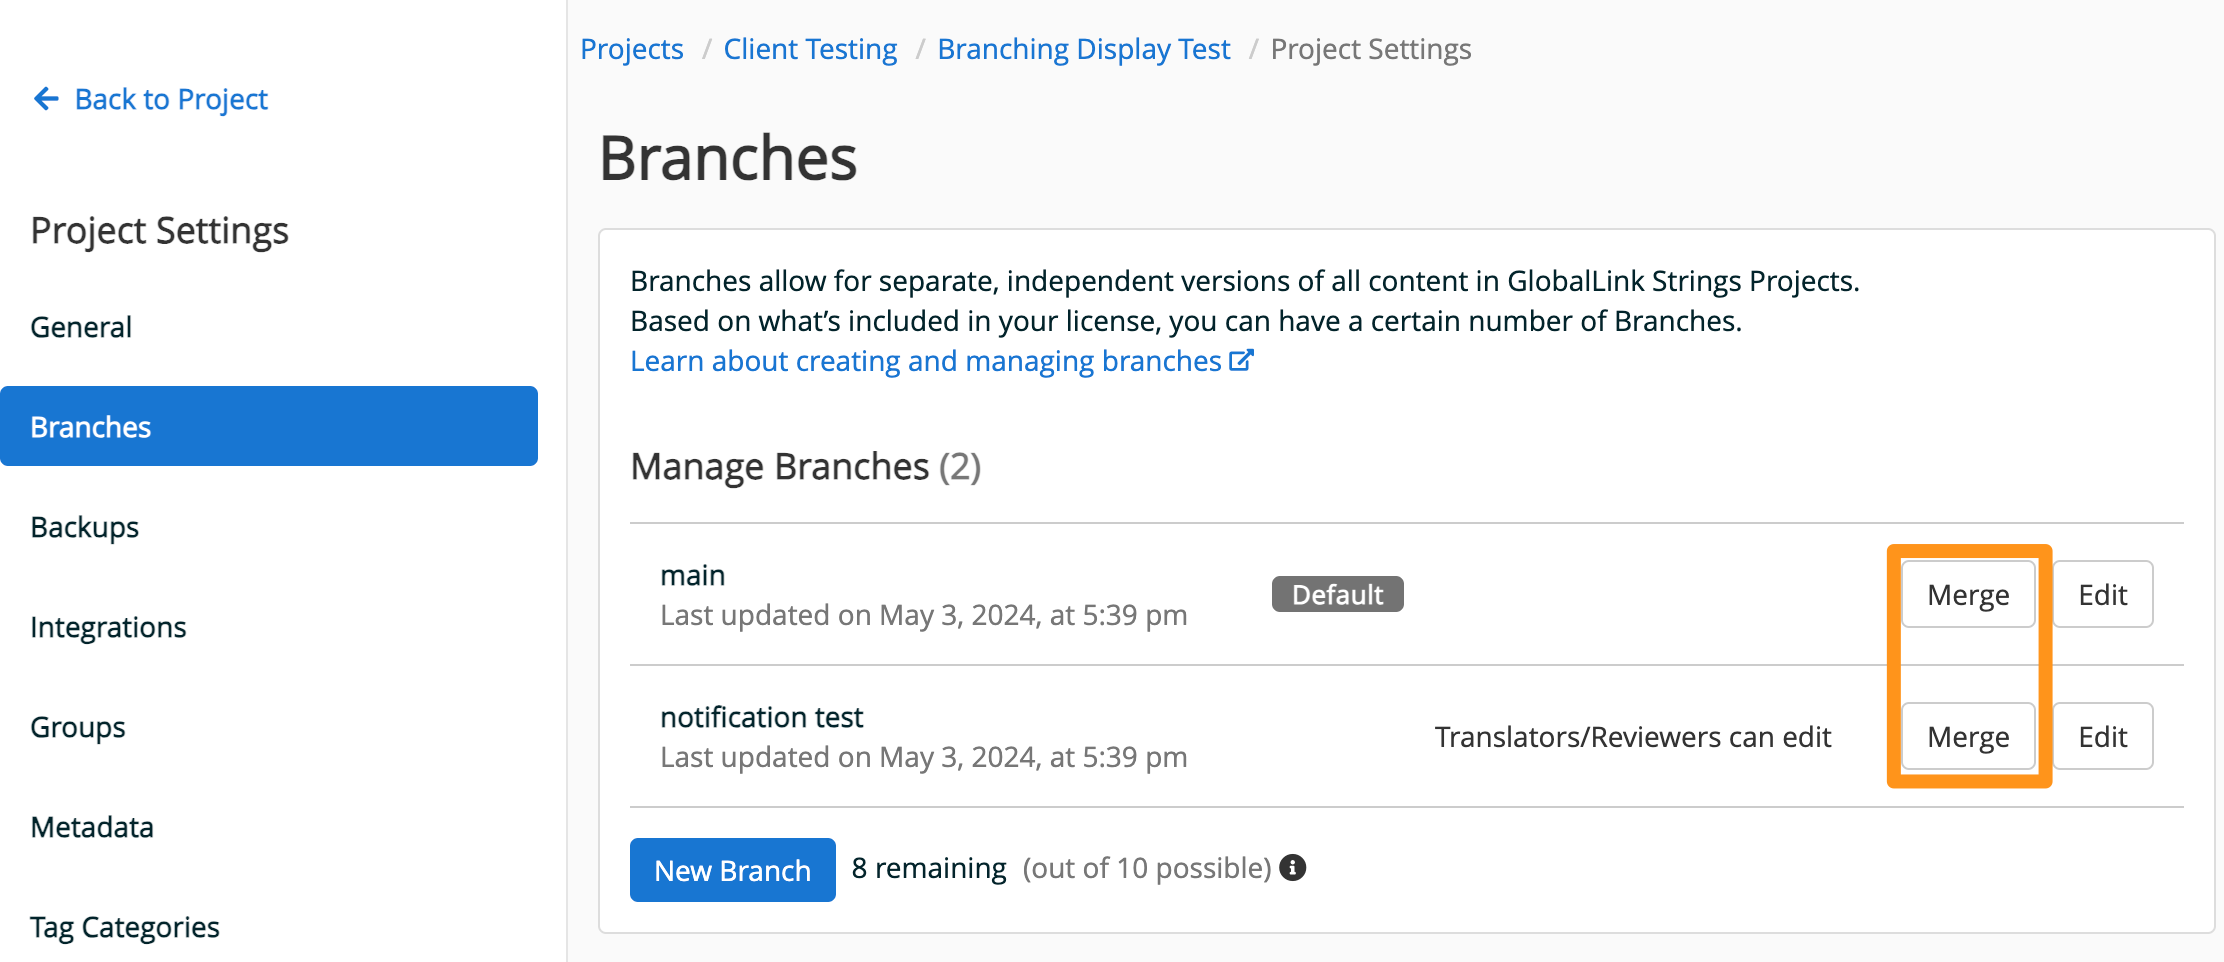
To change an existing Branch name, change the default branch, or change the edit permissions click Edit.
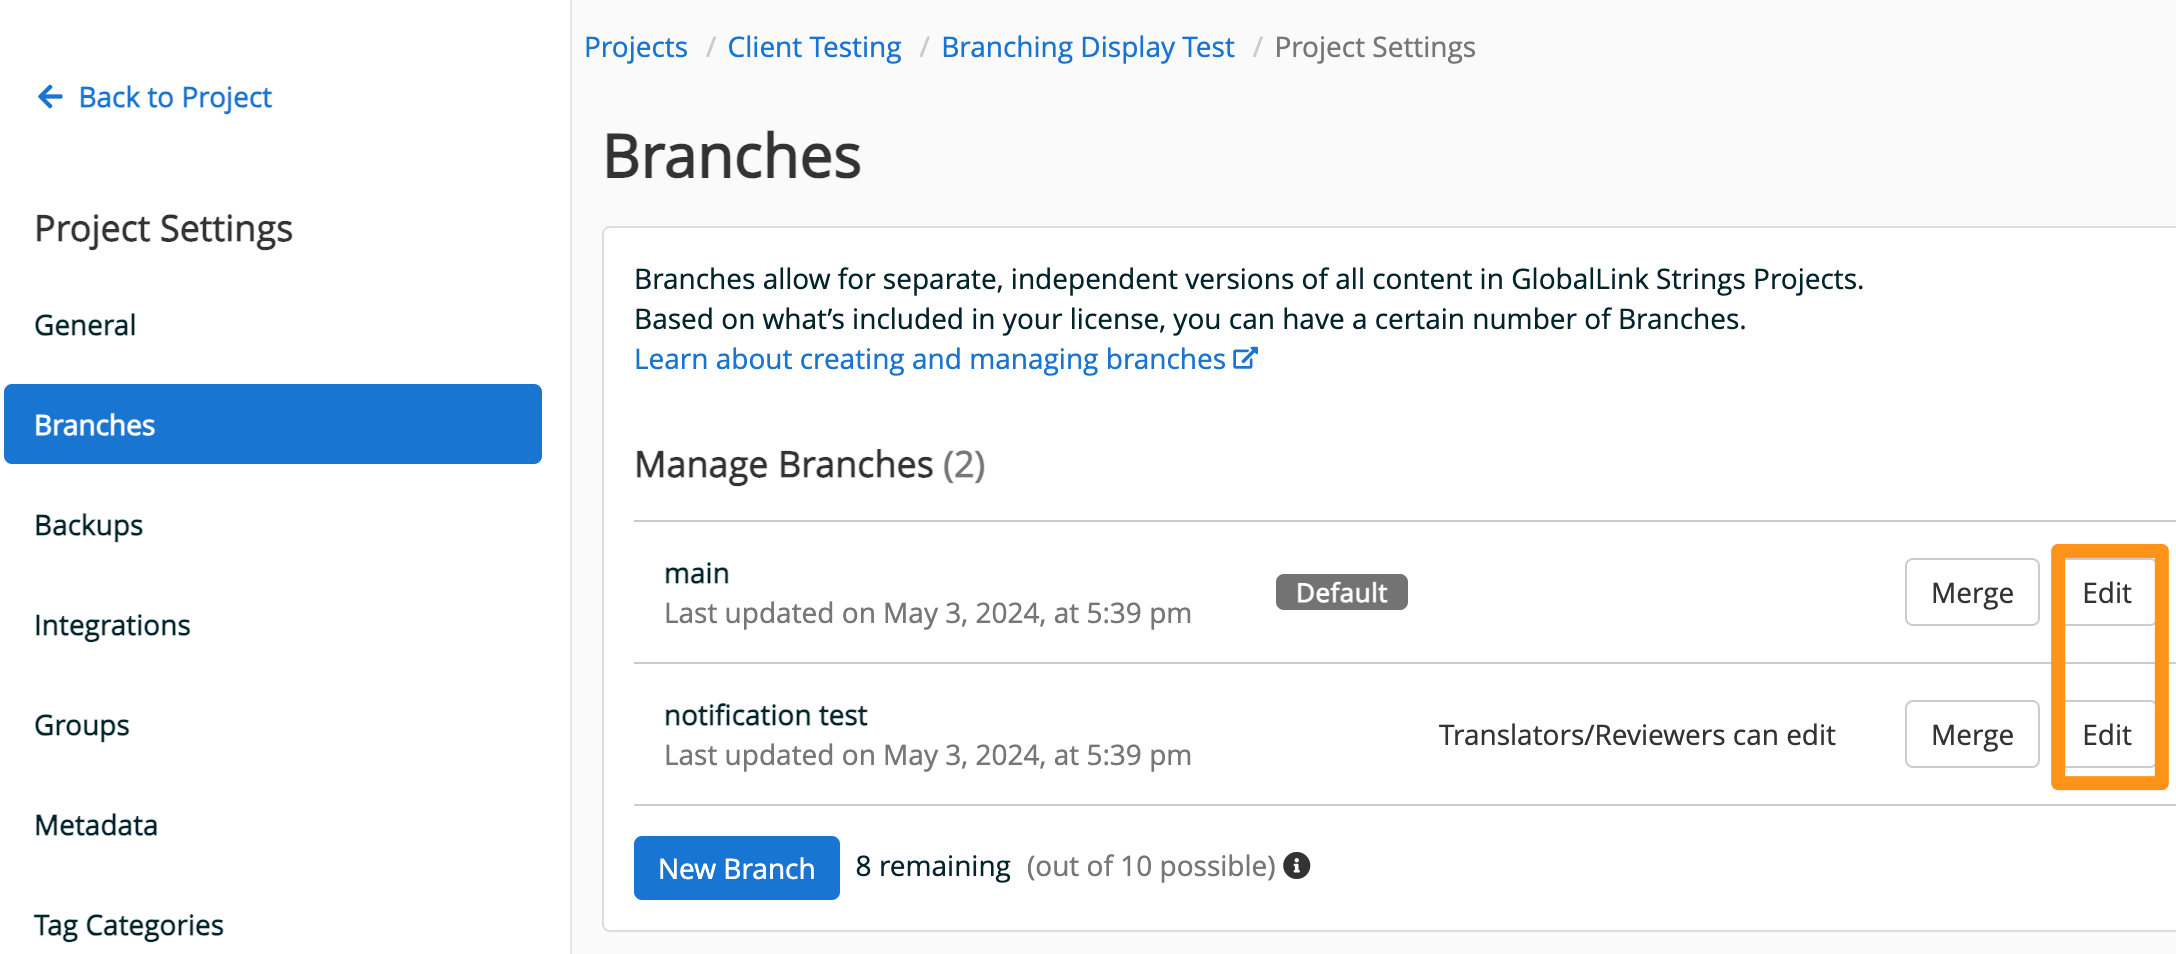
Branches cannot be deleted.
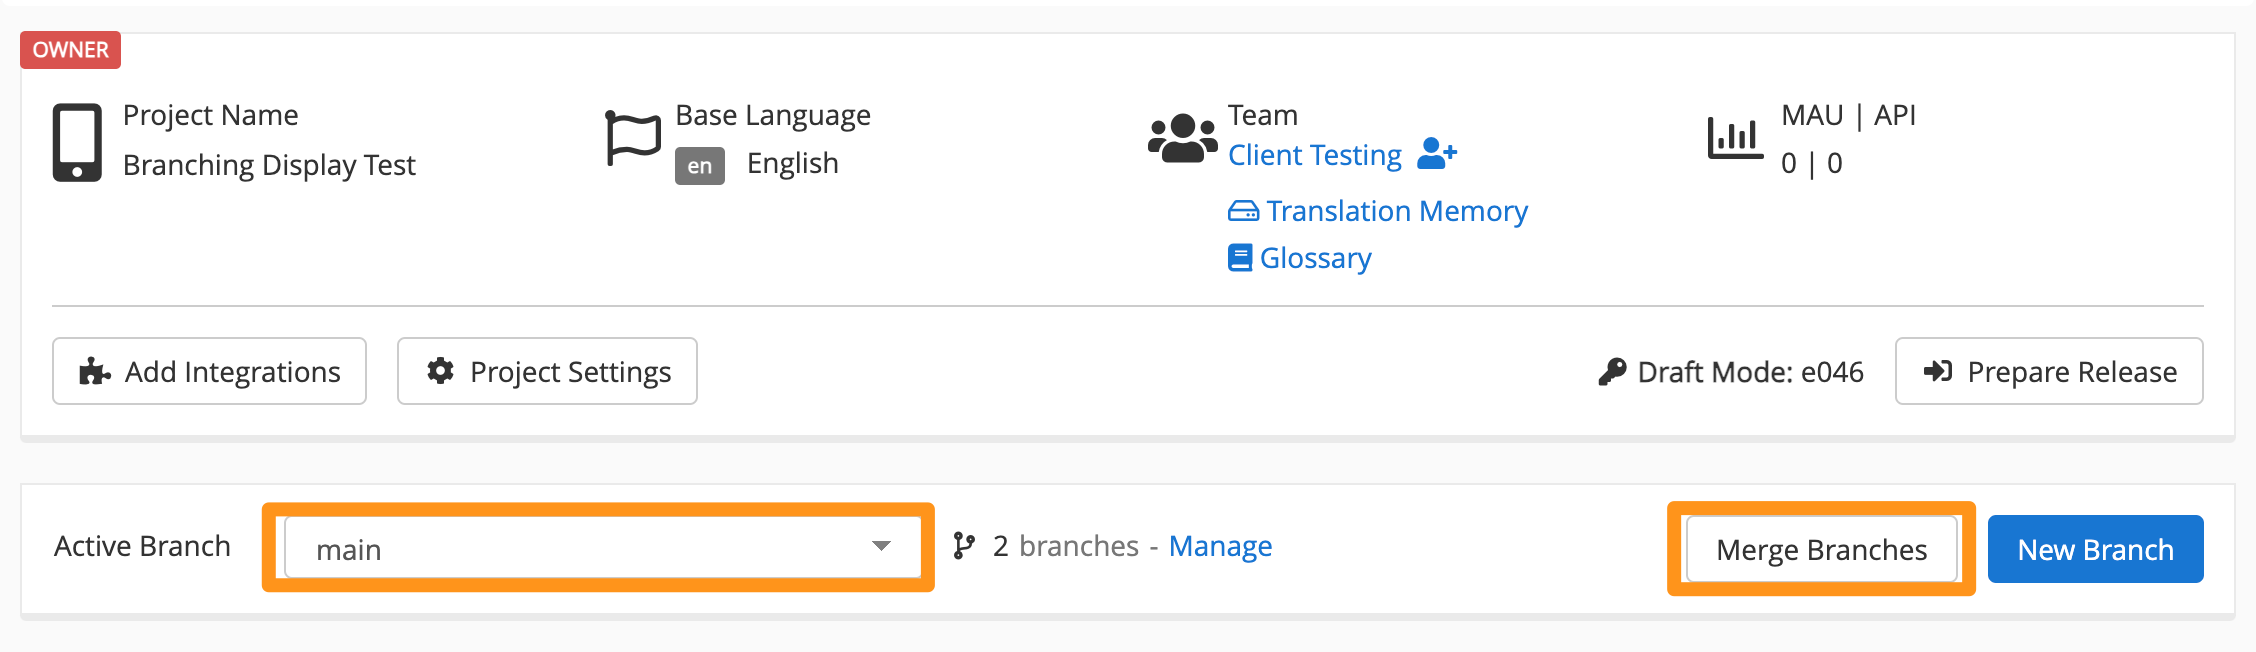
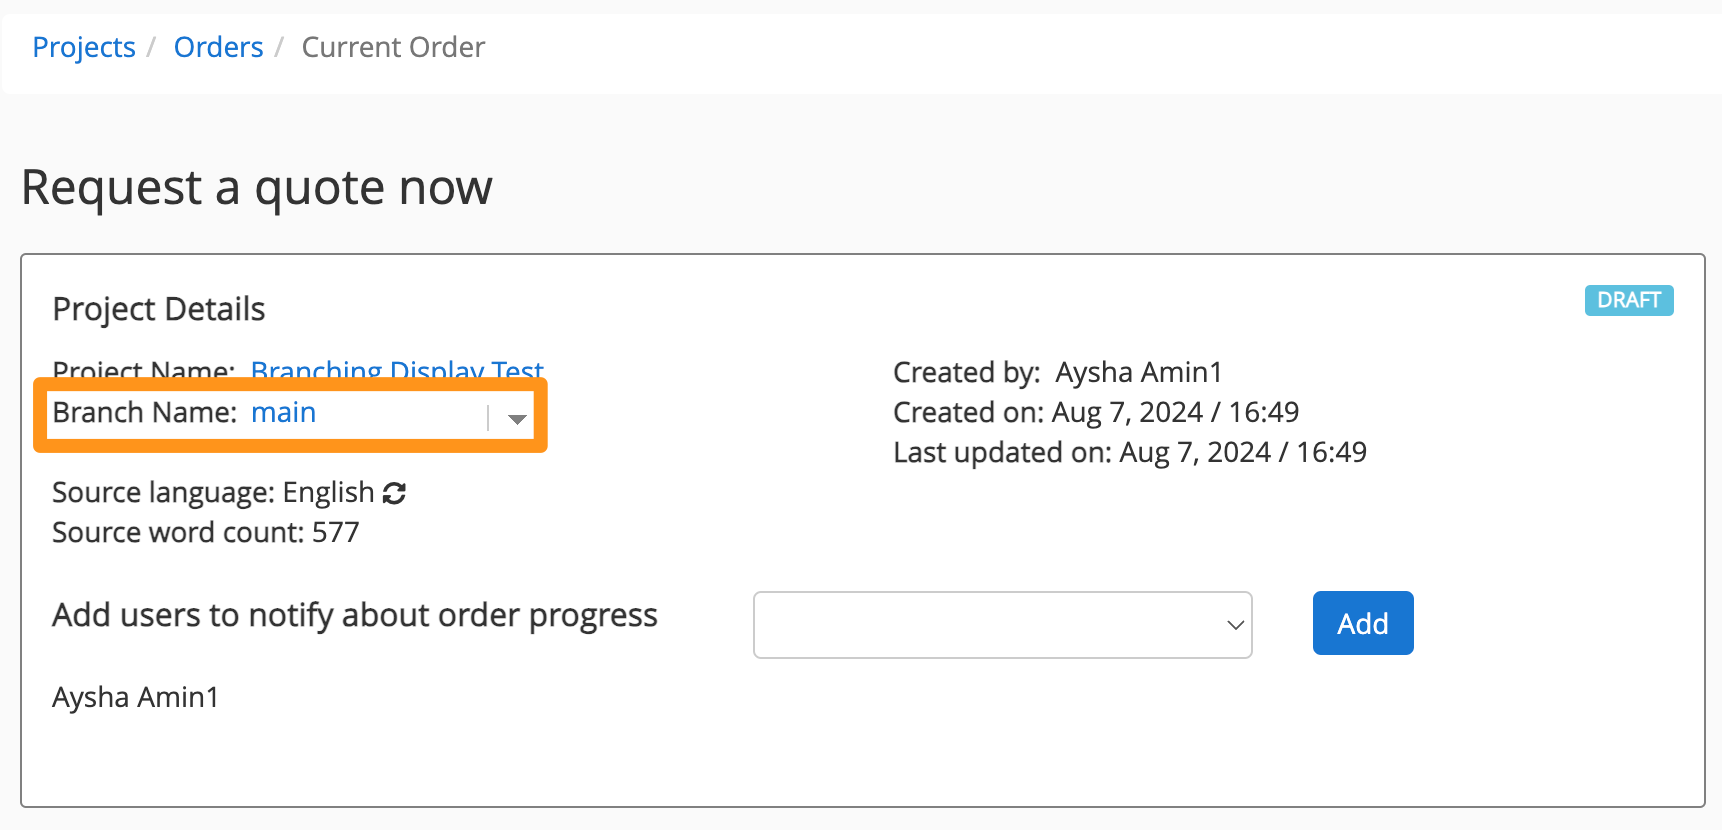
You can see the currently selected Branch on the Project Overview Page. The Branch you see by default is the one set as Default Branch in the Project Settings. To change the selected Branch use the dropdown menu on the Project Overview page.
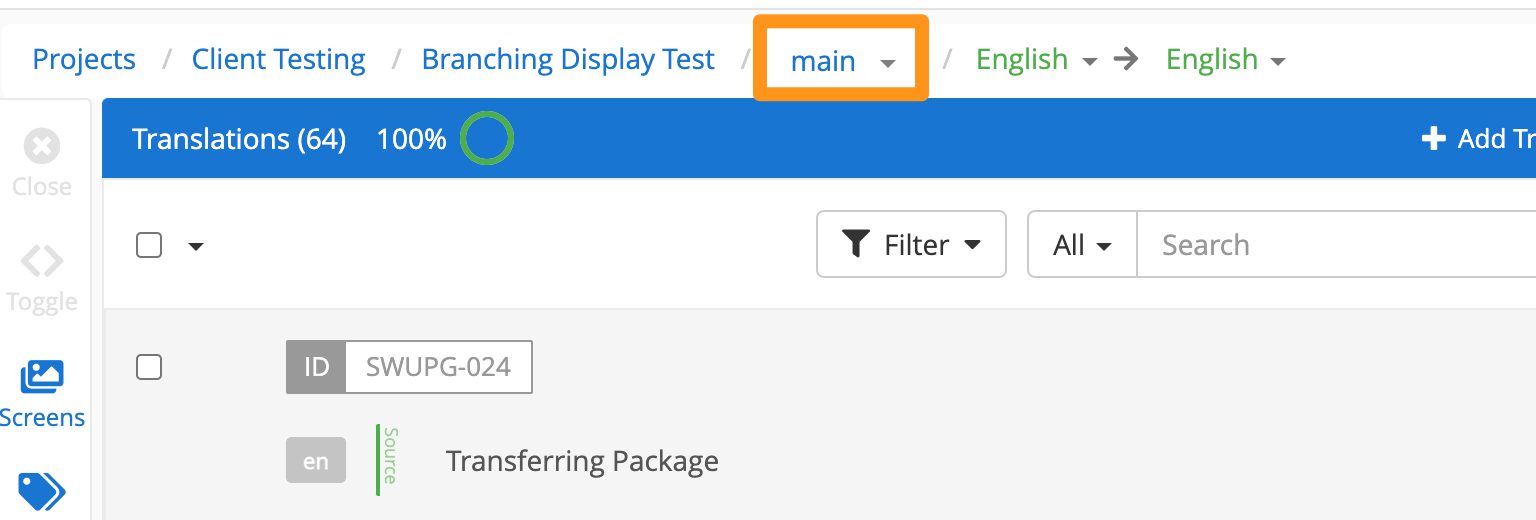
Alternatively, in the Editor you can switch the current Branch via the breadcrumbs.
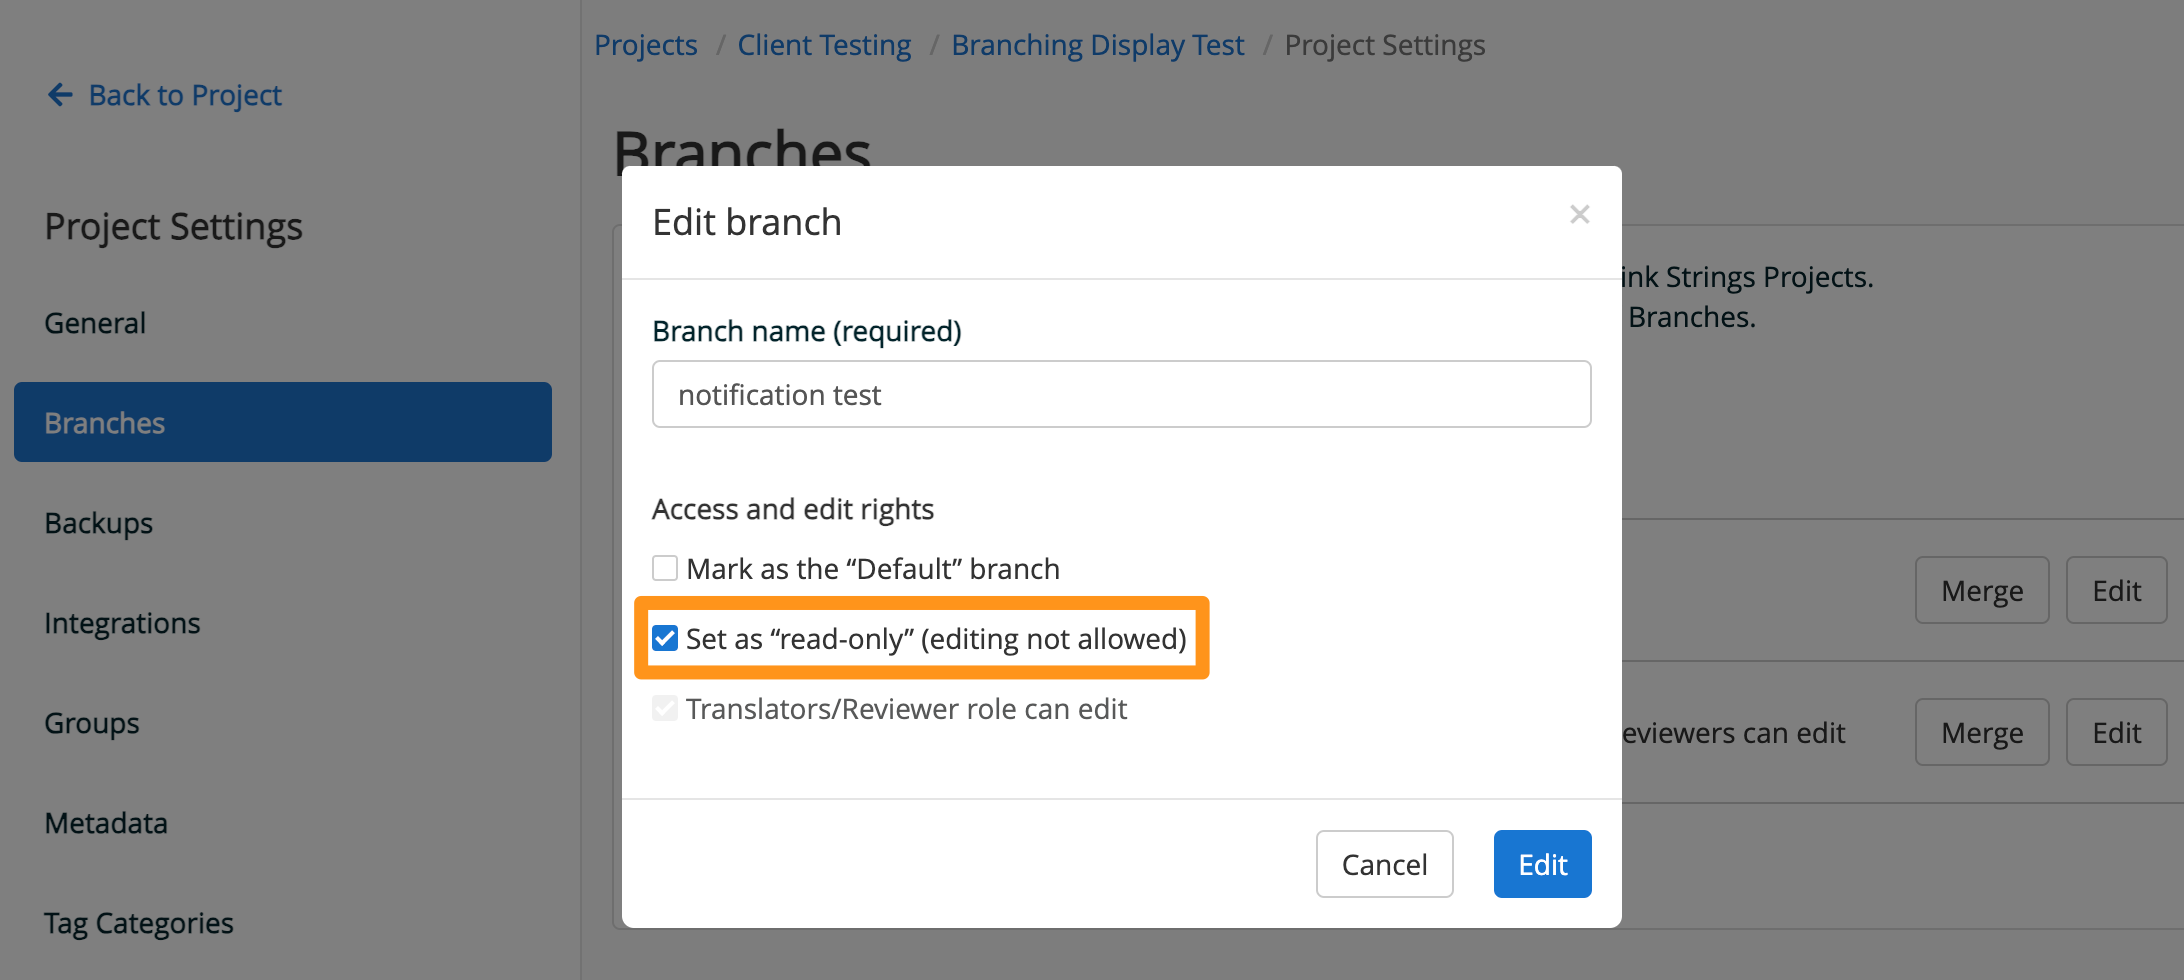
To prevent changes to specific Branches, you can designate the Branch as Read-Only. Branches with the Read-Only setting enabled cannot be edited in any way. Users will not be able to change, add, or remove any strings, source, translations, tags, screens, statuses, metadata, or languages. Additionally, orders cannot be created, files cannot be imported, and the Read-Only Branch cannot be on the recieving end of a merge. Users can still export translations, integrate with the Branch, and merge the Read-Only Branch into another Branch. Designating a Branch as Read-Only can be accomplished in the Project Settings by clicking Edit and selecting the Read Only checkbox.
Permission to edit content within Branches sits at a user role level. Users that are granted access to branches will have the same type of access in all of them. The only additional difference for Projects with Branching is that it can be defined on which Branch users with the Translator/Reviewer role can make edits to translations. This can be accomplished in the Project Settings by clicking Edit then selecting the checkbox.

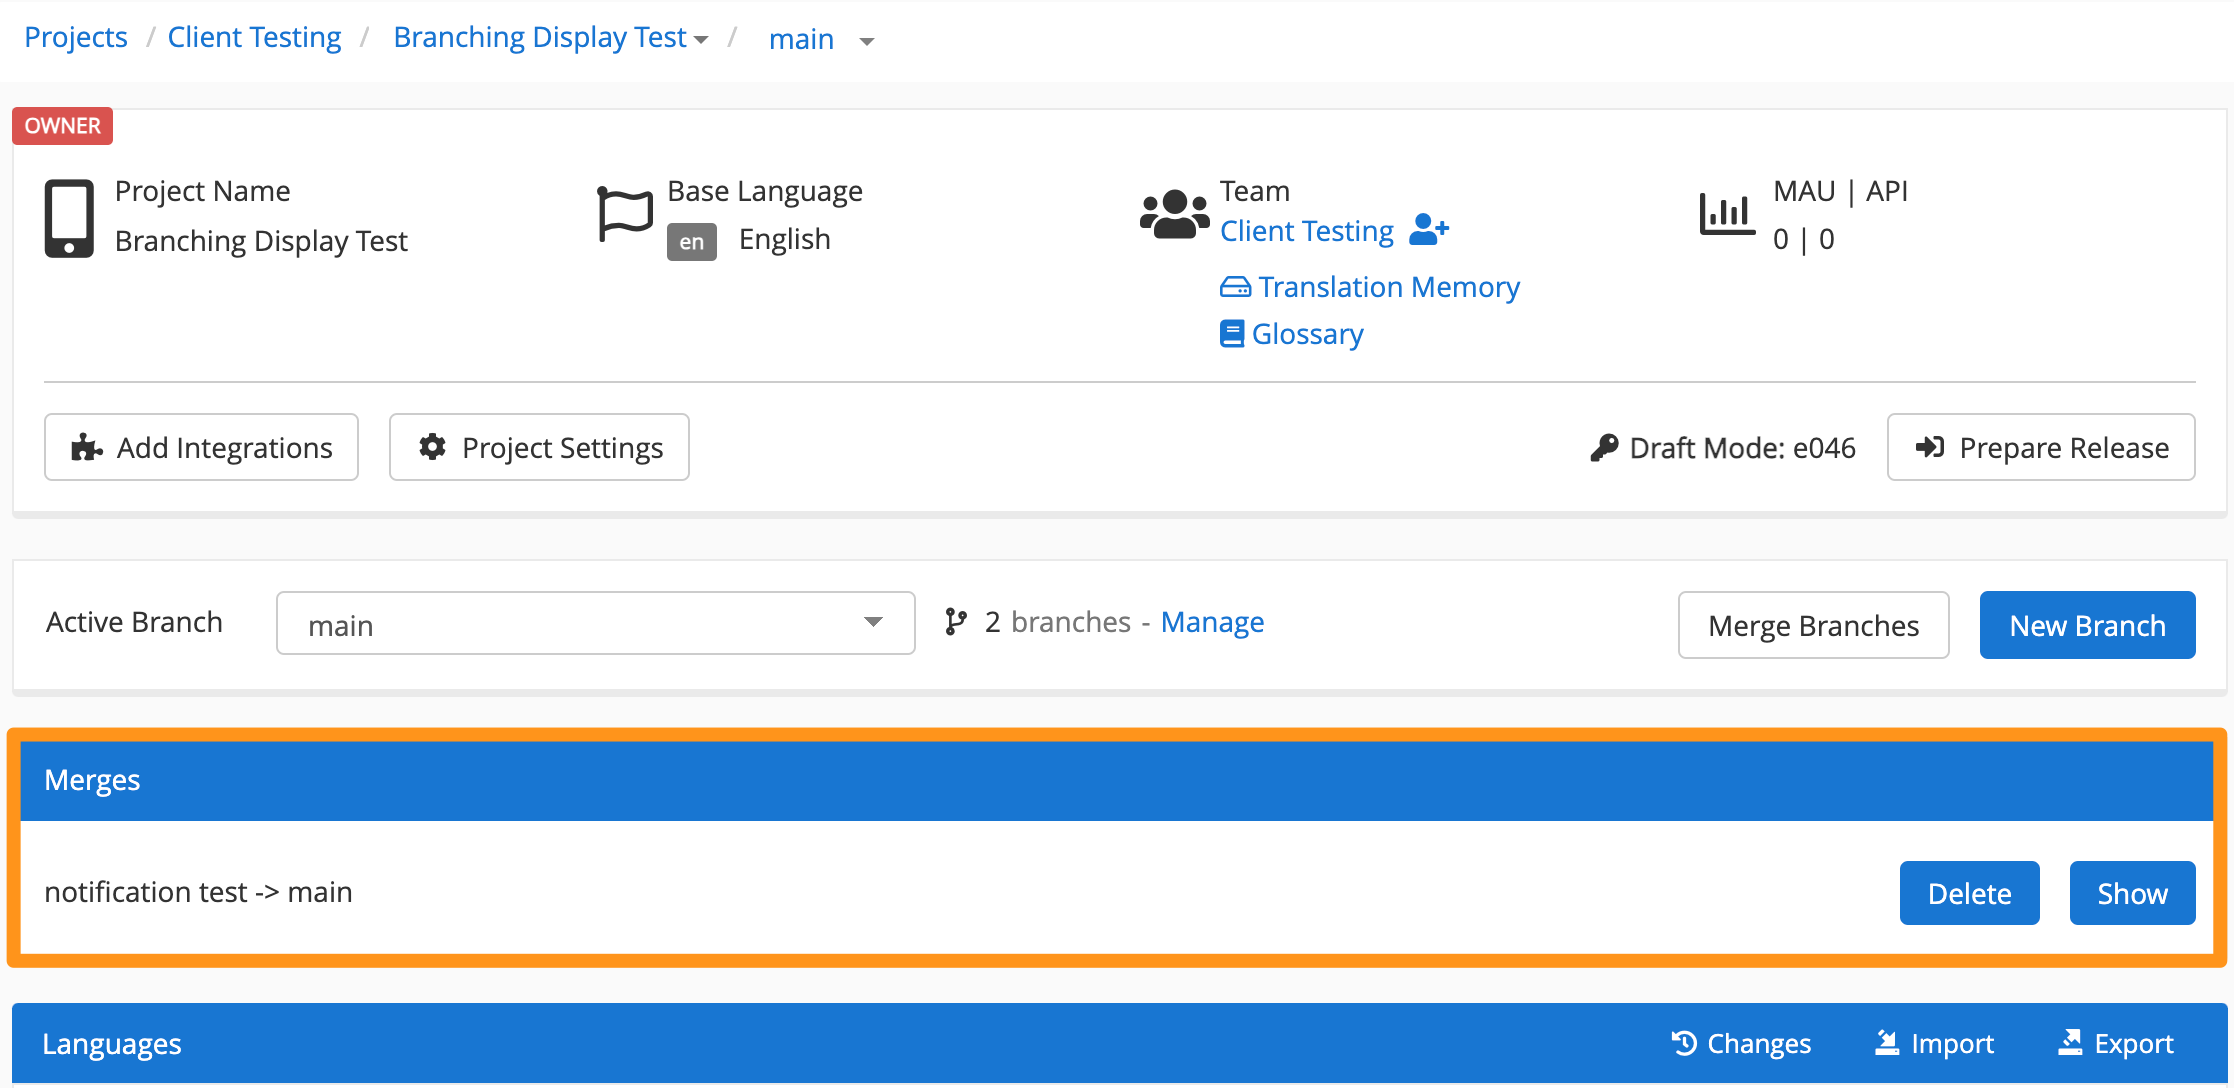
In some cases, your Branches might stay completely separate within your project, but more often than not, there will be a point in time where content from one Branch should be passed over to another. For example, the content in your “development” Branch should be promoted to your “production” Branch. This is achieved by Merging Branches into each other.
A Merge is not just an import and overwrite. It compares the changes made in both branches since their last synchronization point and combines those changes into the destination branch. The last synchronization point is considered to be either the most recent merge between the branches or the branch creation time if they have never been merged before.
You can start a Merging process on the Project Overview page via the Branch dropdown. First, select a Branch then choose which other Branch you want to merge into.
This same process can be started from within the Project Settings.
Depending on the Project, the Merging process must consider several different data points. This means that if you start a Merging process, GL Strings will have to perform a Merge Calculation. There is a progress indicator showing you all ongoing and finished Merge Calculations.
The Merge Calculation will only take into account changes that were completed before the calculation began. If you apply additional changes after the Merge Calculation, the Merge calculation will be invalidated. You will need to initiate a new Merge Calculation to ensure those changes are included.
In some cases, there might be changes to an element in scope - for example, a certain translation - in both Branches which results in a Merge Conflict. That simply means the Merging process cannot just pick one or the other, but will ask the user to decide which version to keep.
To further clarify, let’s assume you have the default Branch “main” in your Project and now create a new Branch based on “main” and call it “development”. When you create “development” it contains the same content as “main”, but as you continue your development and localization processes, differences will emerge. Below are some scenarios on such differences and how merging will work in the context of these scenarios:
Scenario 1: Changes are made in the “development” Branch, then “development” is merged into the “main” Branch. In “development” you change the source text of example.key.1 from “Hello user” to “Hello friend”. In “main” you don’t make any changes to example.key.1. When “development” is merged into “main”, the source text of example.key.1 in “main” is updated to “Hello friend”
Scenario 2: Changes are made in the “development” Branch, but now the “main” Branch is merged into “development”. Like in scenario 1, in “development” you change the source text of example.key.1 from “Hello user” to “Hello friend”. In the “main” Branch you don’t make any changes to example.key.1. Now “main” is merged into “development”, so the other direction as in Scenario 1. However, after the merge, the example.key.1 will still have the new source text “Hello friend”.
As mentioned above, merging does not just import into and overwrite one Branch with another. It brings together all changes made to both Branches based on a shared point in time. This also means you can’t reset or roll back a Branch to the state of another one only by merging one into the other.
Scenario 3: A change is made to the same key in the “development” and “main” Branches. This time, example.key.1 is changed in both Branches. In “development”, the new source text is “Hello friend”. In “main”, the source text is also changed to “Hello neighbor”. When merging either of these Branches into the other, the user triggering the Merging process has to decide which to keep. This means we have a Merge Conflict. It has to be resolved by choosing “development” or “main” as the basis to resolve.
Scenario 4: A key is deleted in the “development” Branch, then “development” is merged into the “main” Branch. The key example.key.1 is deleted from “development” in this scenario. When “development” is now merged into “main”, while no changes were made to that same key on “main”, after the merge, example.key.1 will also be deleted from “main”.
If there was a change to the same key in “main”, we would have a Merge Conflict again and the user would have to decide to resolve by picking from “main” or “development”.
When merging Branches, keys that exist only on the Destination Branch are not always preserved automatically.
If the Destination Branch has been modified since the last merge (or since the Branch was created if it has never been merged), GL Strings cannot determine if the key was intentionally deleted from the Source Branch or if the key is intended to exist only on the Destination Branch.
In this situation, the key is included in the Merge Conflict. This allows you to decide whether to keep the key or remove the key to ensure the destination matches the Source Branch.
Choosing how to resolve the conflict:
If your goal is to merge translations from the Source Branch while preserving keys that only exist on the Destination Branch, you should resolve with the Destination Branch. When you resolve with the destination:
If your goal is to merge translations from the Source Branch while also removing keys that only exist on the Destination Branch, you should resolve with the Source Branch. When you resolve with the source:
For a Project with Branching enabled, the GL Strings API Access Token will stay the same and all previously working API calls will work in the same way but only interact with the Default Branch as defined in the Project Settings.
If you want to call a specific Branch with your API request (get or post), you have to add the branchId of the Branch you want to perform the action on as a parameter to the call. You can retrieve the branchId from the Project Settings
As an example for requesting the complete scope of your Project you would have previously requested the url https://api.globallinkstrings.com/v1/api?app=<your-app_id> as get request with the header Authorization: Bearer <your-api_token> in place. If you now want to do the same kind of call to any Branch that is NOT the "main" of your Project, you need to modify the API request url to look like this https://api.globallinkstrings.com/v1/api?app=<your-app_id>&branchId=<your-branch_id> The header remains the same.
This pattern also applies to all API methods for Tag or Screenshot requests and post calls.
Additionally, to request all branches that are currently present in your Project you can use this route https://api.globallinkstrings.com/v1/api/branches?app=<your-app_id>. It will return all Branches of your Project with names and branchId. This way you can build your scripts and integration to work with different Branches.
This only works if your Project is already migrated to a Branching
Project. If not, call will return an error.
All calls without branchId present will always route to the "main" Branch.
To be able to use branch-specific features you need to use at least the GL Strings SDK 4.0.184 on Android and at least version 2.0.167 on iOS. If your project is a branching project and the SDK version does support branching, watch out for the log line: Branching is enabled.
For a Project with Branching enabled, the GL Strings API Access Token will stay the same and all previously working CLI configurations will work in the same way, but they will only interact with the "main" Branch.
If you want to call a specific Branch with the CLI (push or pull), you have to add the branch_id parameter, of the Branch you want to perform the action on, into the 'app' object inside the .applanga.json file. You can retrieve the branchId from the Project Settings