

Worry no more! We give our users two different backup types to ensure you can revert whatever goes wrong.

A localization project can easily become pretty complex undergoing constant changes in translation methods, workflows, and team composition. With that comes all kind of potential for error. New team members are not familiar with tools yet and accidentally overwrite translations, languages are deleted in the heat of the moment, miscommunication leads to a reset of nearly complete translation workflows or some technical error in the process leads to the wrong translations in the wrong place - we have seen it all.
So far, we were always able to help our people to restore their translations, but we felt it was time to hand these tools to the user base for an even more convenient experience. With our last release, we added two ways to make sure you can revert whatever might go wrong: Automatic Backups and Manual Backups. You can access the backups per app on the Project Settings page.
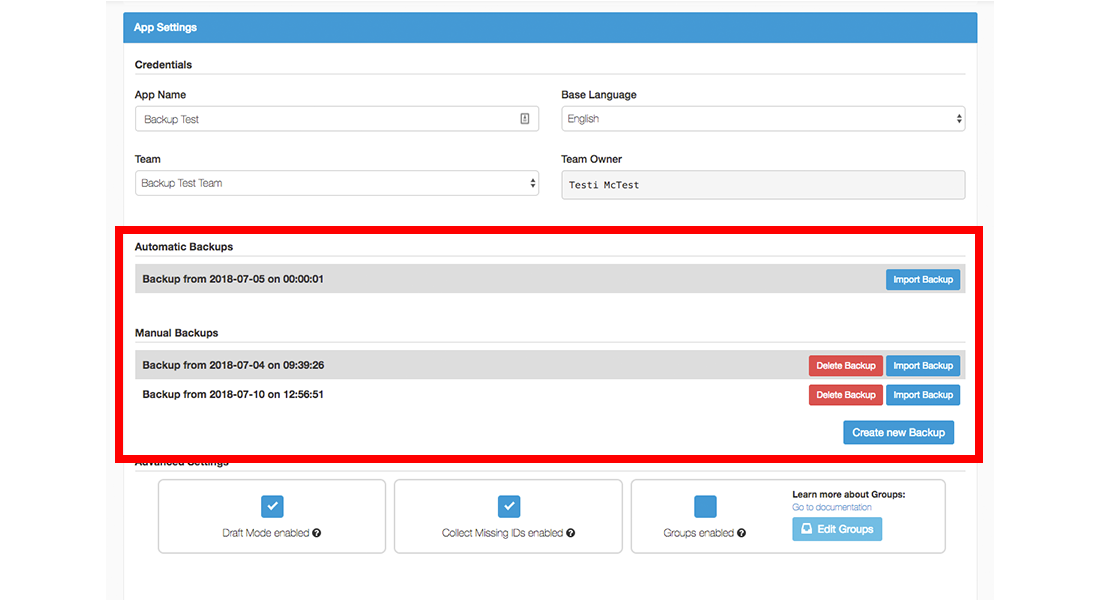
Option 1 - Automatic Backups
As the name already states, these backups are created and saved automatically every day. Depending on your subscription, you can have a certain number of these backups. If the maximum is reached, the system will delete the oldest backup to have space for a new one.
Before a new backup is created, the system will check if there have been any changes since the last one was saved and skip saving a new one if not. This way, Automatic backups will always stay relevant by holding on to your last changes.
Automatic Backups are our insurance for all these moments you realize, a “terrible” mistake just happened and you have to roll back. You can do that now with the press of just one button.
Option 2 - Manual Backups
This kind of backup will only be created if you trigger it. As with the automatic ones, you have only a certain number available but in contrast, they are therefore not overwritten. Once you create a manual backup it will be kept indefinitely. Only if you reached your limit and need to save a newer backup you will have to delete one of your older ones.
This feature is great to create a snapshot of your localization project where you feel comfortable to always roll back to e.g before you start a big overhaul of your translations and just saving a status where your translation feel “complete”.
How to use backups to restore your app
Simply go to your App Settings page and you will see a list of each, all your Automatic and all your Manual Backups. On the right of each list item, you'll find the "Import Backup" button. Simply chose to which one you want to go back to and voila.

Important: When the backup is imported, it will overwrite the current state of your app! If you want to keep anything of the current state, follow the instruction in the next section.
How to pick and choose which changes you want to keep
Sometimes you realize that something went wrong earlier but in the meantime, you made good progress that you don’t want to lose by rolling back everything with the backup. In this circumstance, you can use a combination of Applanga dashboard features to use a backup to fix errors while keeping what was added or changed since then.

Learn about our latest features and improvements
Read the Full Article
It’s time to reflect on what we accomplished in 2024 and to find out what we’re working on in 2025
Read the Full Article